SYDNEY'S CAULKING & SEALING SPECIALIST

One failed joint can cause thousands in damage.

Professional caulking, sealant replacement and joint sealing for residential, strata and commercial buildings across Sydney.
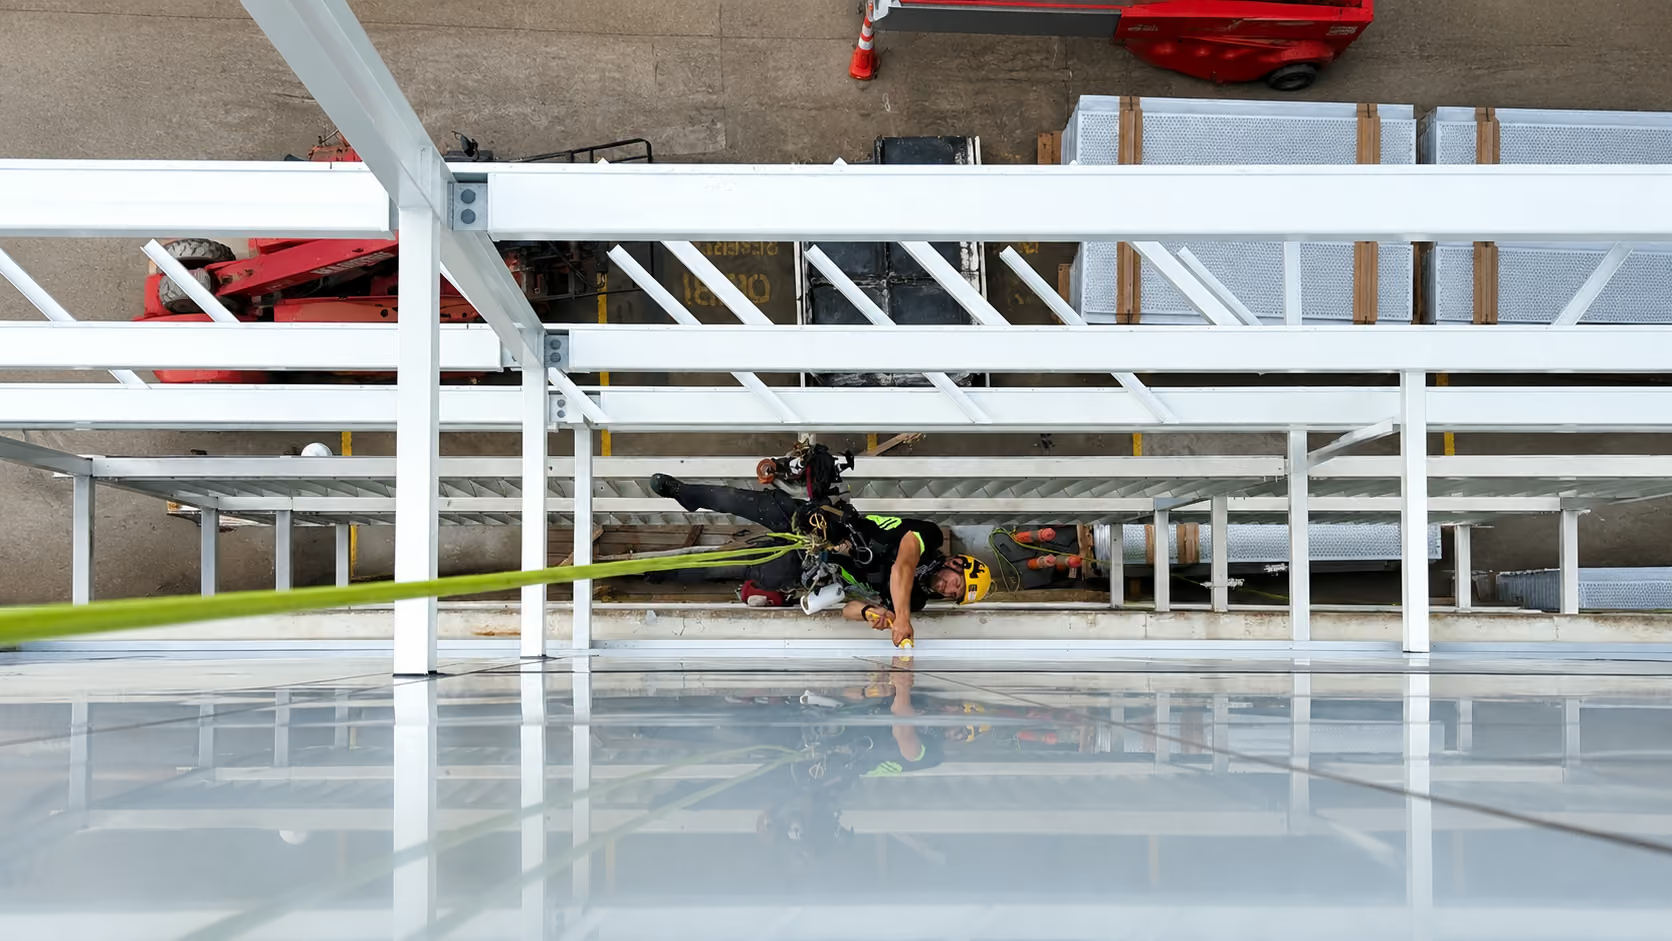

Rope access technician suspended horizontally beneath a white steel-framed structure, sealing the joints of a facade panel
IRATA & SPRAT Qualified
Rope Access Certified
Fully Insured
Public & Workers Liability Covered
Detailed Reporting
Photos & Documentation
Quality Guaranteed
Workmanship Warranty
No-Obligation Quotes
Fast Turnaround

WHY CAULKING & SEALING MATTERS

YOUR BUILDING FACES A LOT.

CORRECT SEALING KEEPS WATER OUT.

Movement joints exist to accommodate building movement — but only when they are correctly filled and maintained. Failed sealant is the most common cause of water ingress in multi-storey buildings.
Thermometer with up and down arrows
THERMAL MOVEMENT

Buildings expand and contract with every temperature change. Joints that cannot flex with this movement crack, open and allow water entry at every level.

Sun with rays reflecting off a surface
UV DEGRADATION
Prolonged UV exposure breaks down sealant polymers, causing surface cracking, hardening and loss of flexibility — accelerating failure on north-facing surfaces in particular.
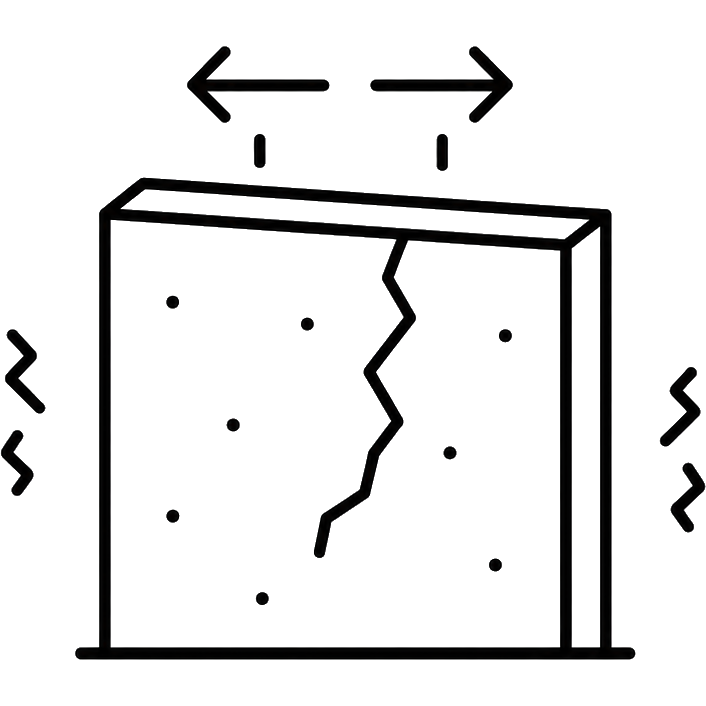
Wall block pulling apart with a crack and movement arrows
SUBSTRATE MOVEMENT
Settlement, vibration and structural movement place ongoing stress on sealant joints. Without a correctly installed backing rod, the sealant tears rather than flexes.
Brick wall with a fractured brick course
POOR ORIGINAL INSTALLATION
Sealant bonded to three sides instead of two cannot accommodate movement. Missing backing rod, skipped primer or incorrect product selection are the most common installation failures.
Liquid soaking into a surface with arrows drawing away to both sides
WATER & MOISTURE EXPOSURE
Persistent exposure to water accelerates sealant degradation. Failed joints allow water behind cladding, into walls and directly to structural elements at every level.
Dollar sign in a circle
DELAY = HIGHER COSTS
A failed sealant joint repaired today costs a fraction of the internal water damage remediation it prevents. Every year deferred compounds the risk and the cost.

THE COST OF WAITING

Addressing issues early can save you up to
70%
in future repair costs.
Green circle with a shield/checkmark inside
Timely Maintenance
Small Investment
Orange right arrow
Orange circle with a wrench inside
Major Repairs
High cost, disruption
Orange right arrow
Red circle with a building inside
Structural Damage
Risk to asset value

WHAT NEGLECT LOOKS LIKE

THESE ARE THE SIGNS

YOUR SEALANT IS FAILING.

These are the visible signs that your sealant joints need professional attention.
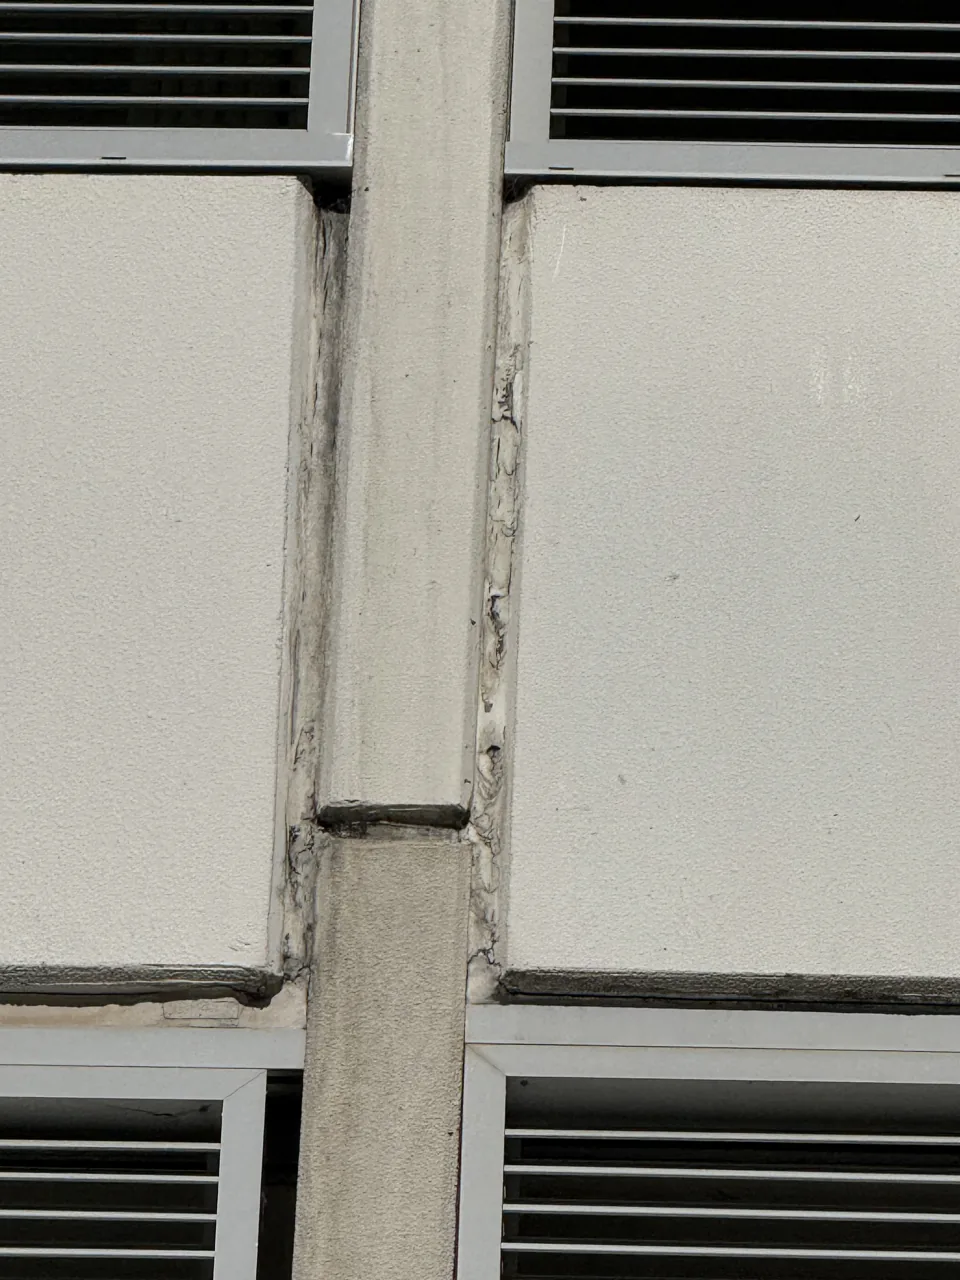
Cracked and perished sealant along a vertical control joint between facade panels

CRACKED SEALANT

Sealant that has lost flexibility cracks along its length — no longer watertight and actively allowing water entry at every crack.
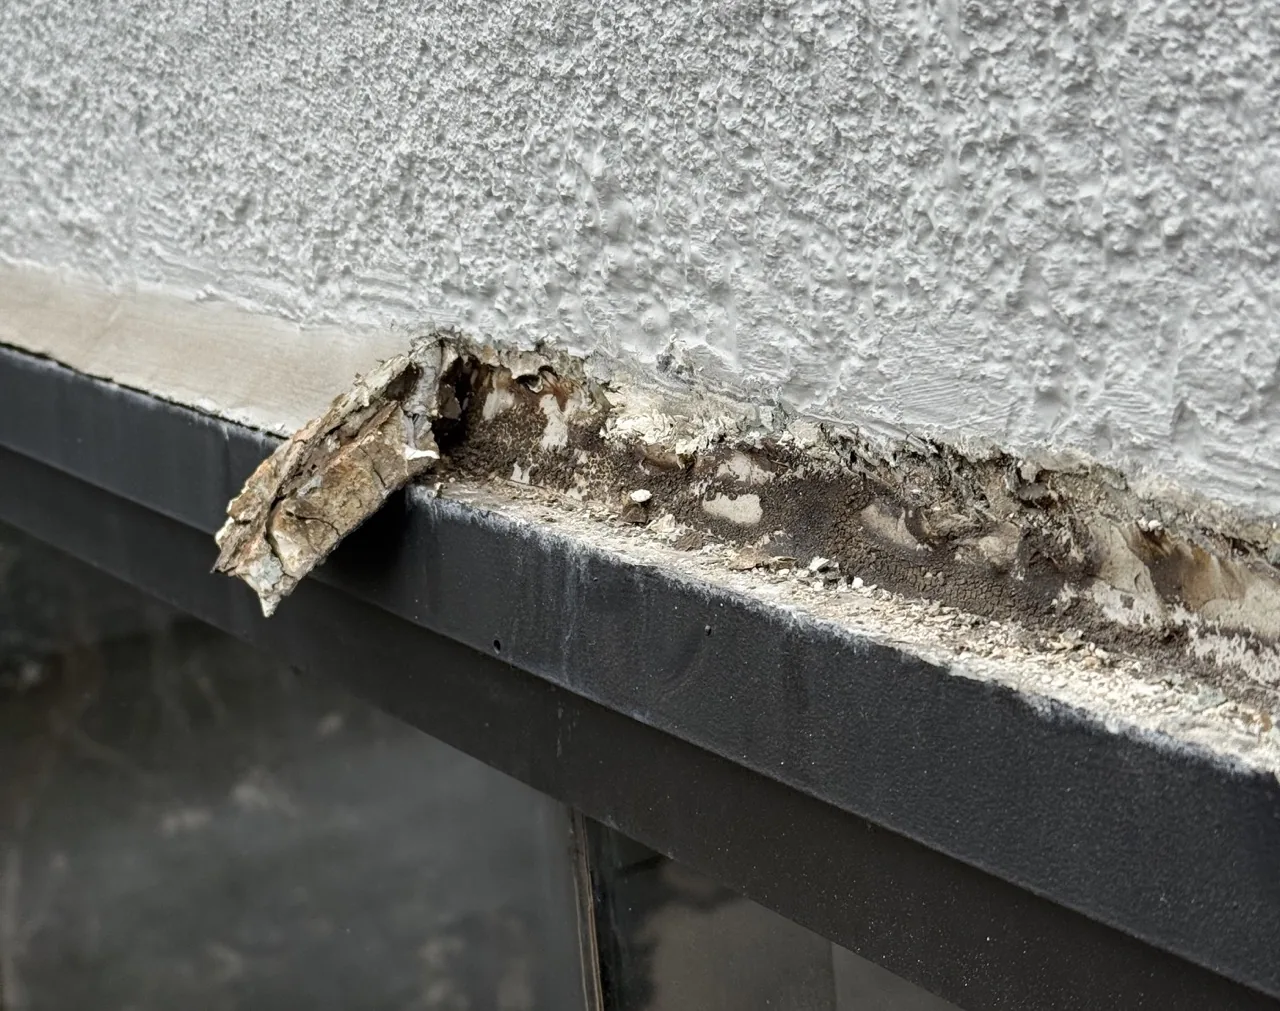
Failed sealant above a window frame, showing mould behind it.

DEBONDED SEALANT

Sealant pulling away from one or both sides of the joint — adhesive failure means water can run freely behind the joint face.
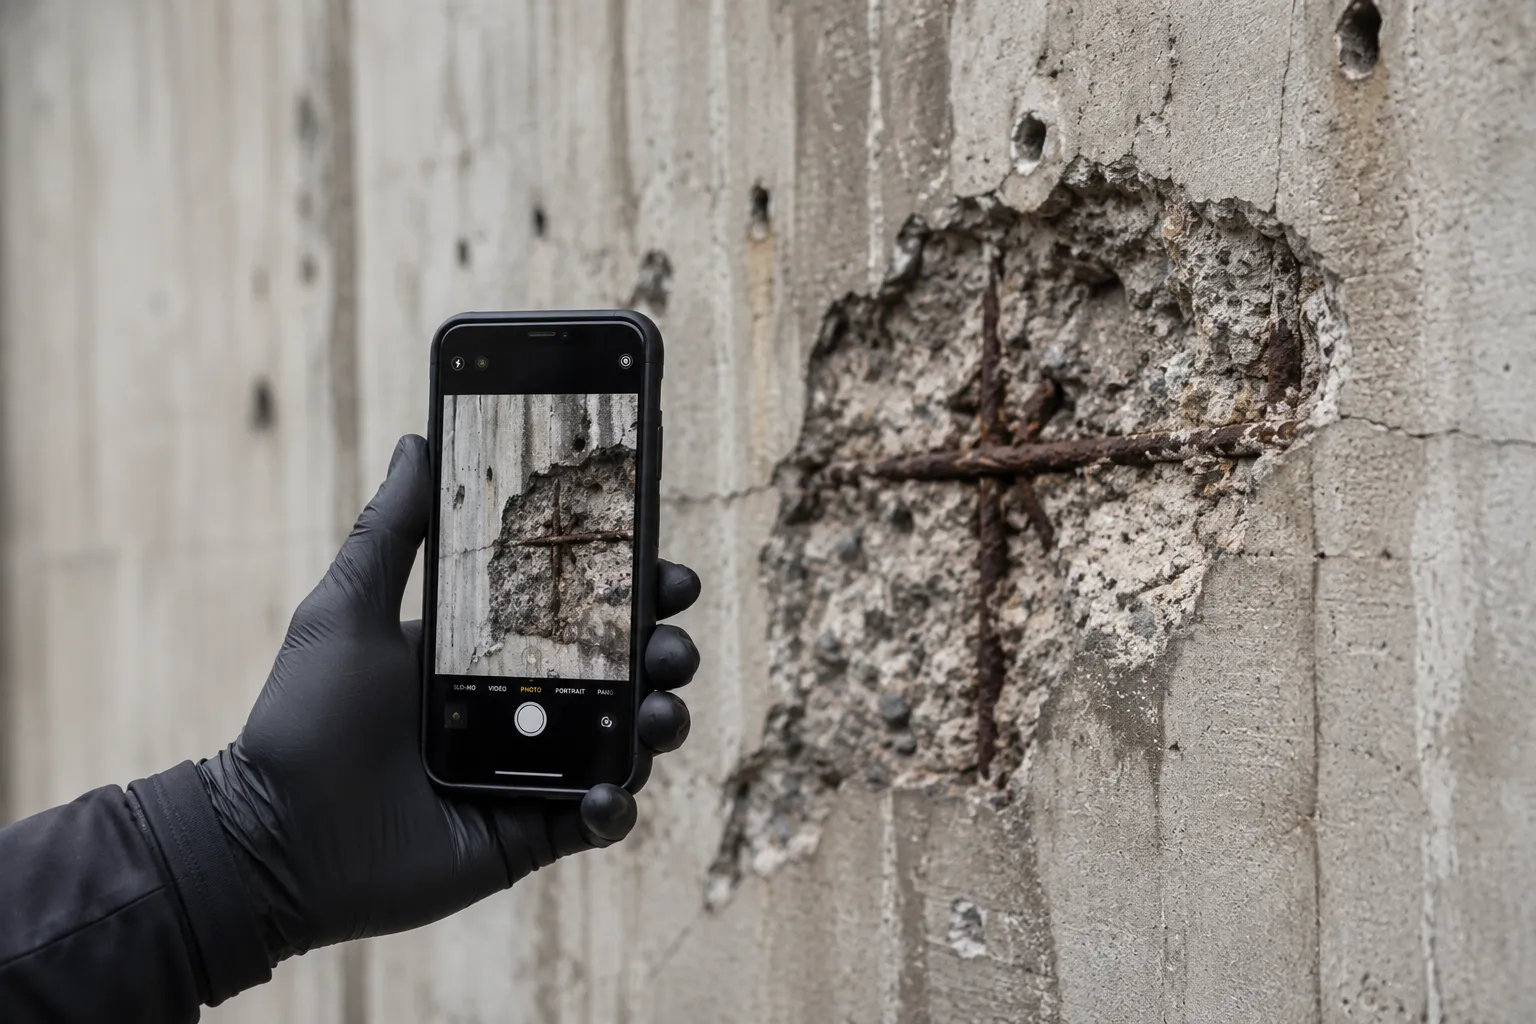
Corroding steel reinforcement bar exposed along the edge of a concrete balcony slab

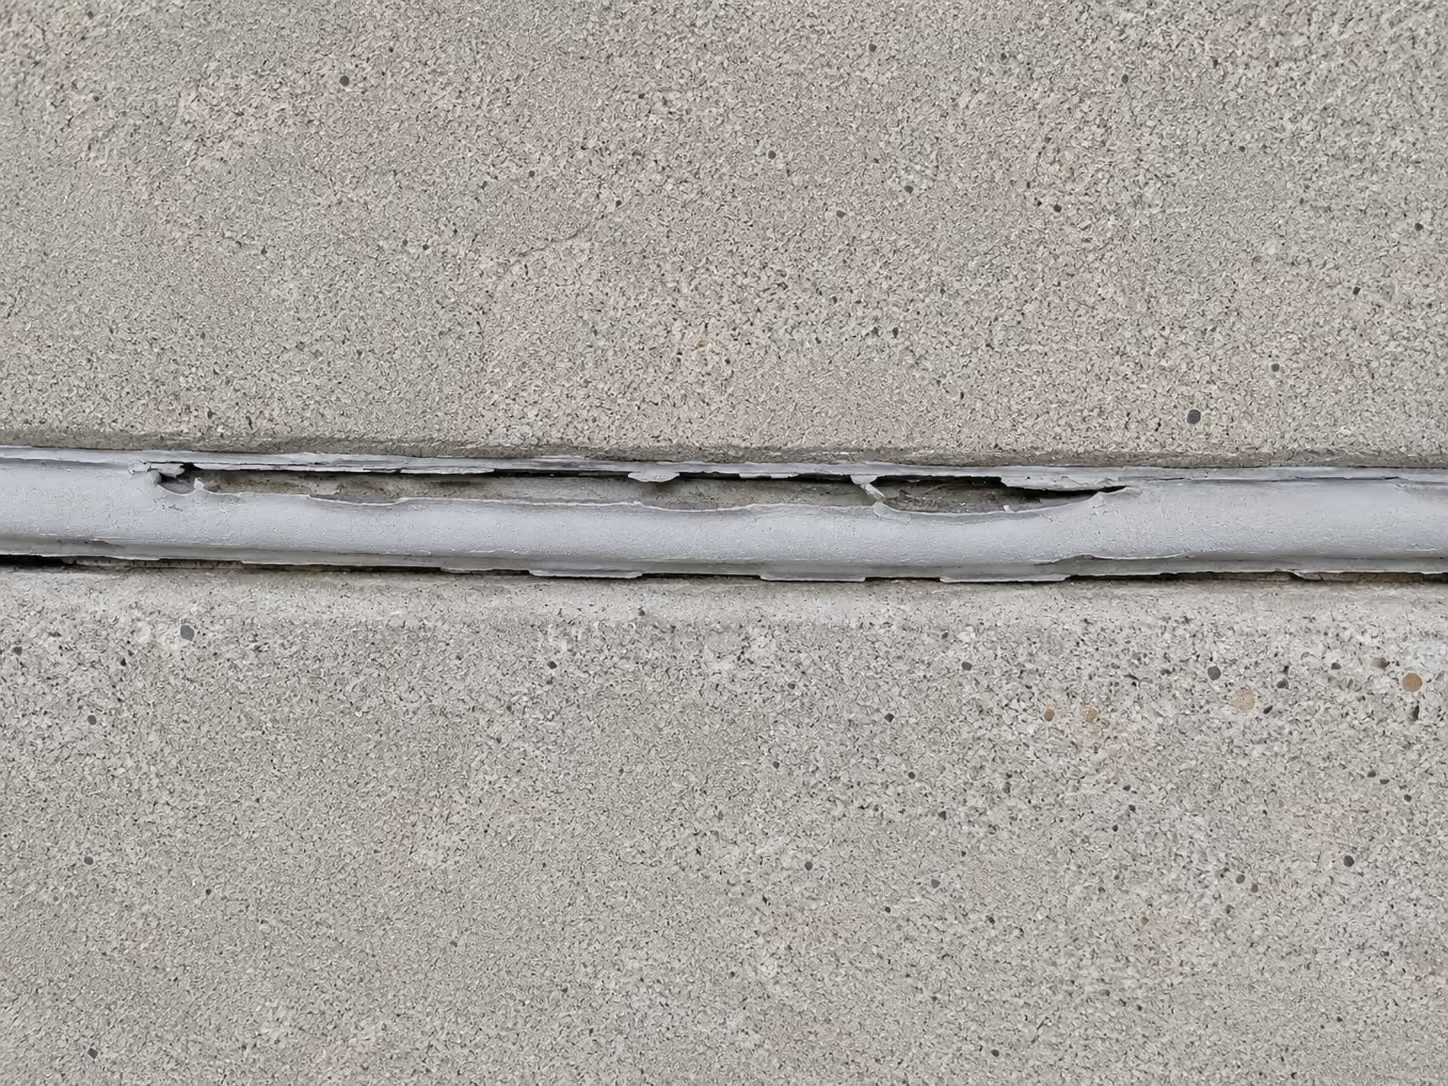
SHRINKAGE & VOIDS

Sealant shrinking back from joint edges leaves visible gaps at both sides — a common failure mode on older or incorrectly specified products.
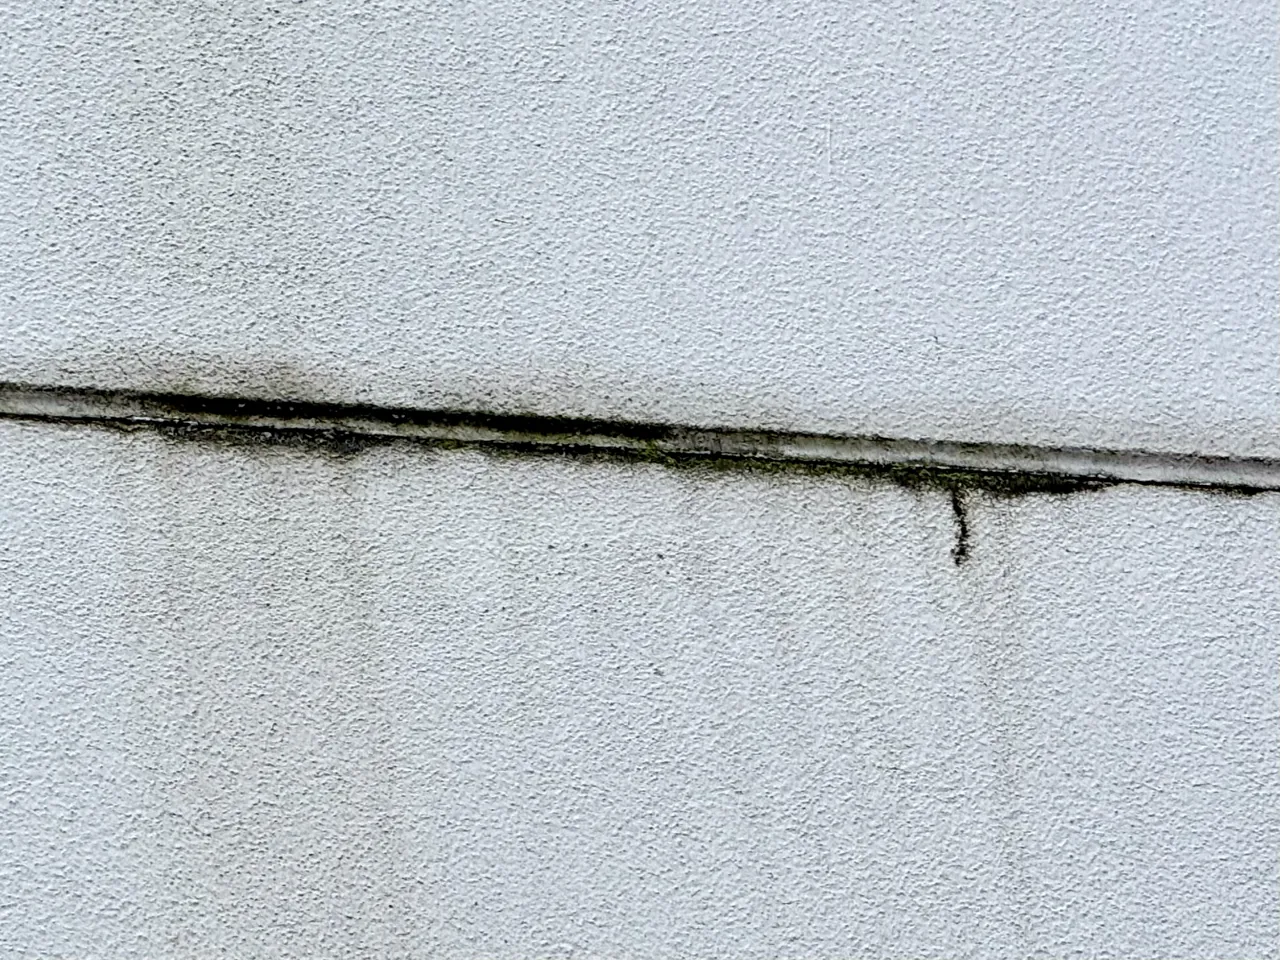
Horizontal crack tracking along a render joint with biological growth colonising the open line

BLEEDING JOINT

Dark staining running down the facade directly below a joint line is direct evidence of active water entry through failed sealant.
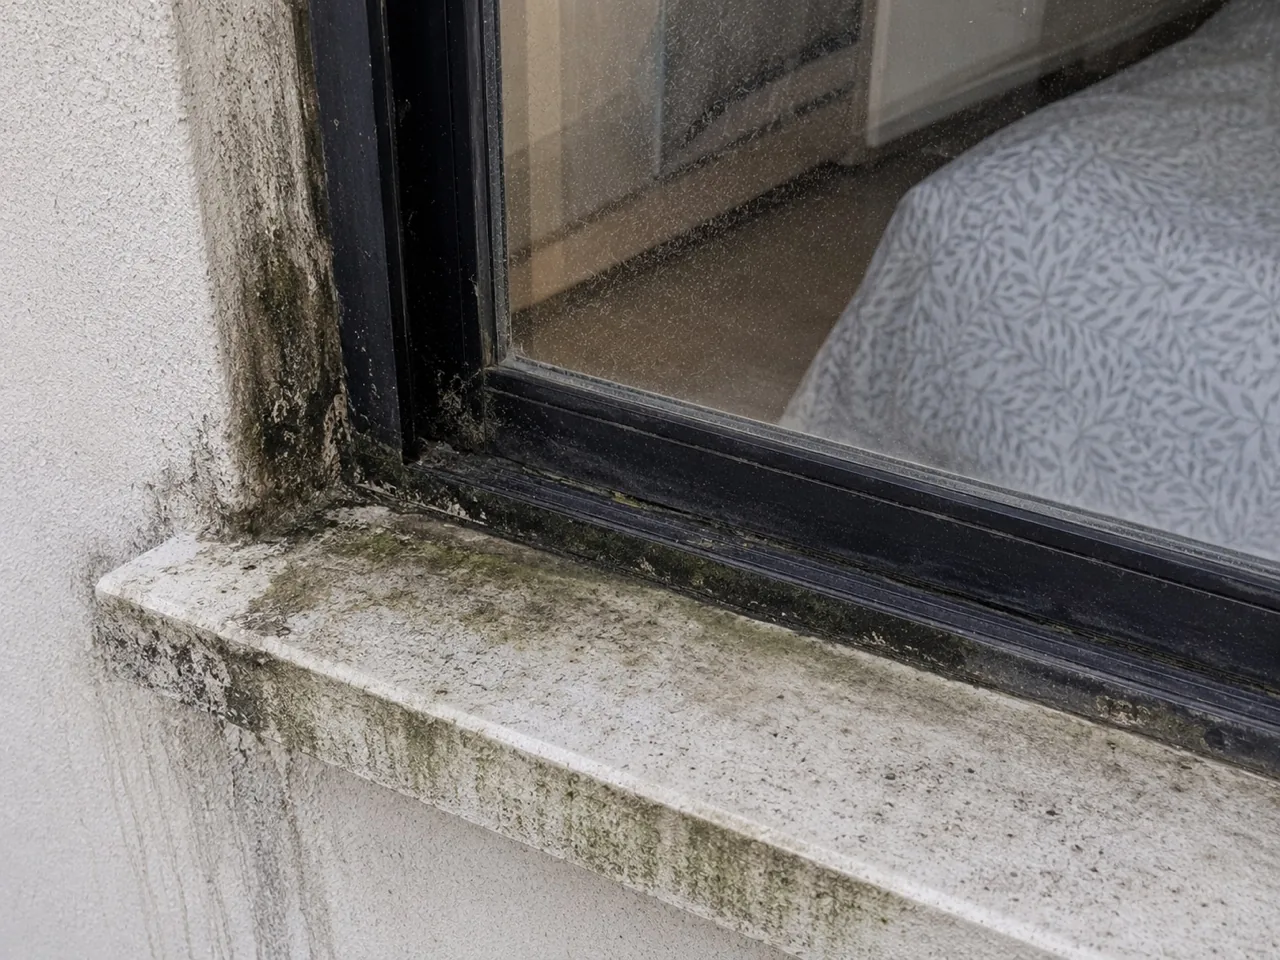
Black and green biological growth colonising a window sill, reveal and frame

FRAME & SEAL CONTAMINATION

Mould or organic growth along a sealant bead indicates persistent moisture retention and active degradation of the sealant surface and substrate.

WHEN SHOULD YOU INSPECT YOUR SEALANTS?

Sealant failure has clear observable signs. Here's how to read where your building's joints sit right now.
Red calendar with a ! inside

OVERDUE

Signs visible now
Red checkmark
Visible cracks or gaps in sealant bead
Red checkmark
Sealant pulling away from substrate on either side
Red checkmark
Water staining on internal surfaces near joints
Red checkmark
Sealant hard, brittle or chalky to touch
GET A FREE ASSESSMENT
Orange calendar with a clock inside

DUE SOON

Within service window
Orange checkmark
Sealant surface chalking or minor hairline cracking
Orange checkmark
Sealant over 7–10 years old
Orange checkmark
Pre-painting scheduled — replace sealant before topcoat
Orange checkmark
Building over 15 years with no sealant history
SCHEDULE INSPECTION
Green calendar with a checkmark inside

ON TRACK

Recently completed
Green checkmark
Sealant flexible and well-adhered
Green checkmark
No cracking, shrinkage or debonding visible
Green checkmark
Replaced within the last 5–7 years
Green checkmark
Joint inspection completed recently
PLAN NEXT CYCLE

TYPICAL SERVICE INTERVALS:

Low-movement joints: 7–10 years
High-movement joints: 5–7 years
Premium sealants:10–15 years
Window perimeter seals:7–10 years
Any visible damage:Immediate
Indicative only. Joint type, movement, UV exposure and original product all affect service life.

OUR PROCESS. CLEAR STEPS. QUALITY EVERY TIME.

1
Inspect & Assess
Get a clear scope with no surprises.
white right arrowwhite down arrow
2
Scope & Map
Every failed, at-risk and sound joint is mapped and prioritised before any work begins.
white right arrowwhite down arrow
3
Access & Setup
Rope access or EWP deployed with minimal disruption to residents and building operations.
white right arrowwhite down arrow
4
Remove & Prepare
All old sealant removed. Joint faces cleaned. Backing rod and primer installed correctly — no shortcuts.
white right arrowwhite down arrow
5
Apply & Finish
Correct sealant product tooled to profile. Paint applied where specified. All joints inspected before we leave.
white right arrowwhite down arrow
6
Report & Handover
You receive photos, condition notes and recommendations for ongoing maintenance.

IT'S NOT JUST SILICONE.

IT'S A SYSTEM THAT WORKS.

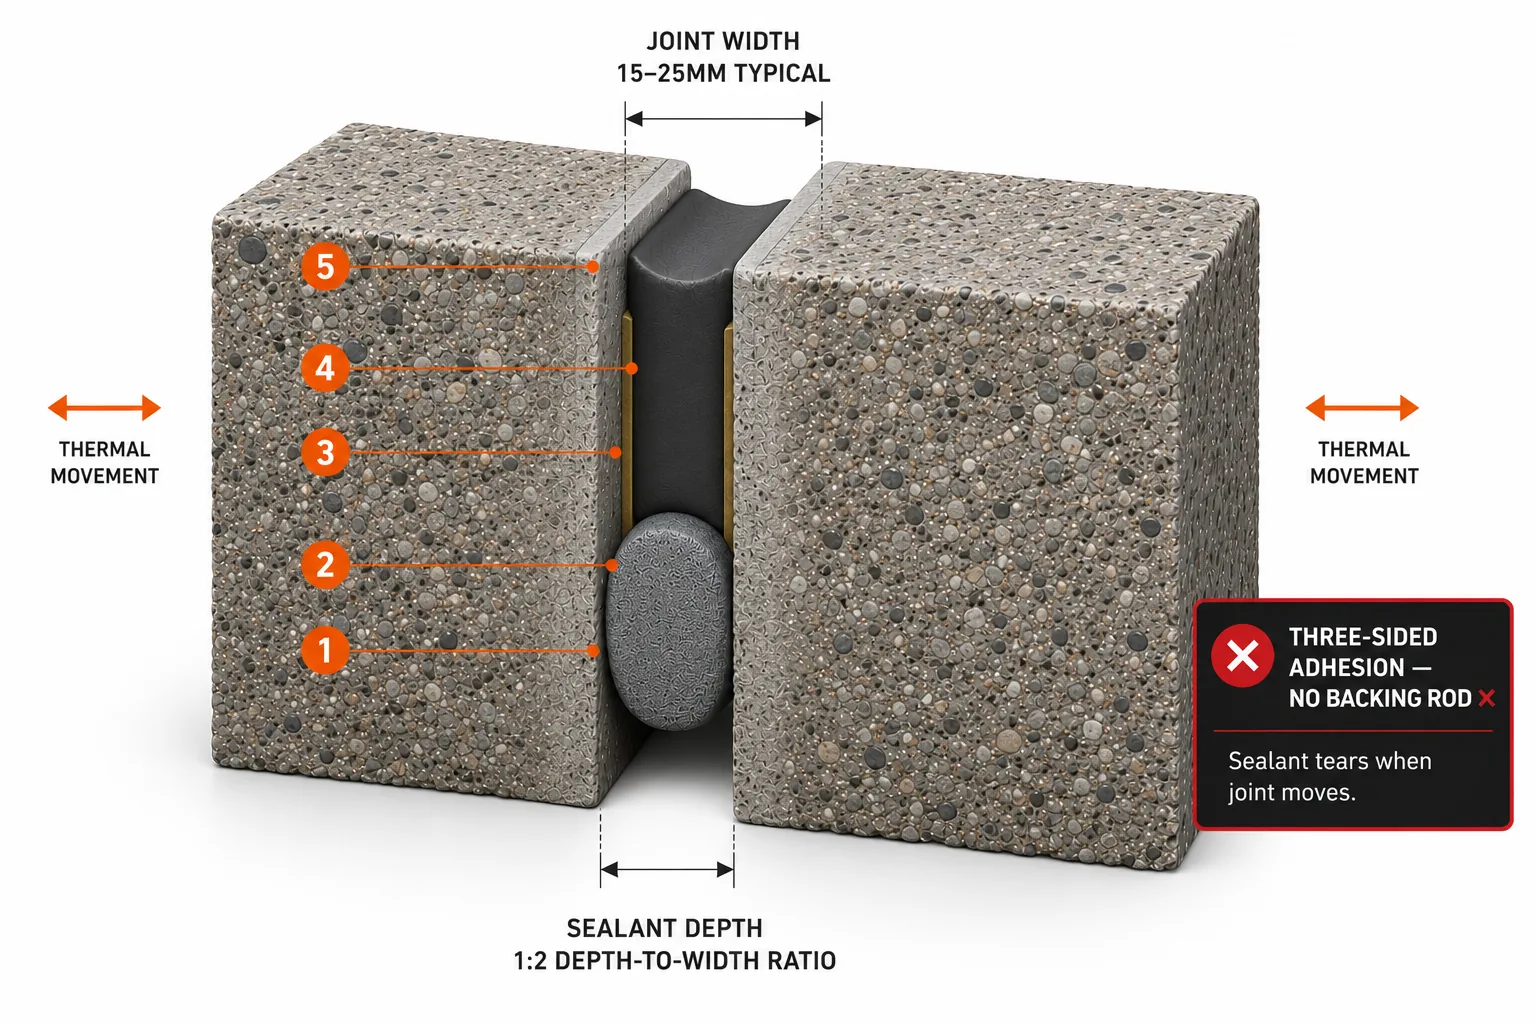
A quality joint system is designed to protect every layer.
1

PREPARED JOINT FACES

All old sealant removed and substrate cleaned. If joint faces aren't correctly prepared, nothing above will bond.
2

BACKING ROD

Controls sealant depth and prevents three-sided adhesion. The most commonly skipped component — and the most important.
3

PRIMER

Applied to both joint faces before sealing. Skipping primer is the single most common cause of early bond failure.
4

SEALANT BODY

Fills the joint and accommodates movement. Must bond to two sides only — never three.
5

PAINT FINISH

Applied where sealant must match the facade. Not all sealants accept paint — correct product selection is essential.
Cutaway of a movement joint showing backing rod and correct two-sided sealant adhesion
1

PREPARED JOINT FACES

All old sealant removed and substrate cleaned. If joint faces aren't correctly prepared, nothing above will bond.
2

BACKING ROD

Controls sealant depth and prevents three-sided adhesion. The most commonly skipped component — and the most important.
3

PRIMER

Applied to both joint faces before sealing. Skipping primer is the single most common cause of early bond failure.
4

SEALANT BODY

Fills the joint and accommodates movement. Must bond to two sides only — never three.
5

PAINT FINISH

Applied where sealant must match the facade. Not all sealants accept paint — correct product selection is essential.

OUR WORK.
REAL
RESULTS.

Corroded stadium roof steel mast base with heavy rust before rope-access remedial coating
Orange circle with white left and right arrows pointing away from each other in the center.
Rooftop steel mast base cleaned, primed and repainted after remedial protective coating
Heavily soiled render wall, failed expansion joints, and damaged render before restoration, Northern Beaches
Orange circle with white left and right arrows pointing away from each other in the center.
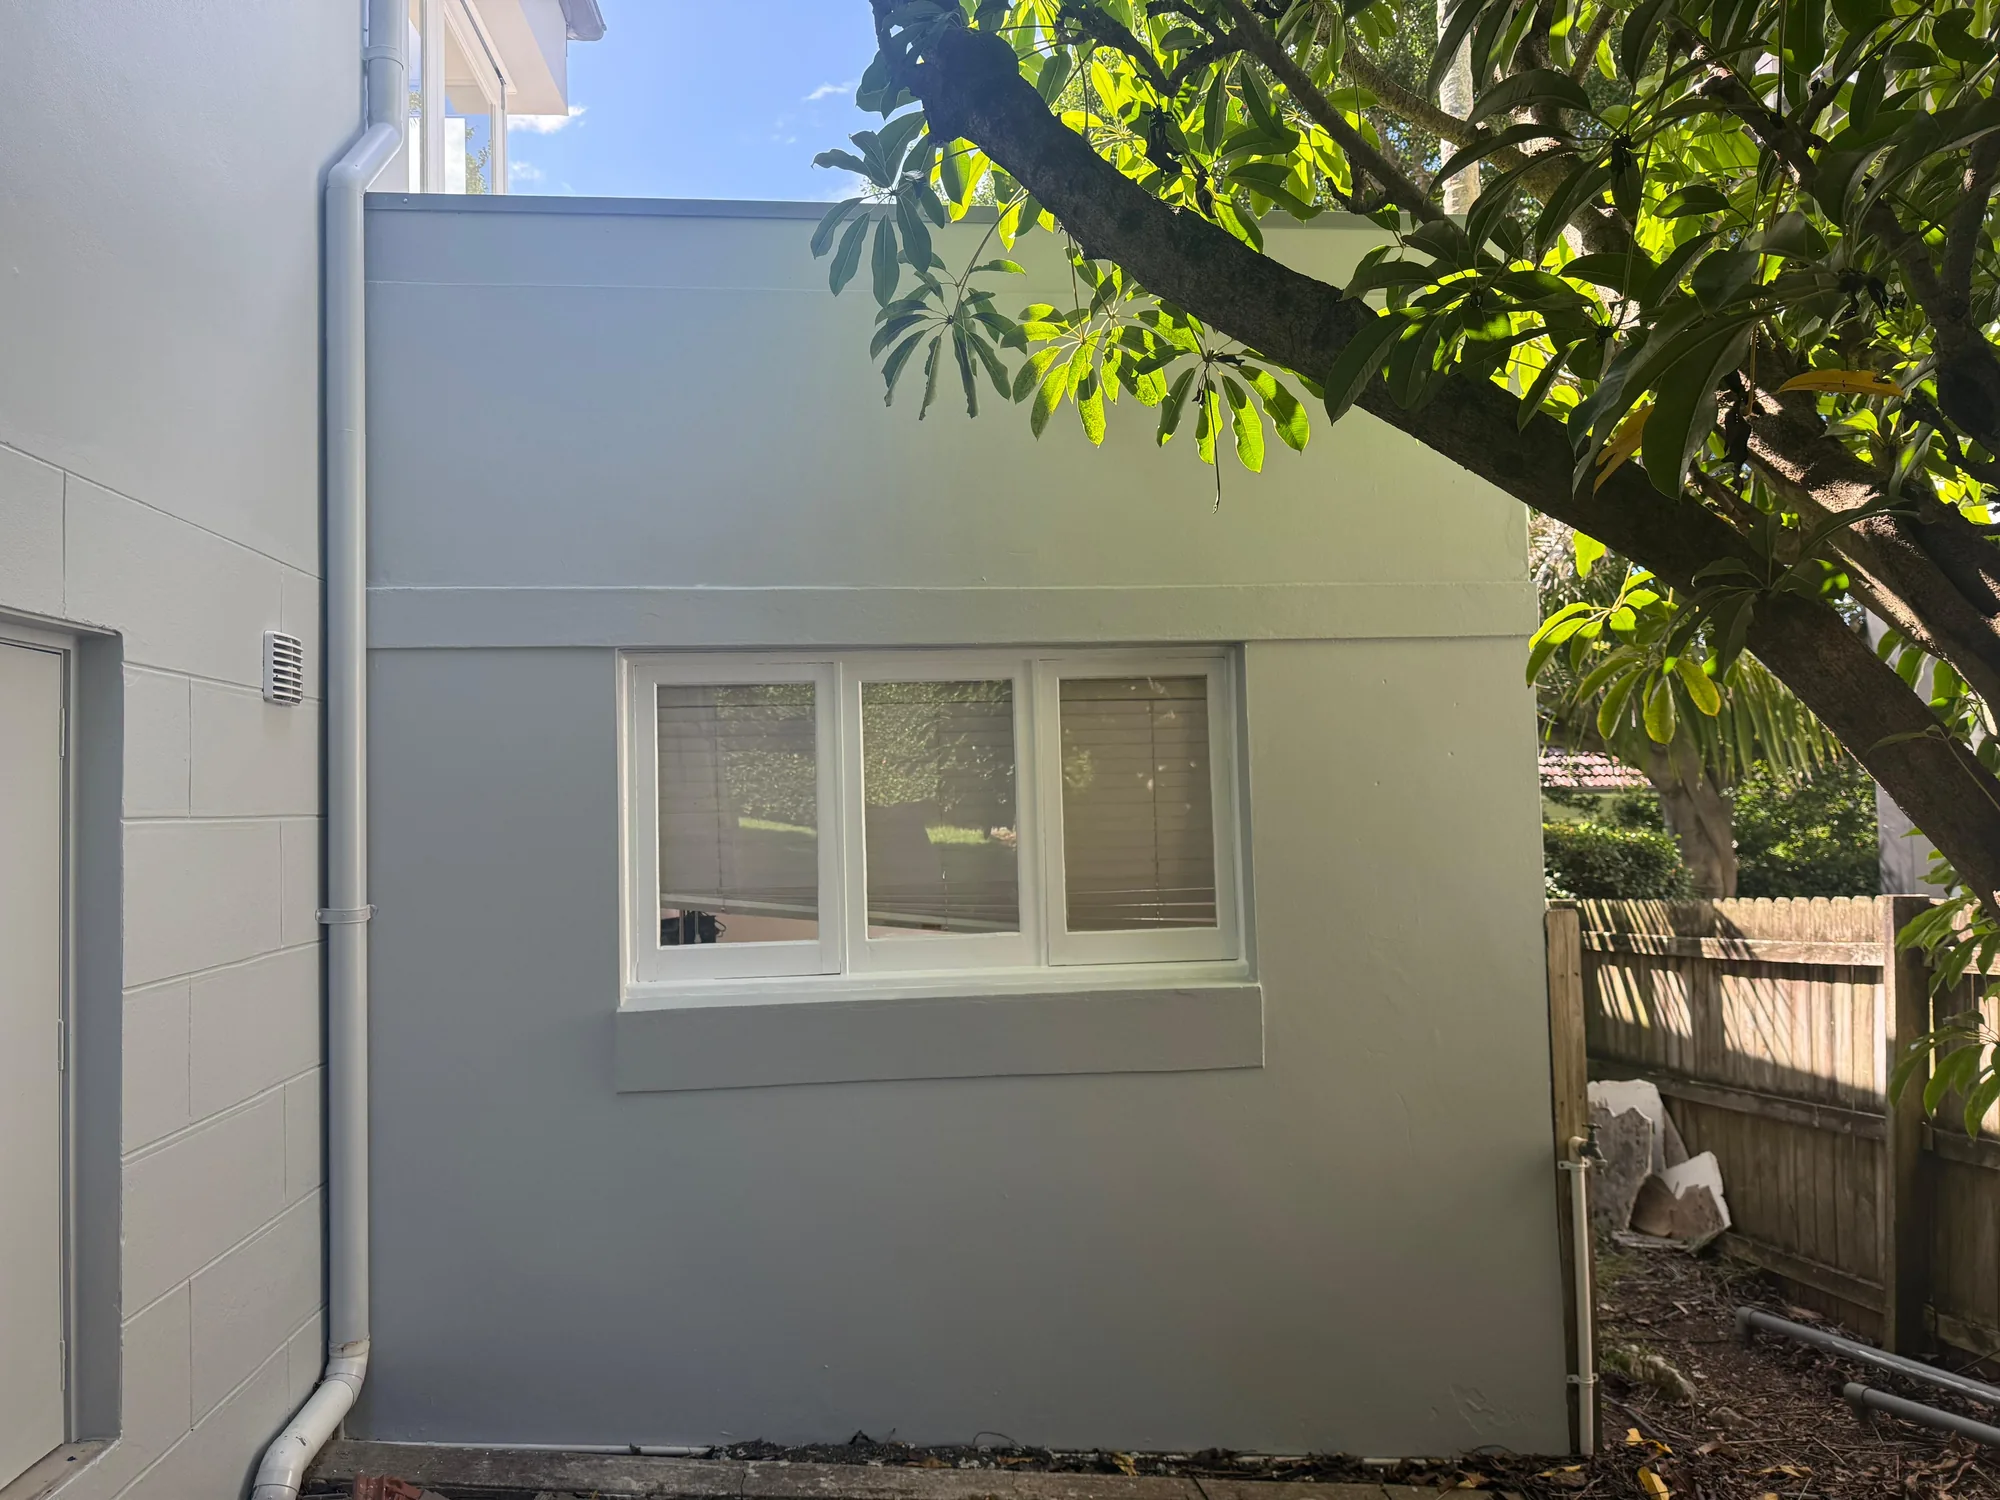
Rendered exterior wall and window reveal repaired and repainted pale grey after facade works, Sydney
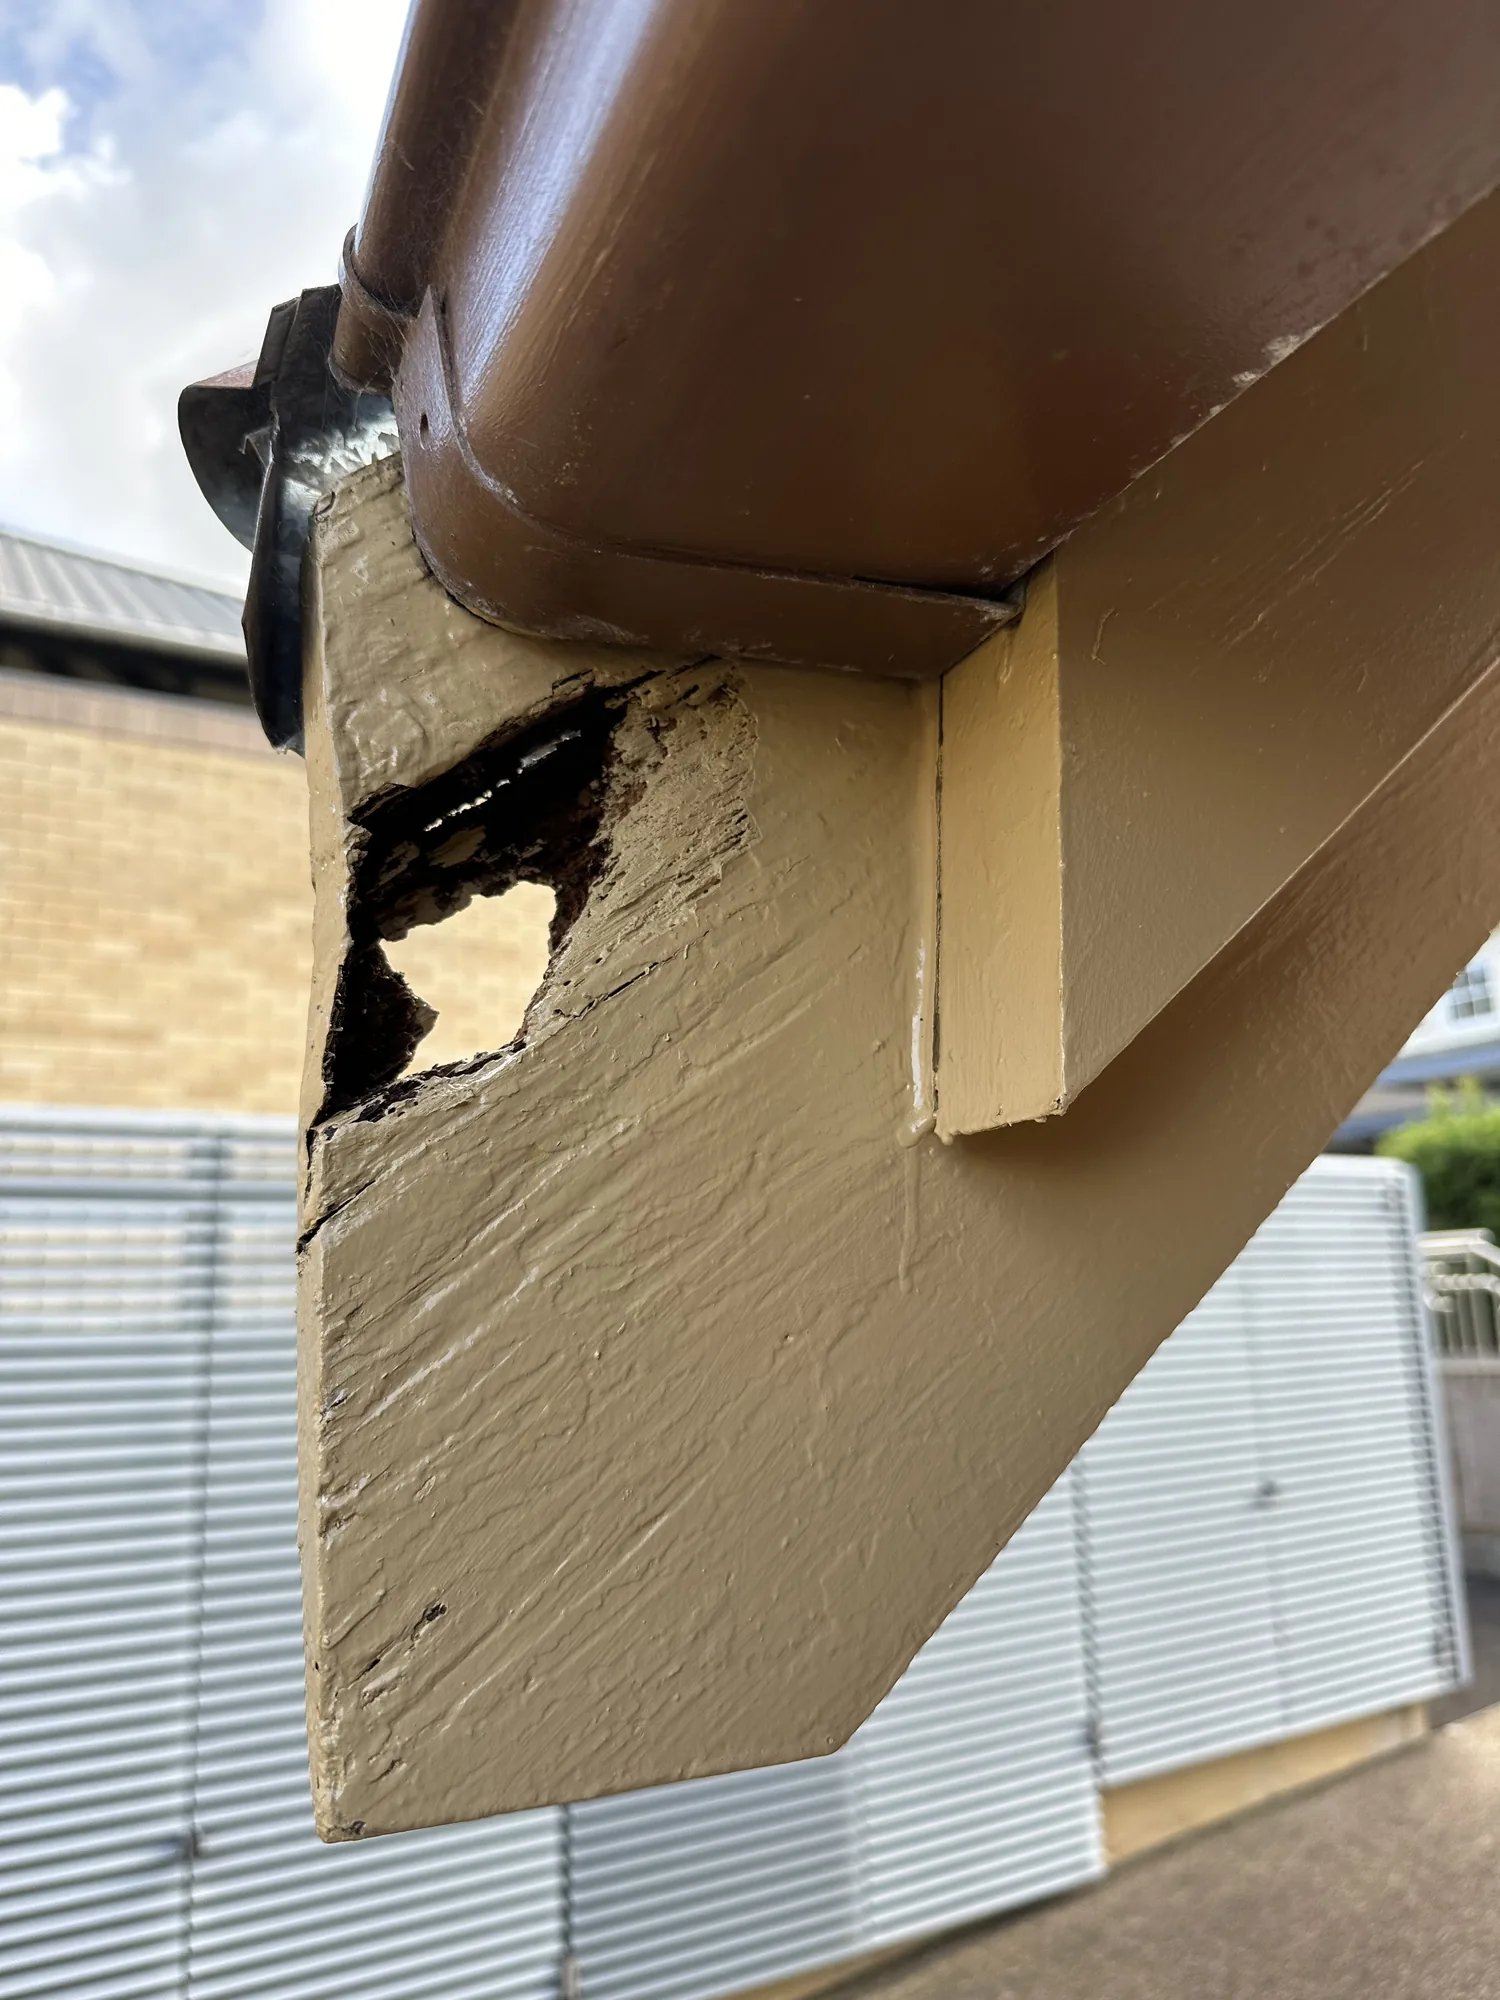
Timber fascia board with rot hole and failed paint before remedial repair
Orange circle with white left and right arrows pointing away from each other in the center.
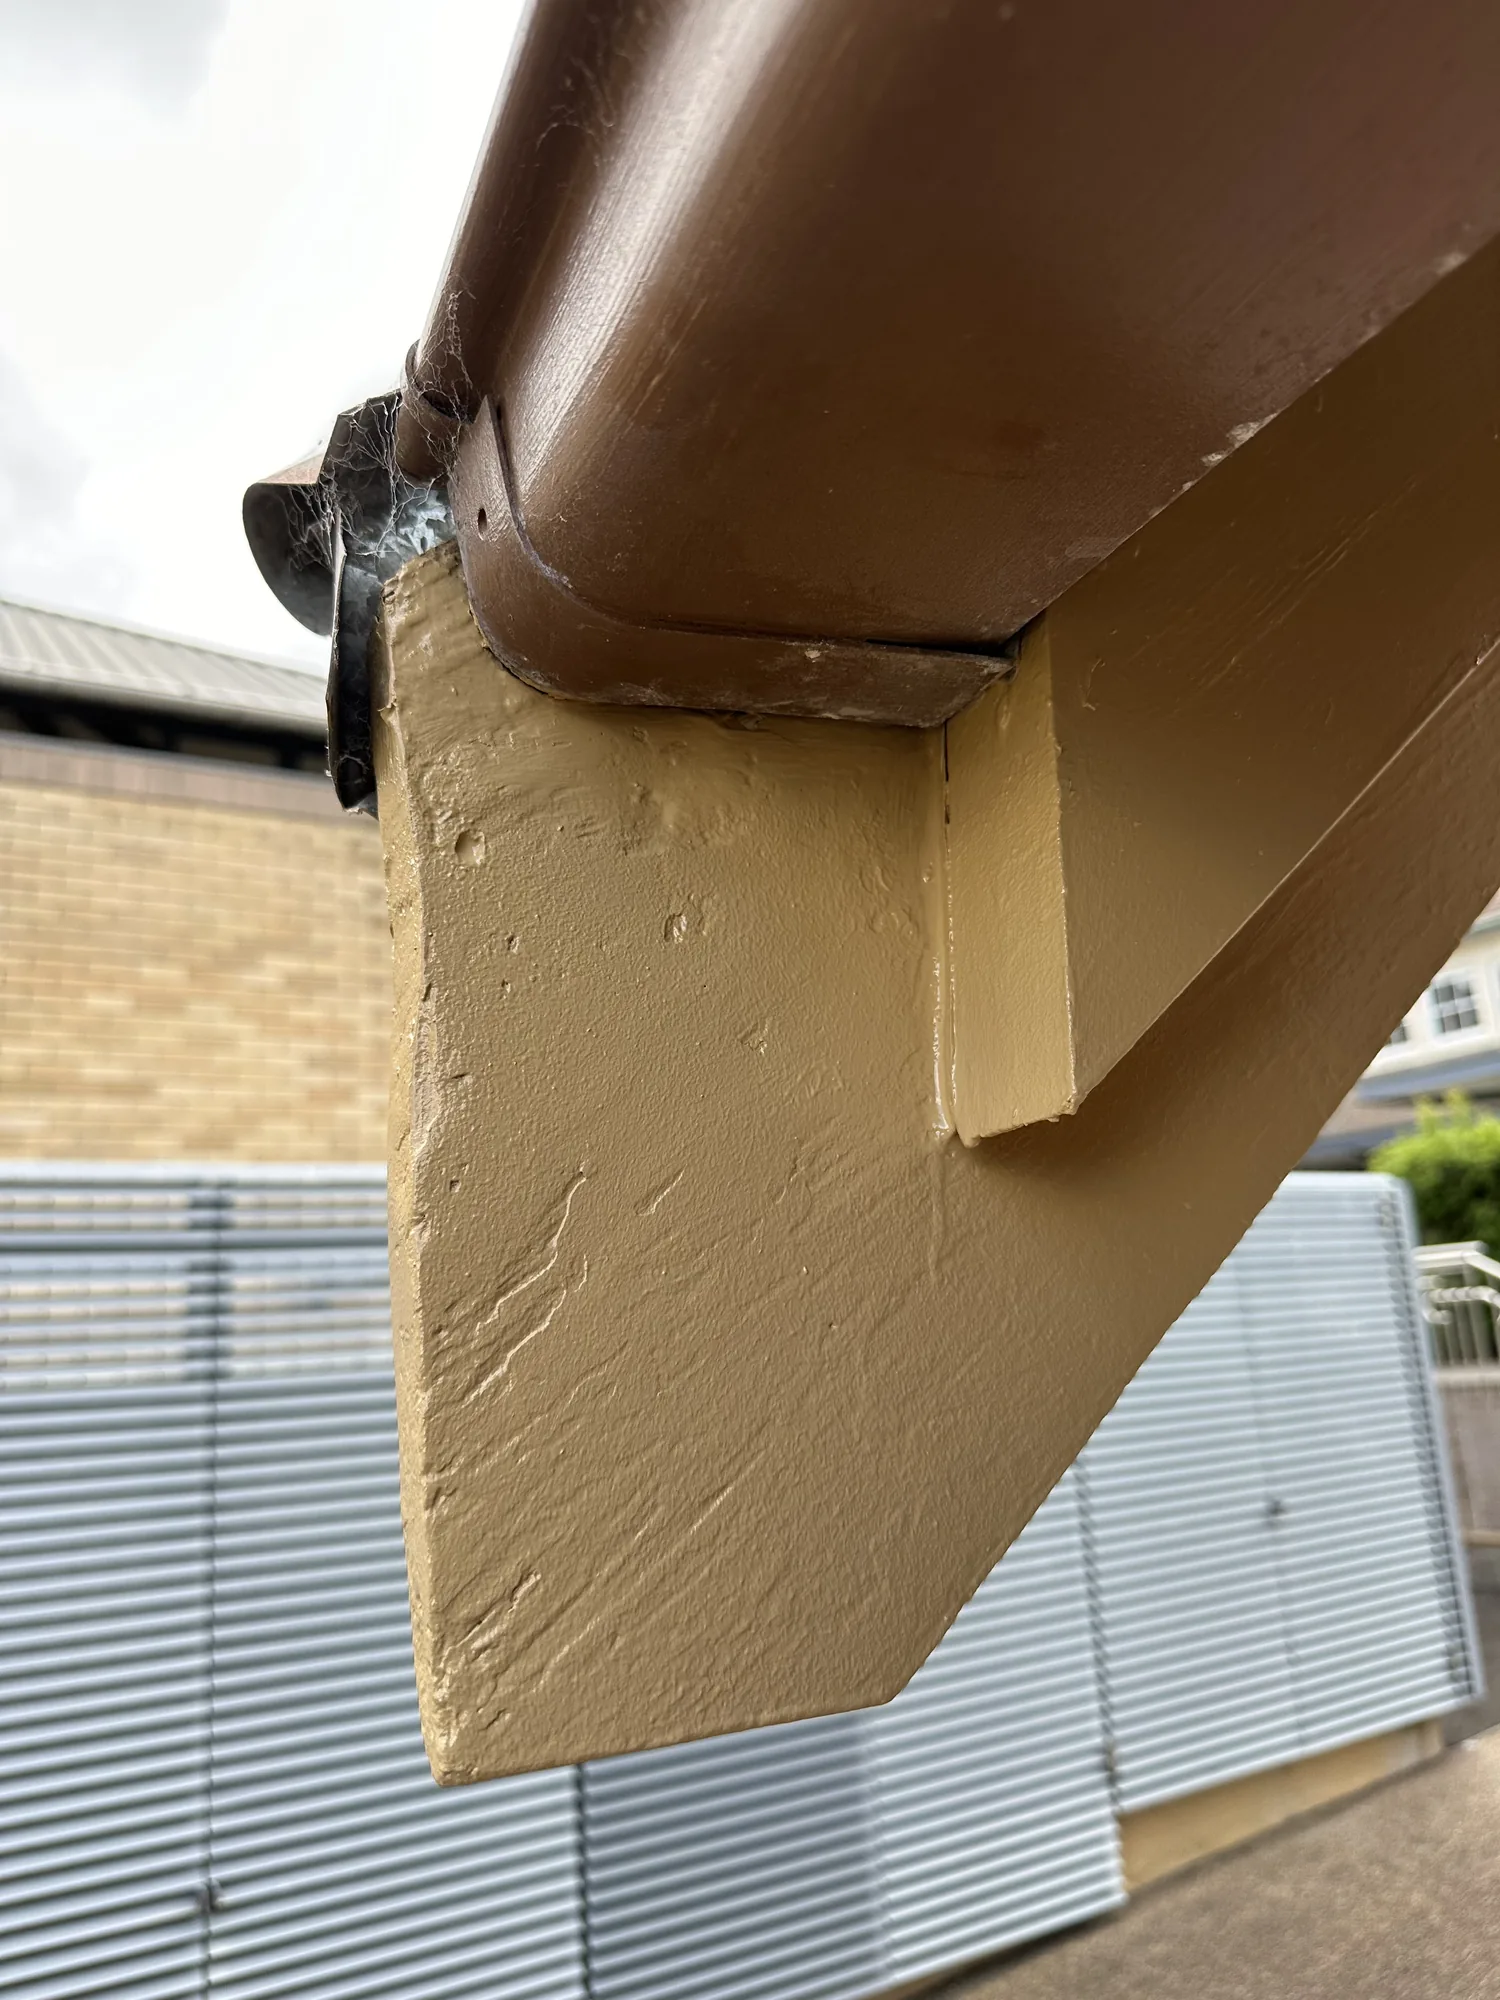
Timber fascia and barge board filled and repainted in tan after remedial carpentry
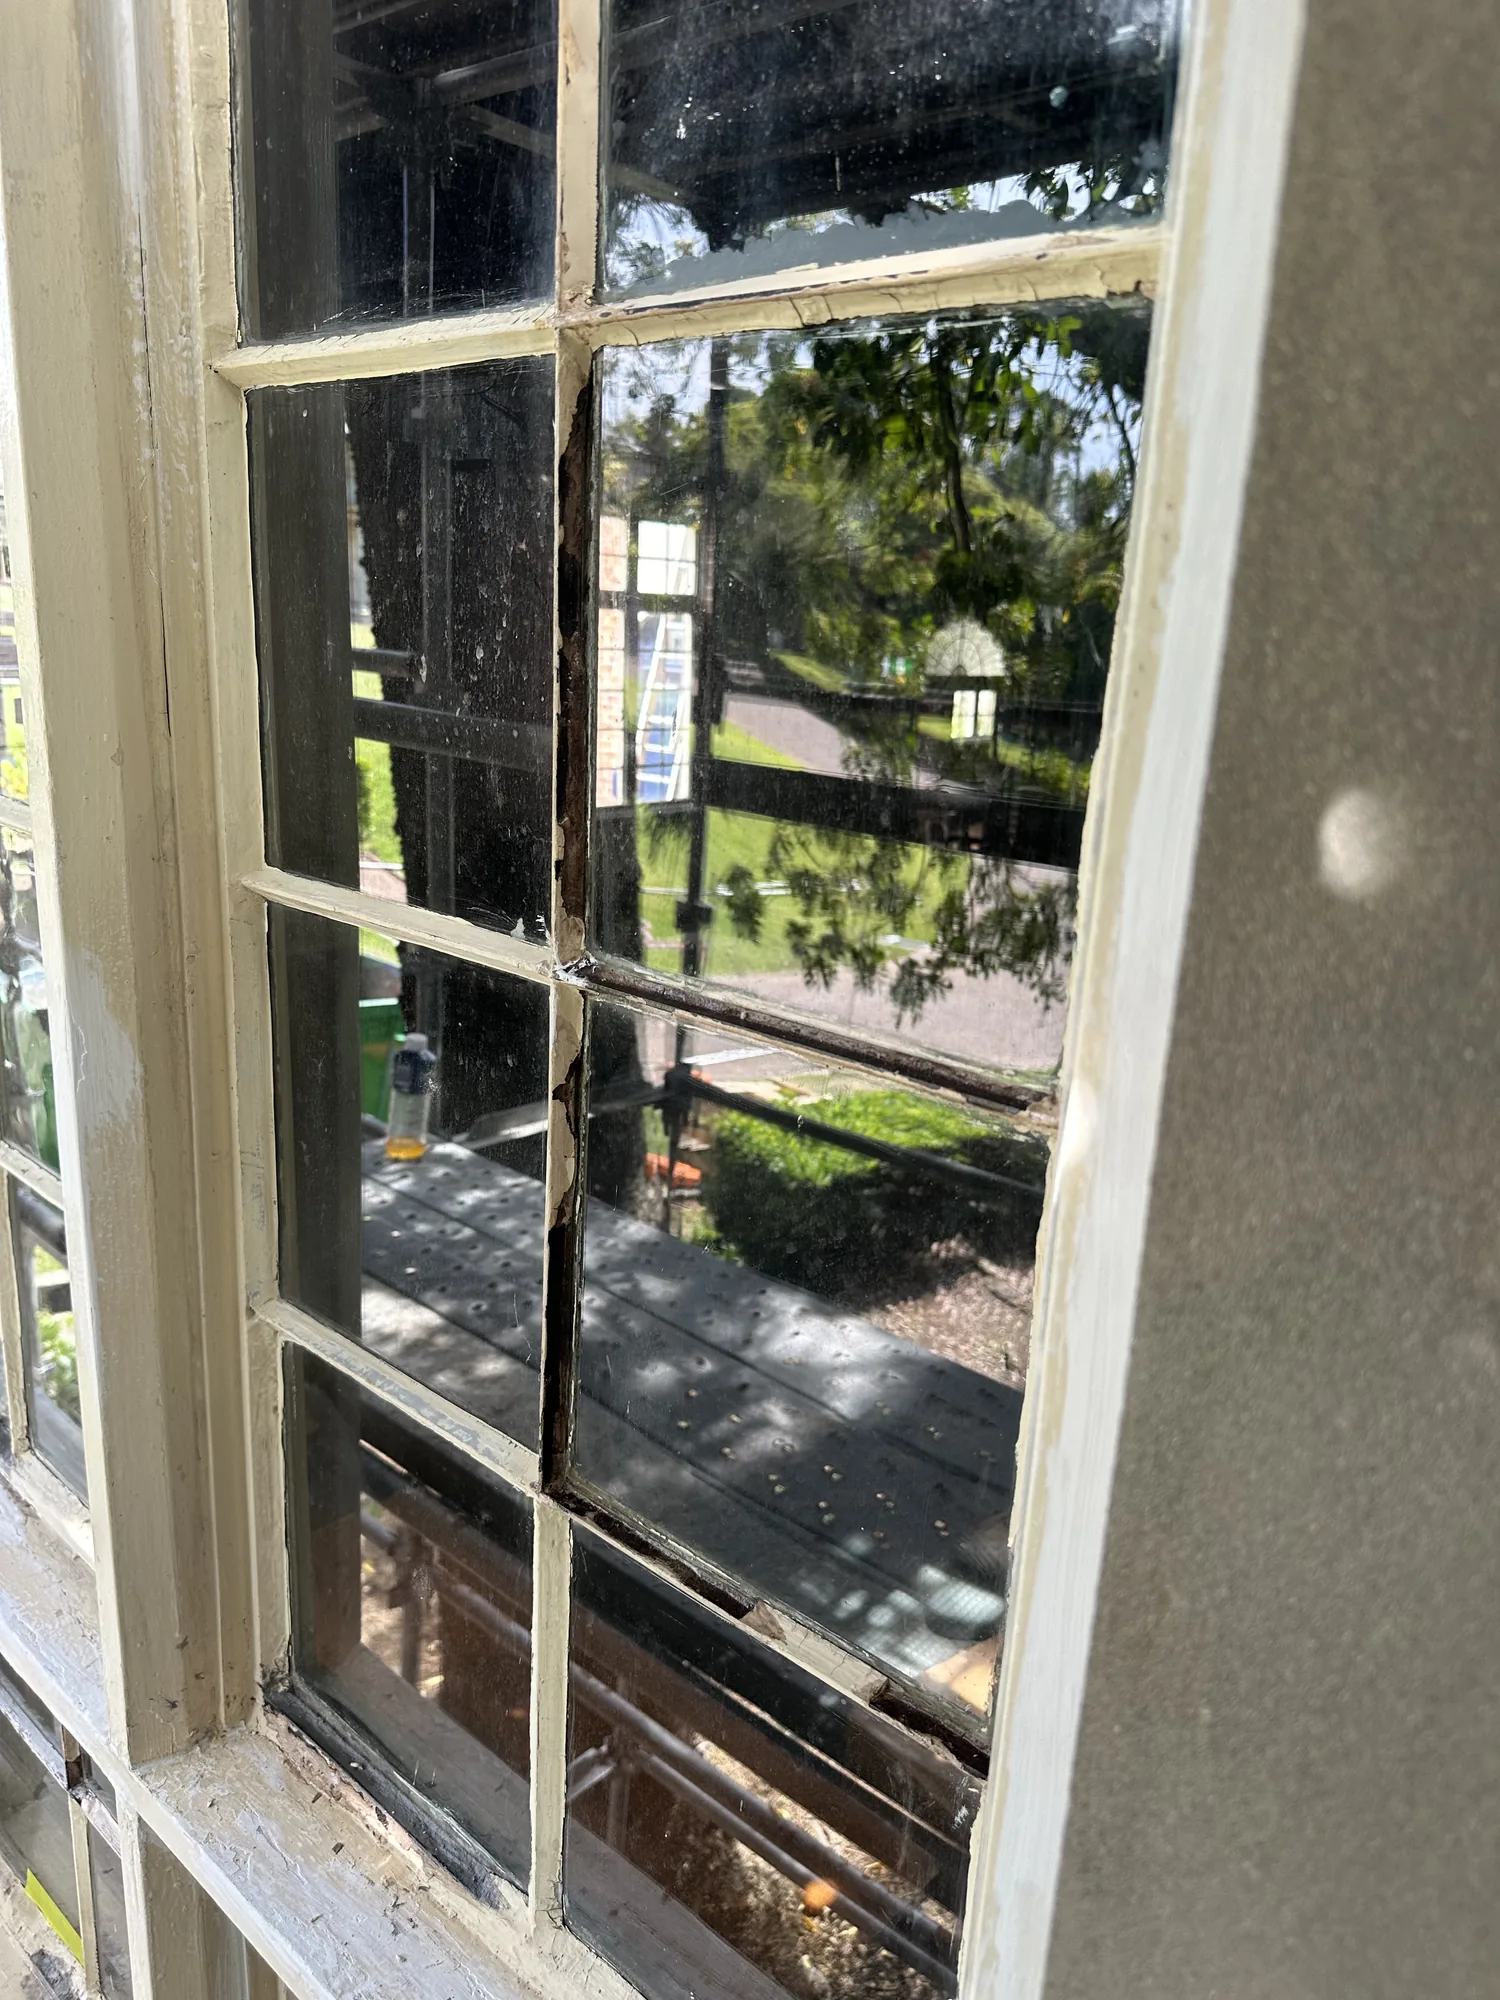
Cracked glazing on a heritage timber-framed multi-pane window before glazing repair and painting
Orange circle with white left and right arrows pointing away from each other in the center.
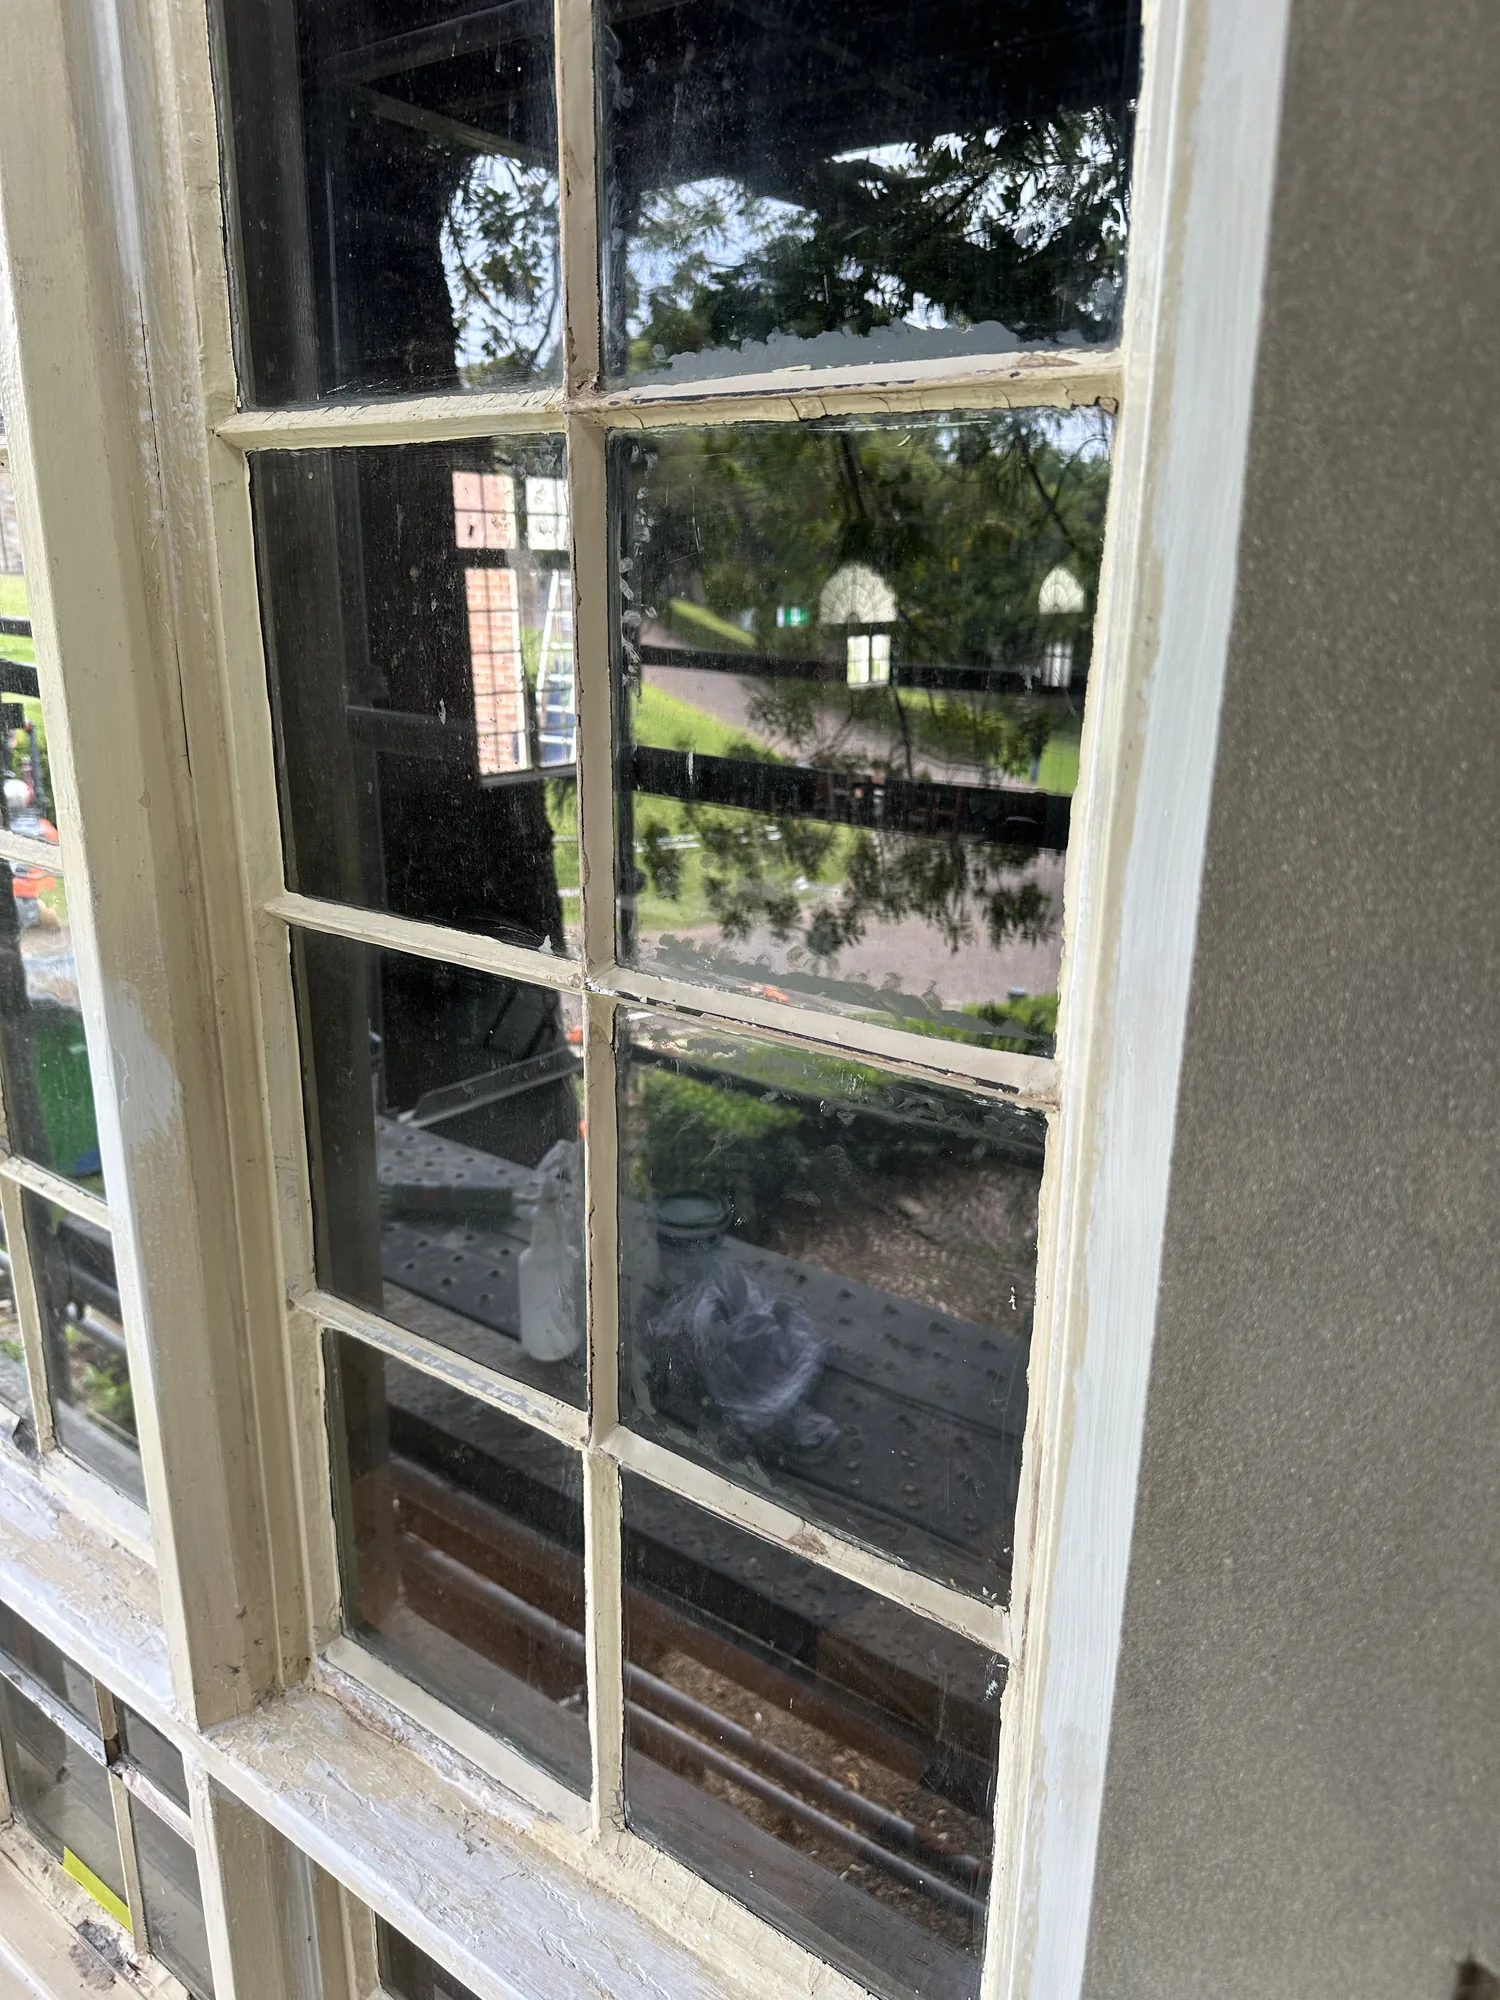
Heritage timber multi-pane window re-puttied and repainted after glazing repair
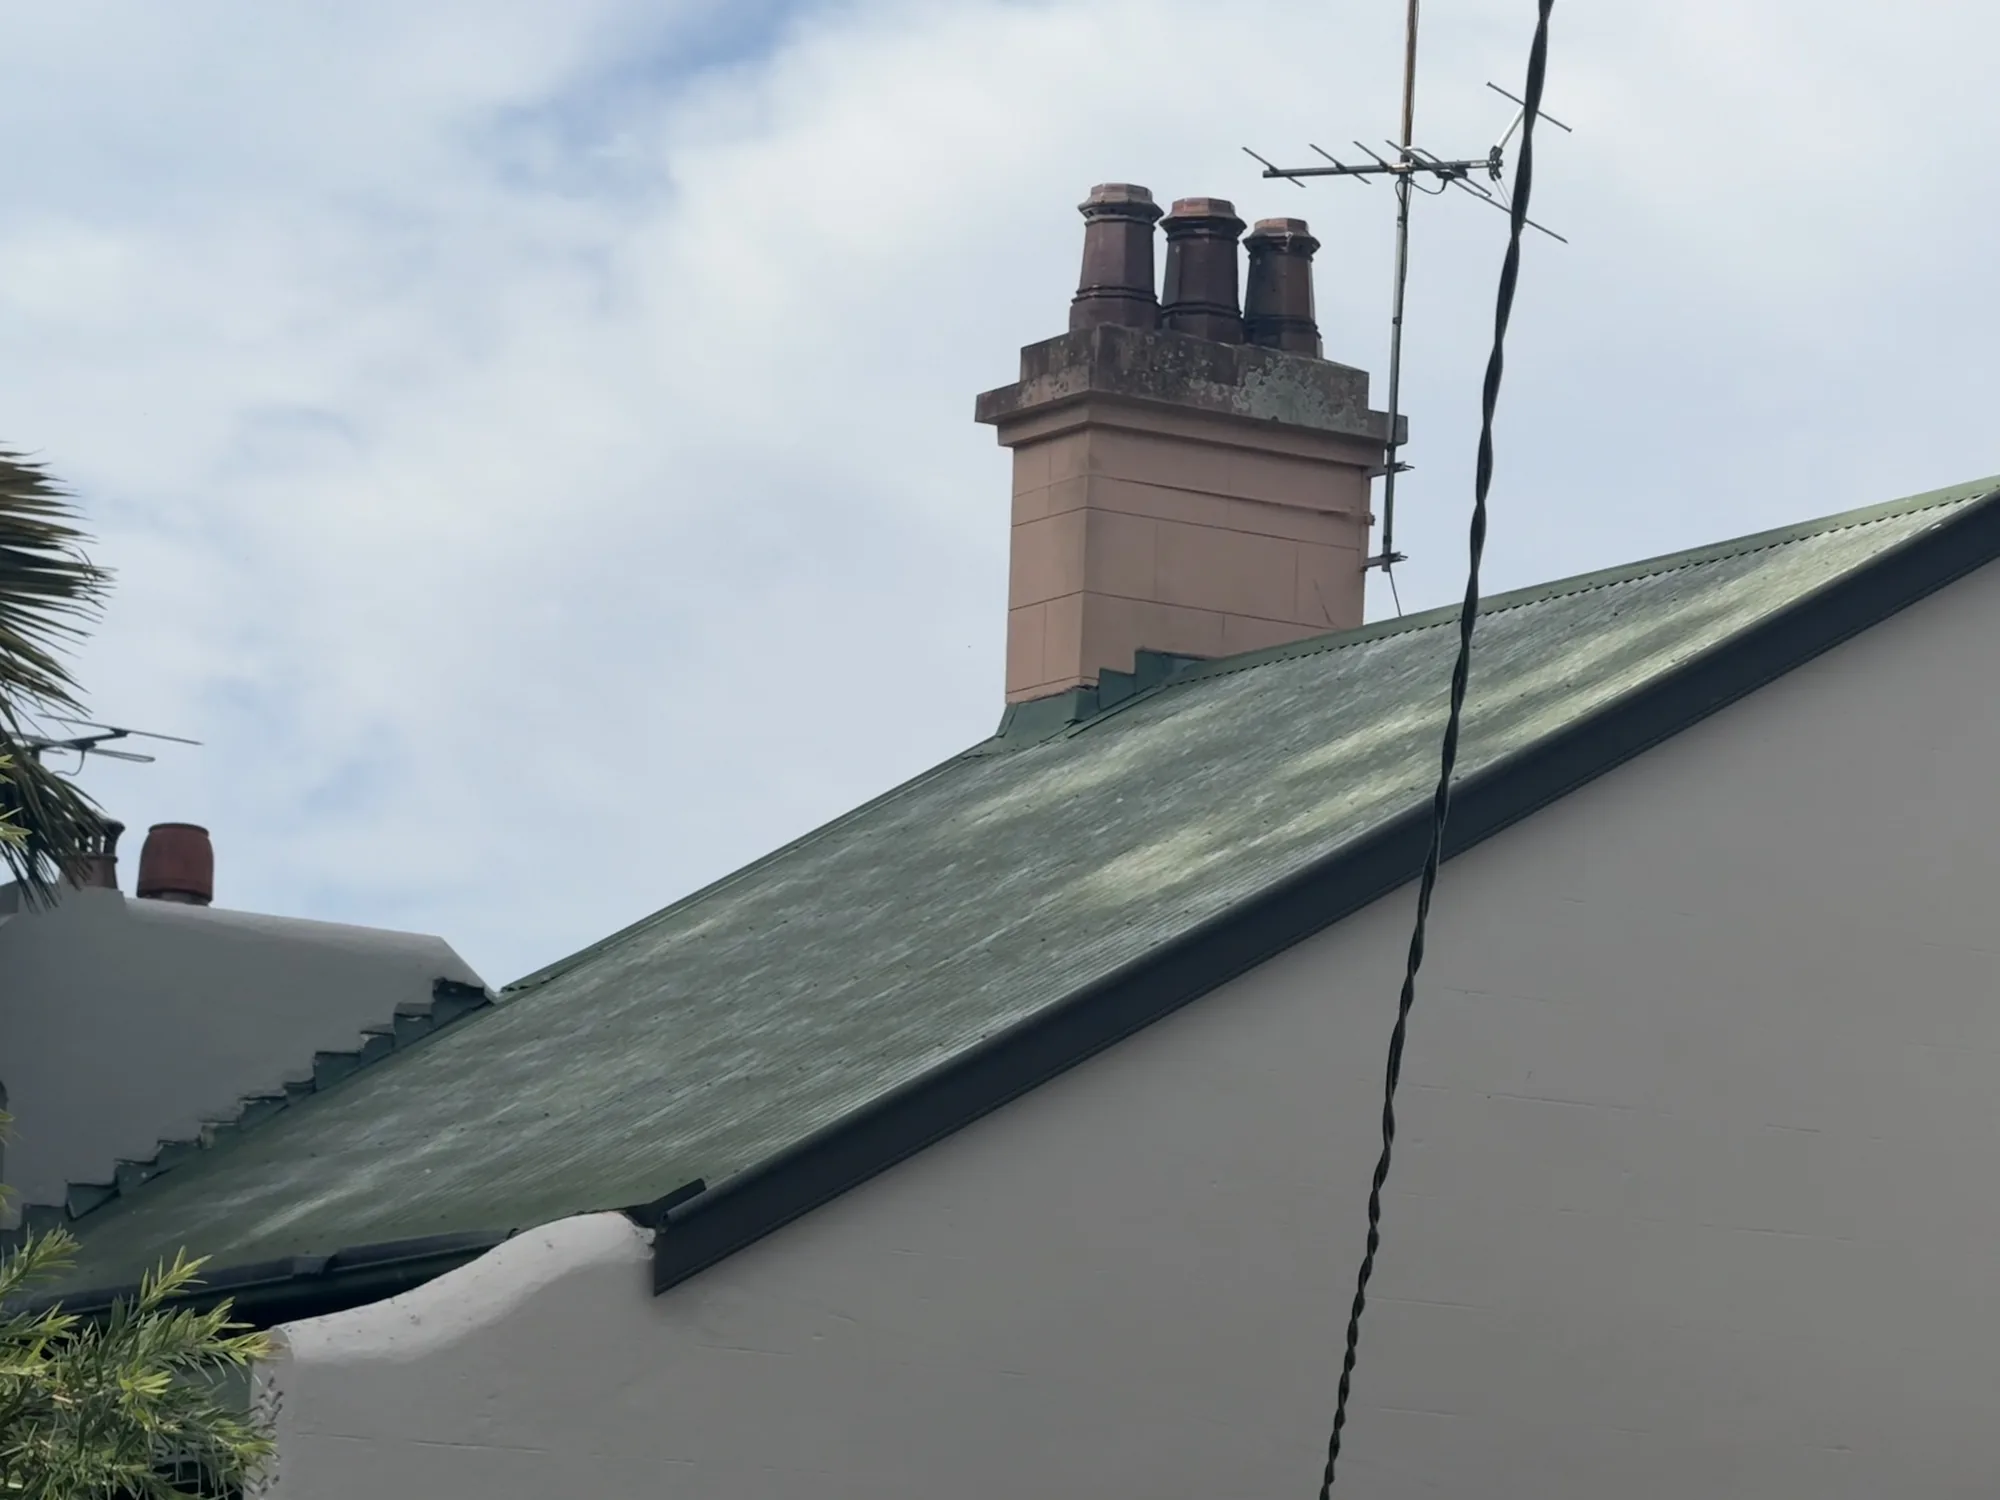
Green heritage corrugated metal roof before soft washing and painting, North Sydney
Orange circle with white left and right arrows pointing away from each other in the center.
Heritage terrace metal roof recoated charcoal with repainted rendered chimney, Sydney
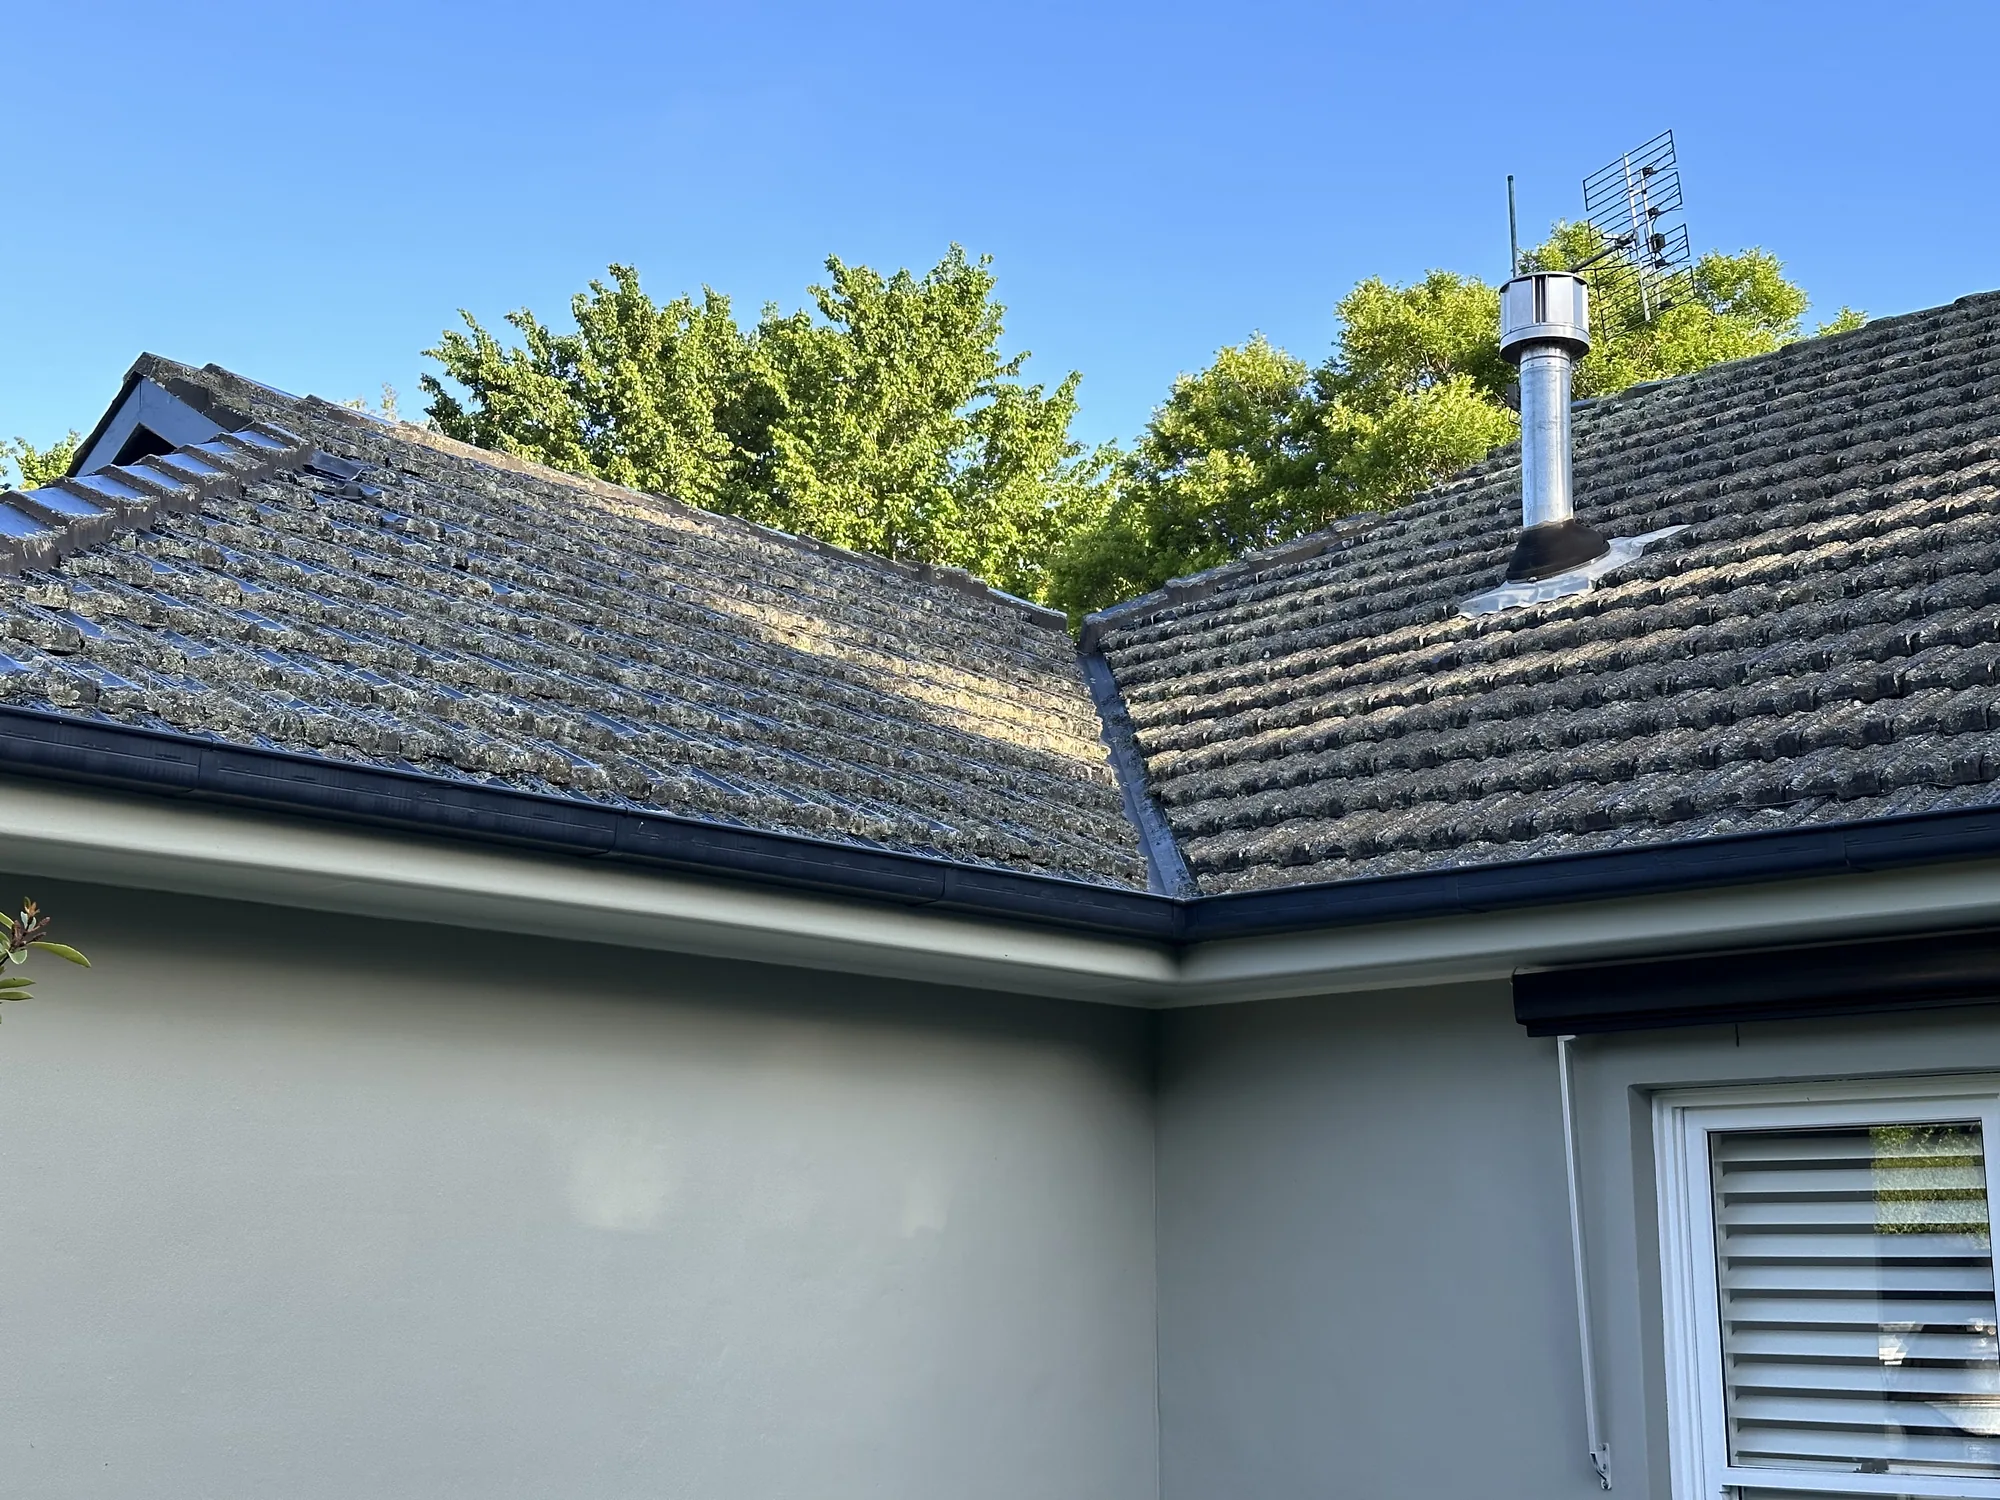
Terracotta tile roof with lichen and moss colonisation before pressure washing treatment, Sydney
Orange circle with white left and right arrows pointing away from each other in the center.
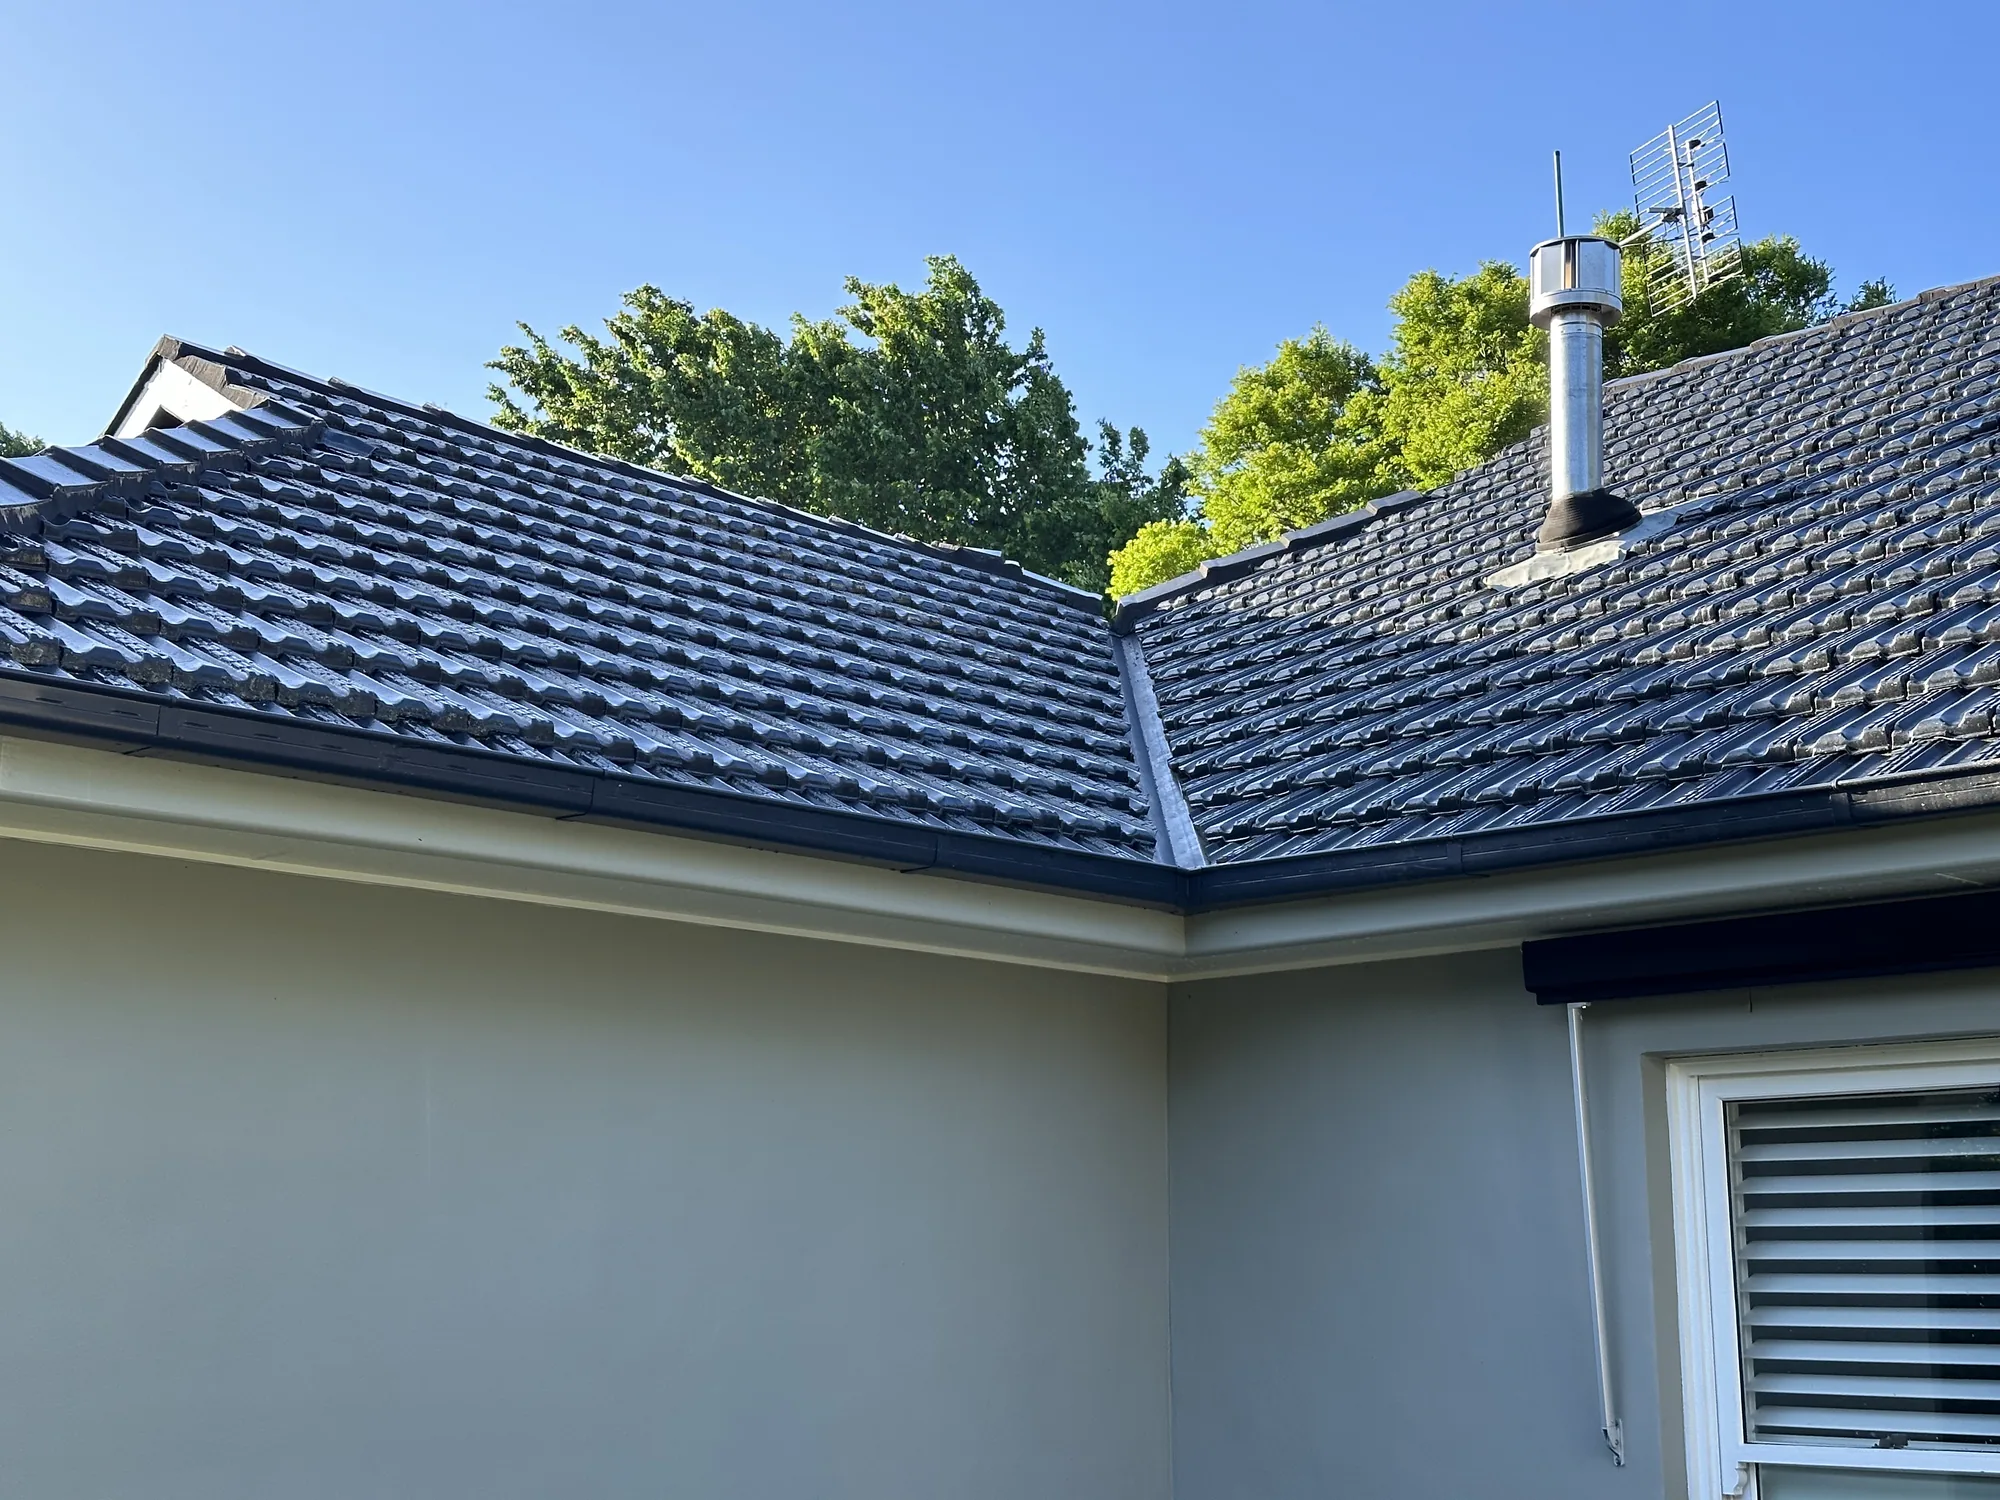
Terracotta tiled roof cleaned after pressure washing, extending the life of the roof, Sydney suburb
Technician on a roof-access ladder painting a tiled two-storey roof, Sydney suburb
Orange circle with white left and right arrows pointing away from each other in the center.
Street view of a technician painting a two-storey tiled roof via ladder access, Sydney
Two-storey home in faded tan render before exterior repaint, Eastern Suburbs
Orange circle with white left and right arrows pointing away from each other in the center.
Two-storey brick-and-render home repainted white with charcoal trim after exterior painting, Eastern Suburbs
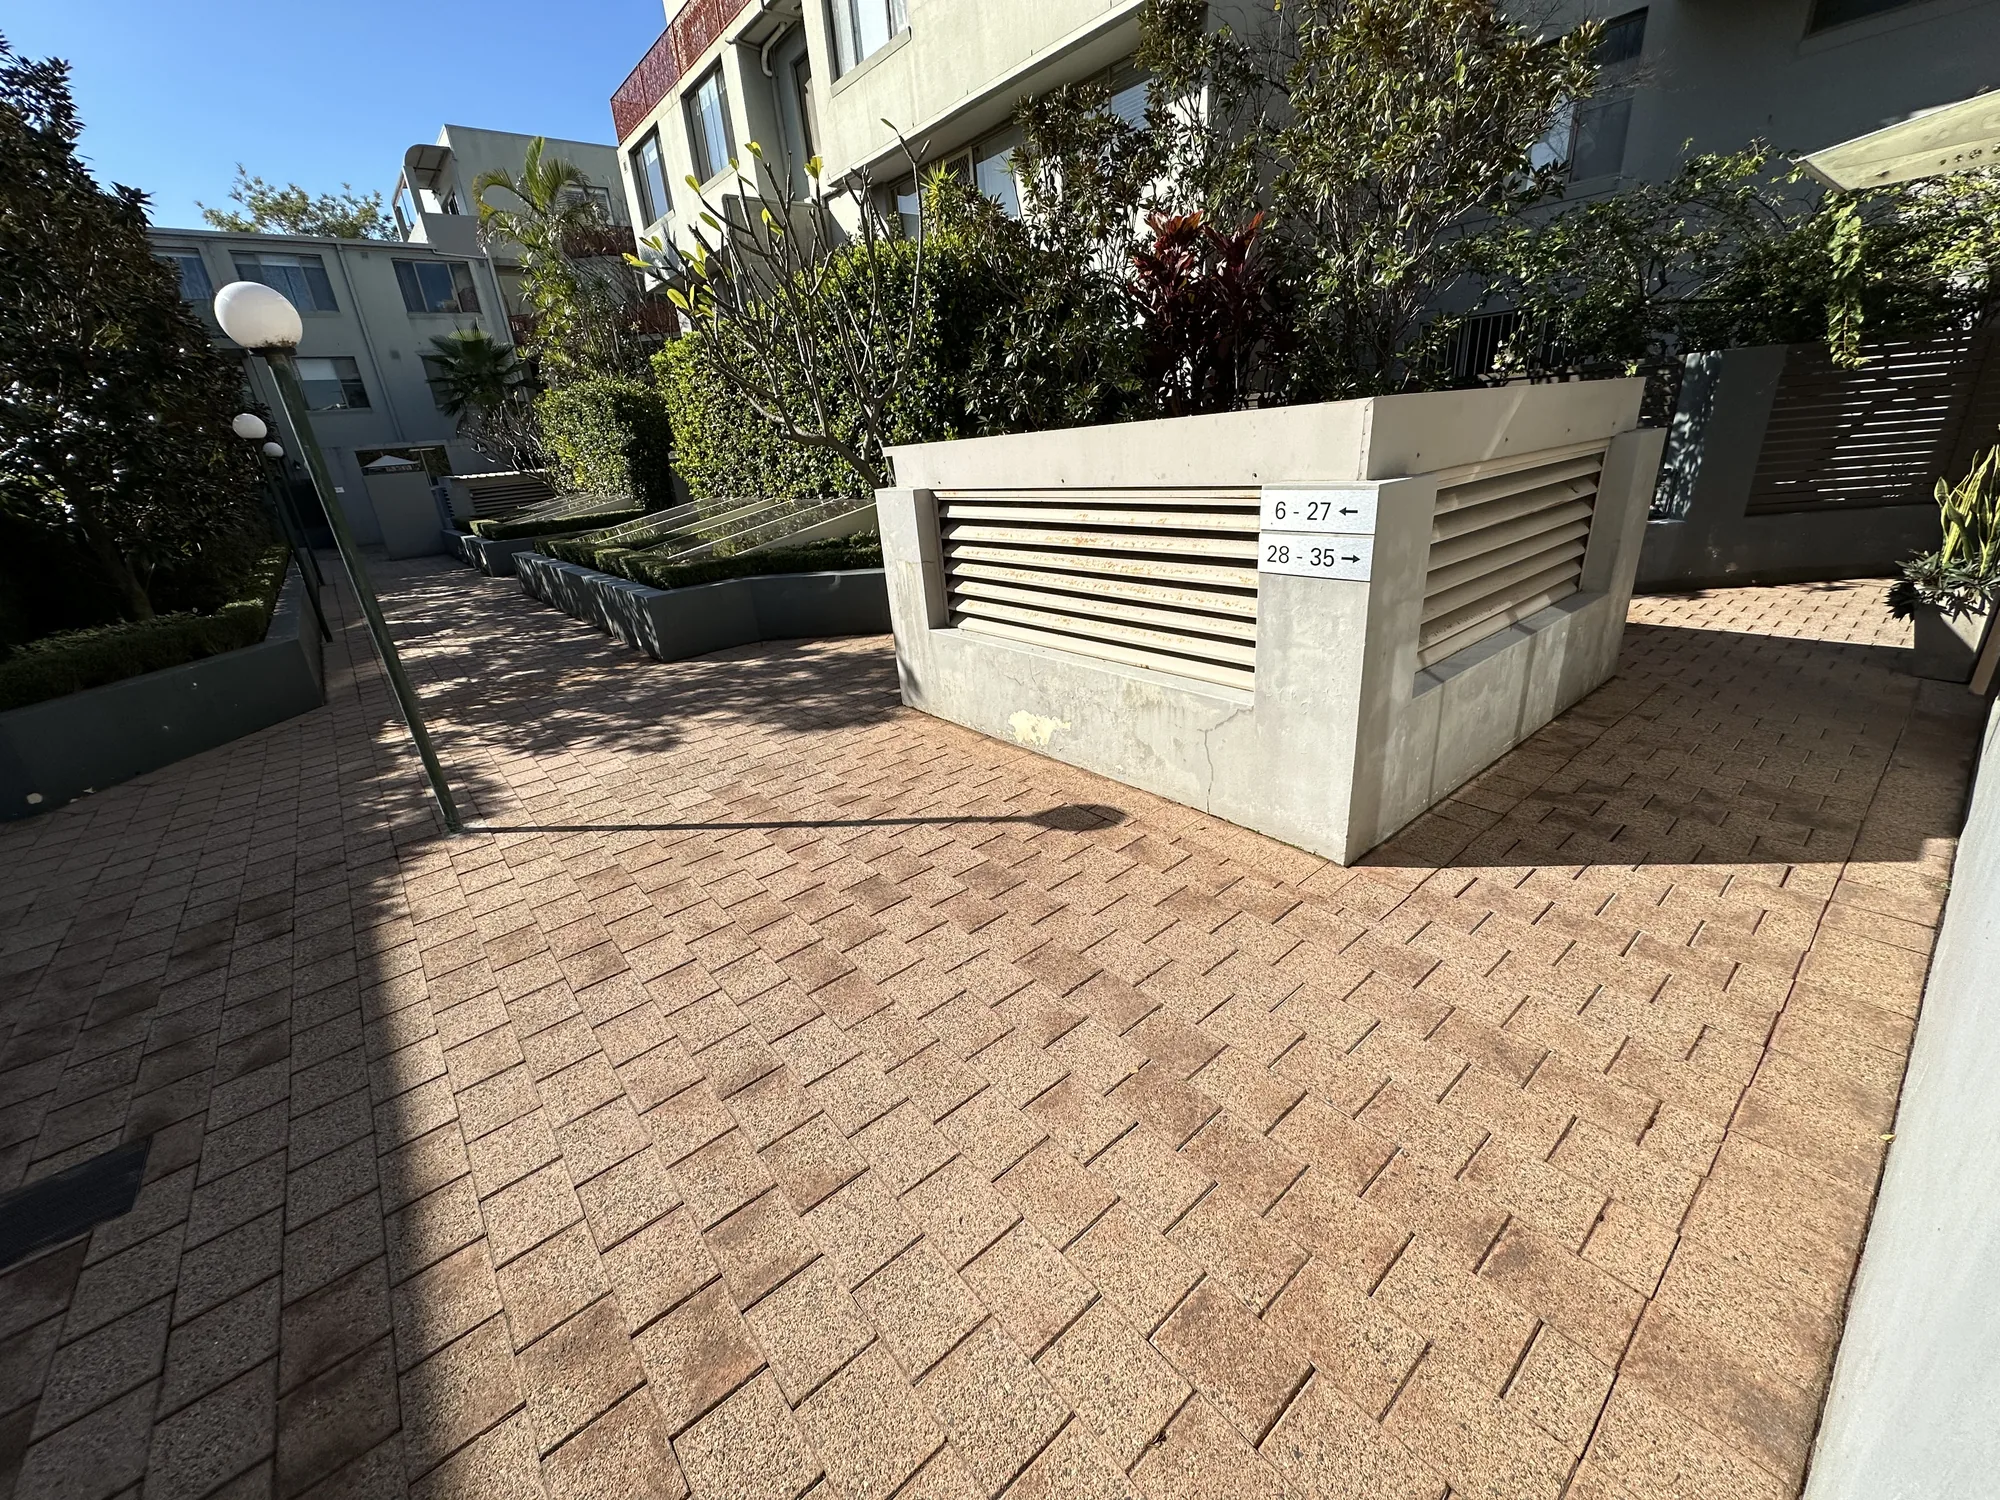
Paved strata courtyard with moss and soiling in joints before pressure washing, Sydney
Orange circle with white left and right arrows pointing away from each other in the center.
Strata courtyard pavers cleaned of moss and grime after pressure washing and re-sanding, Sydney
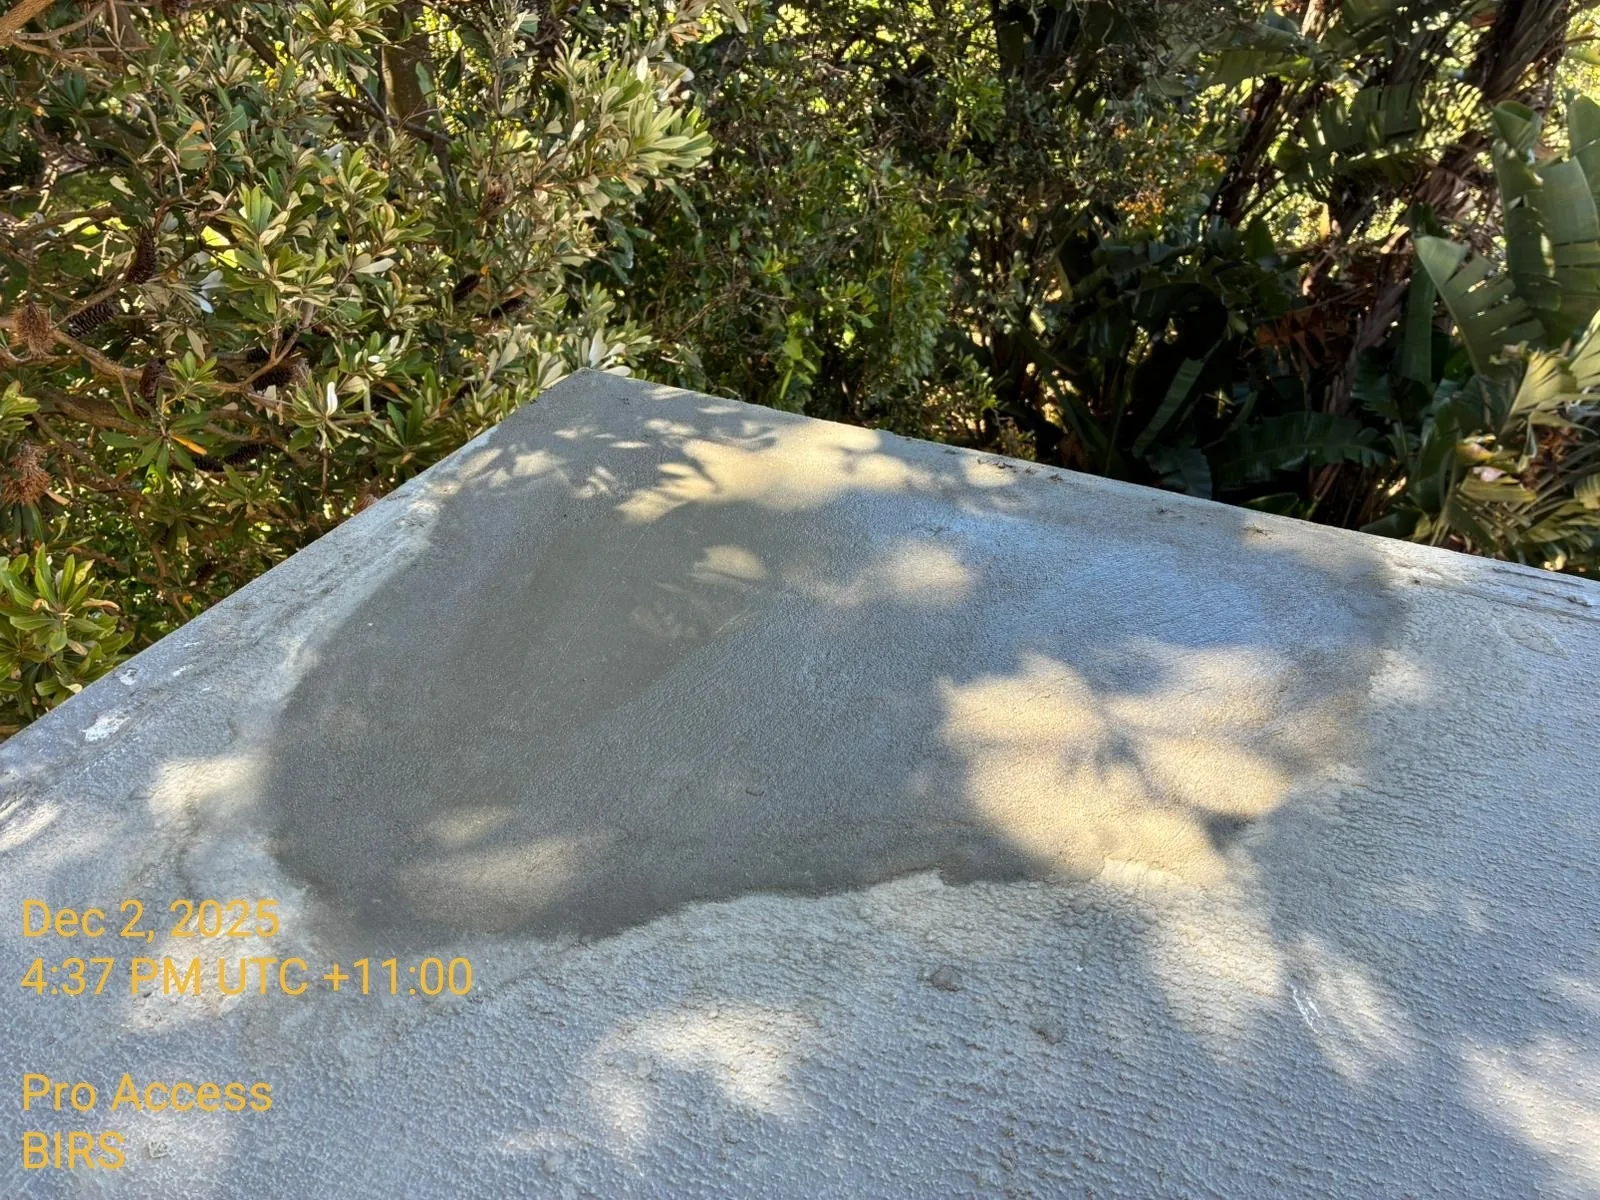
Cracked concrete roof section with failed patch before remedial render, Sydney
Orange circle with white left and right arrows pointing away from each other in the center.
Freshly rendered concrete roof edge after remedial patch repair, Sydney
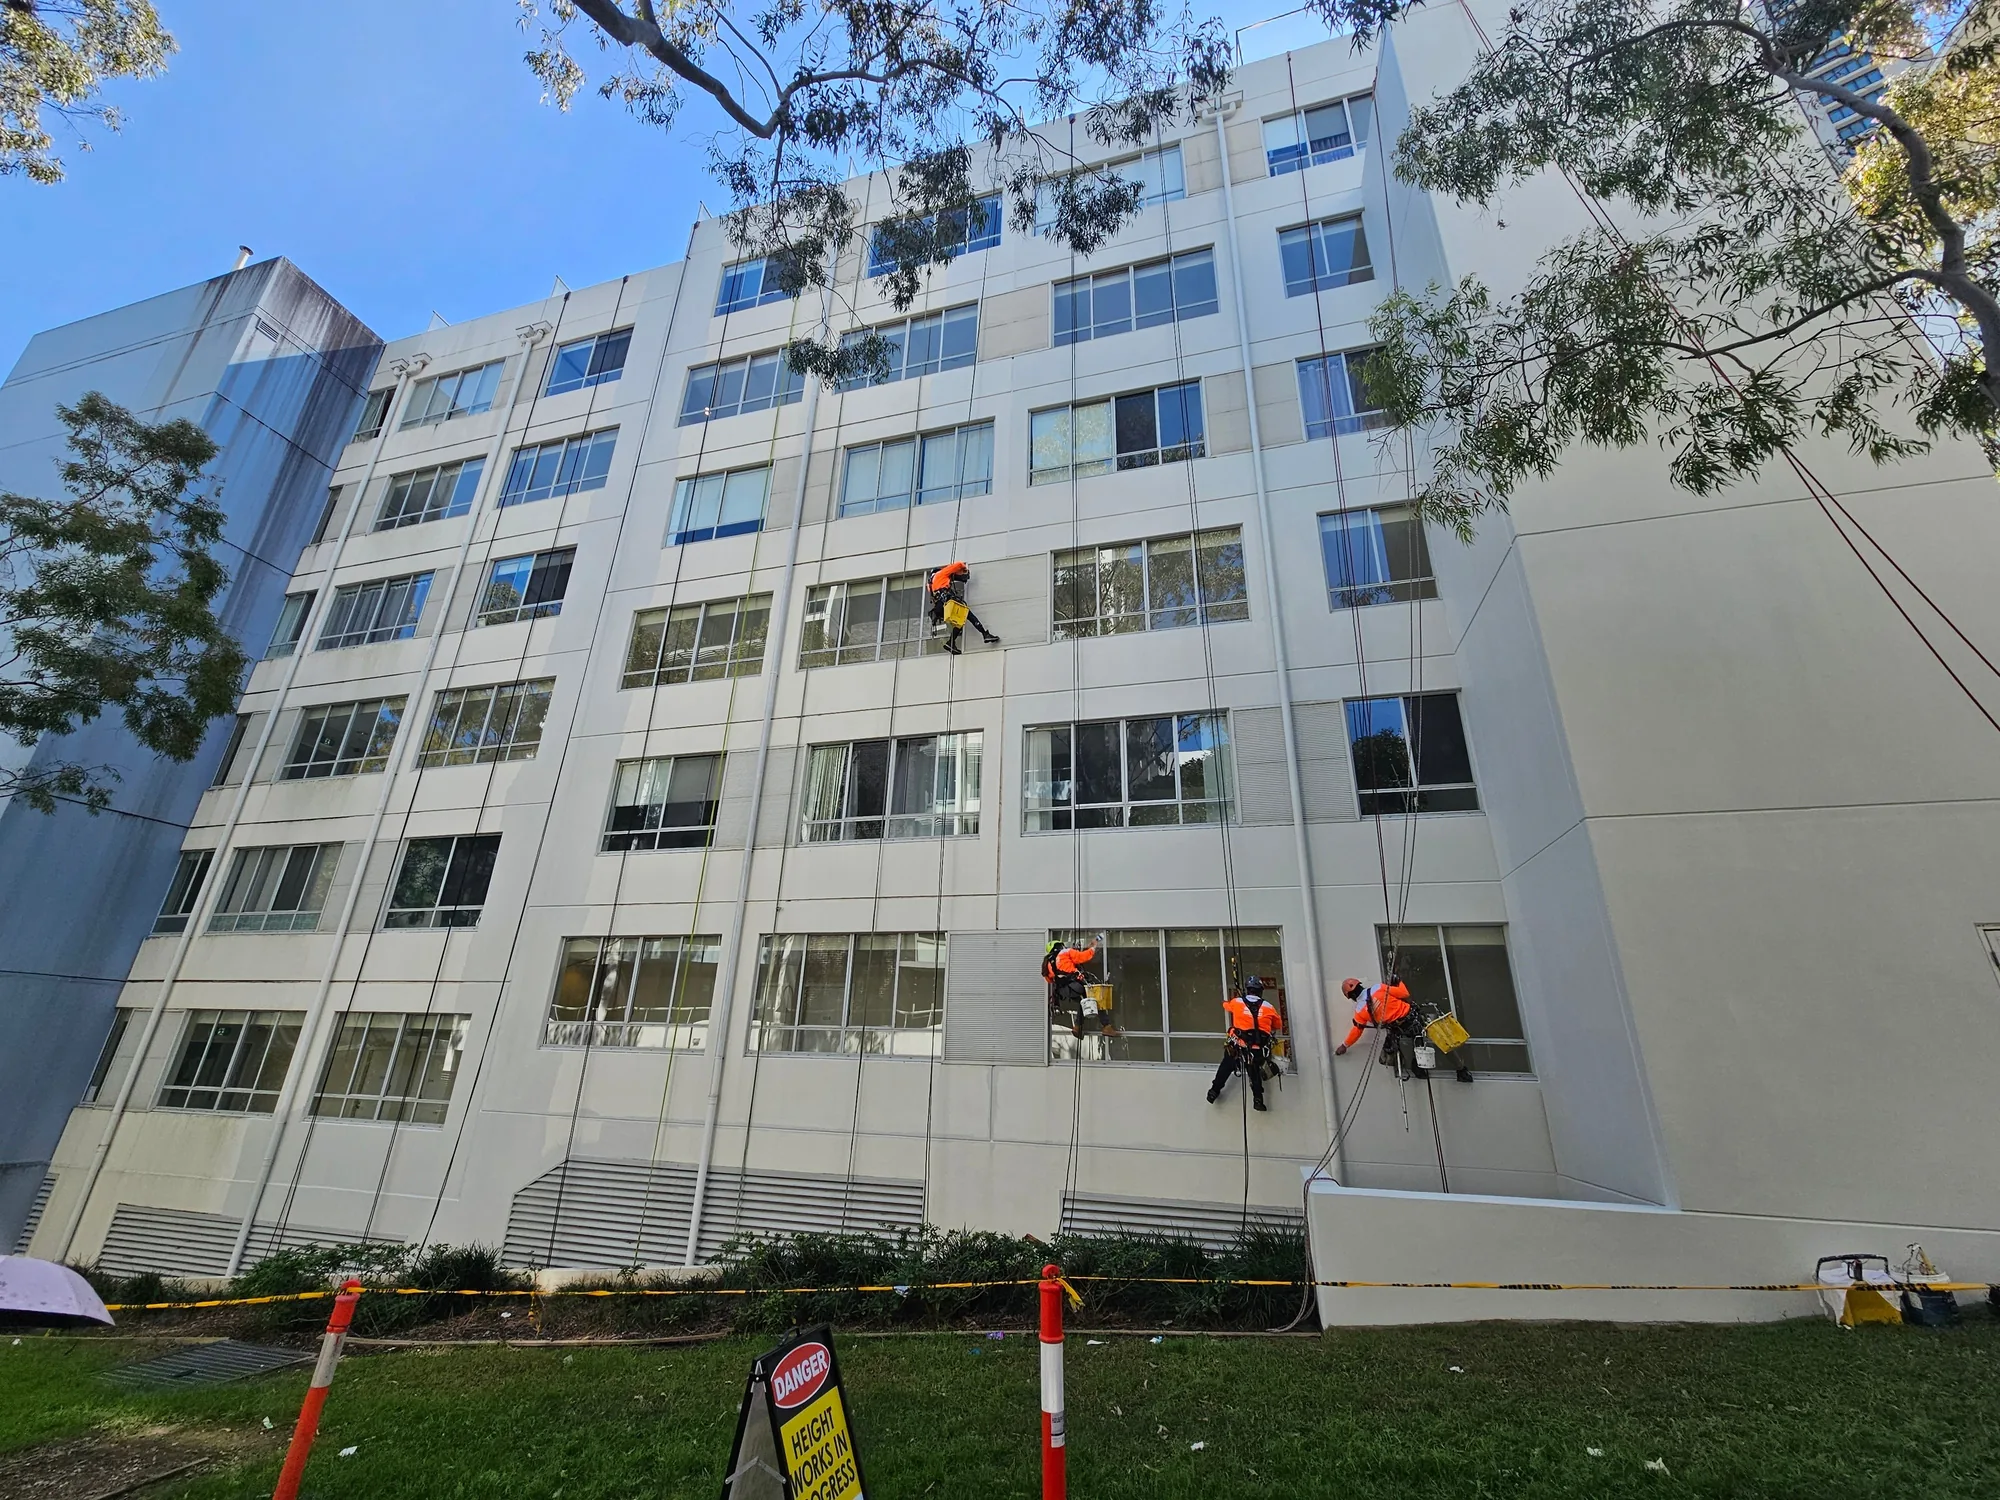
Four rope-access technicians abseiling a multi-storey Sydney facade during exterior painting
Orange circle with white left and right arrows pointing away from each other in the center.
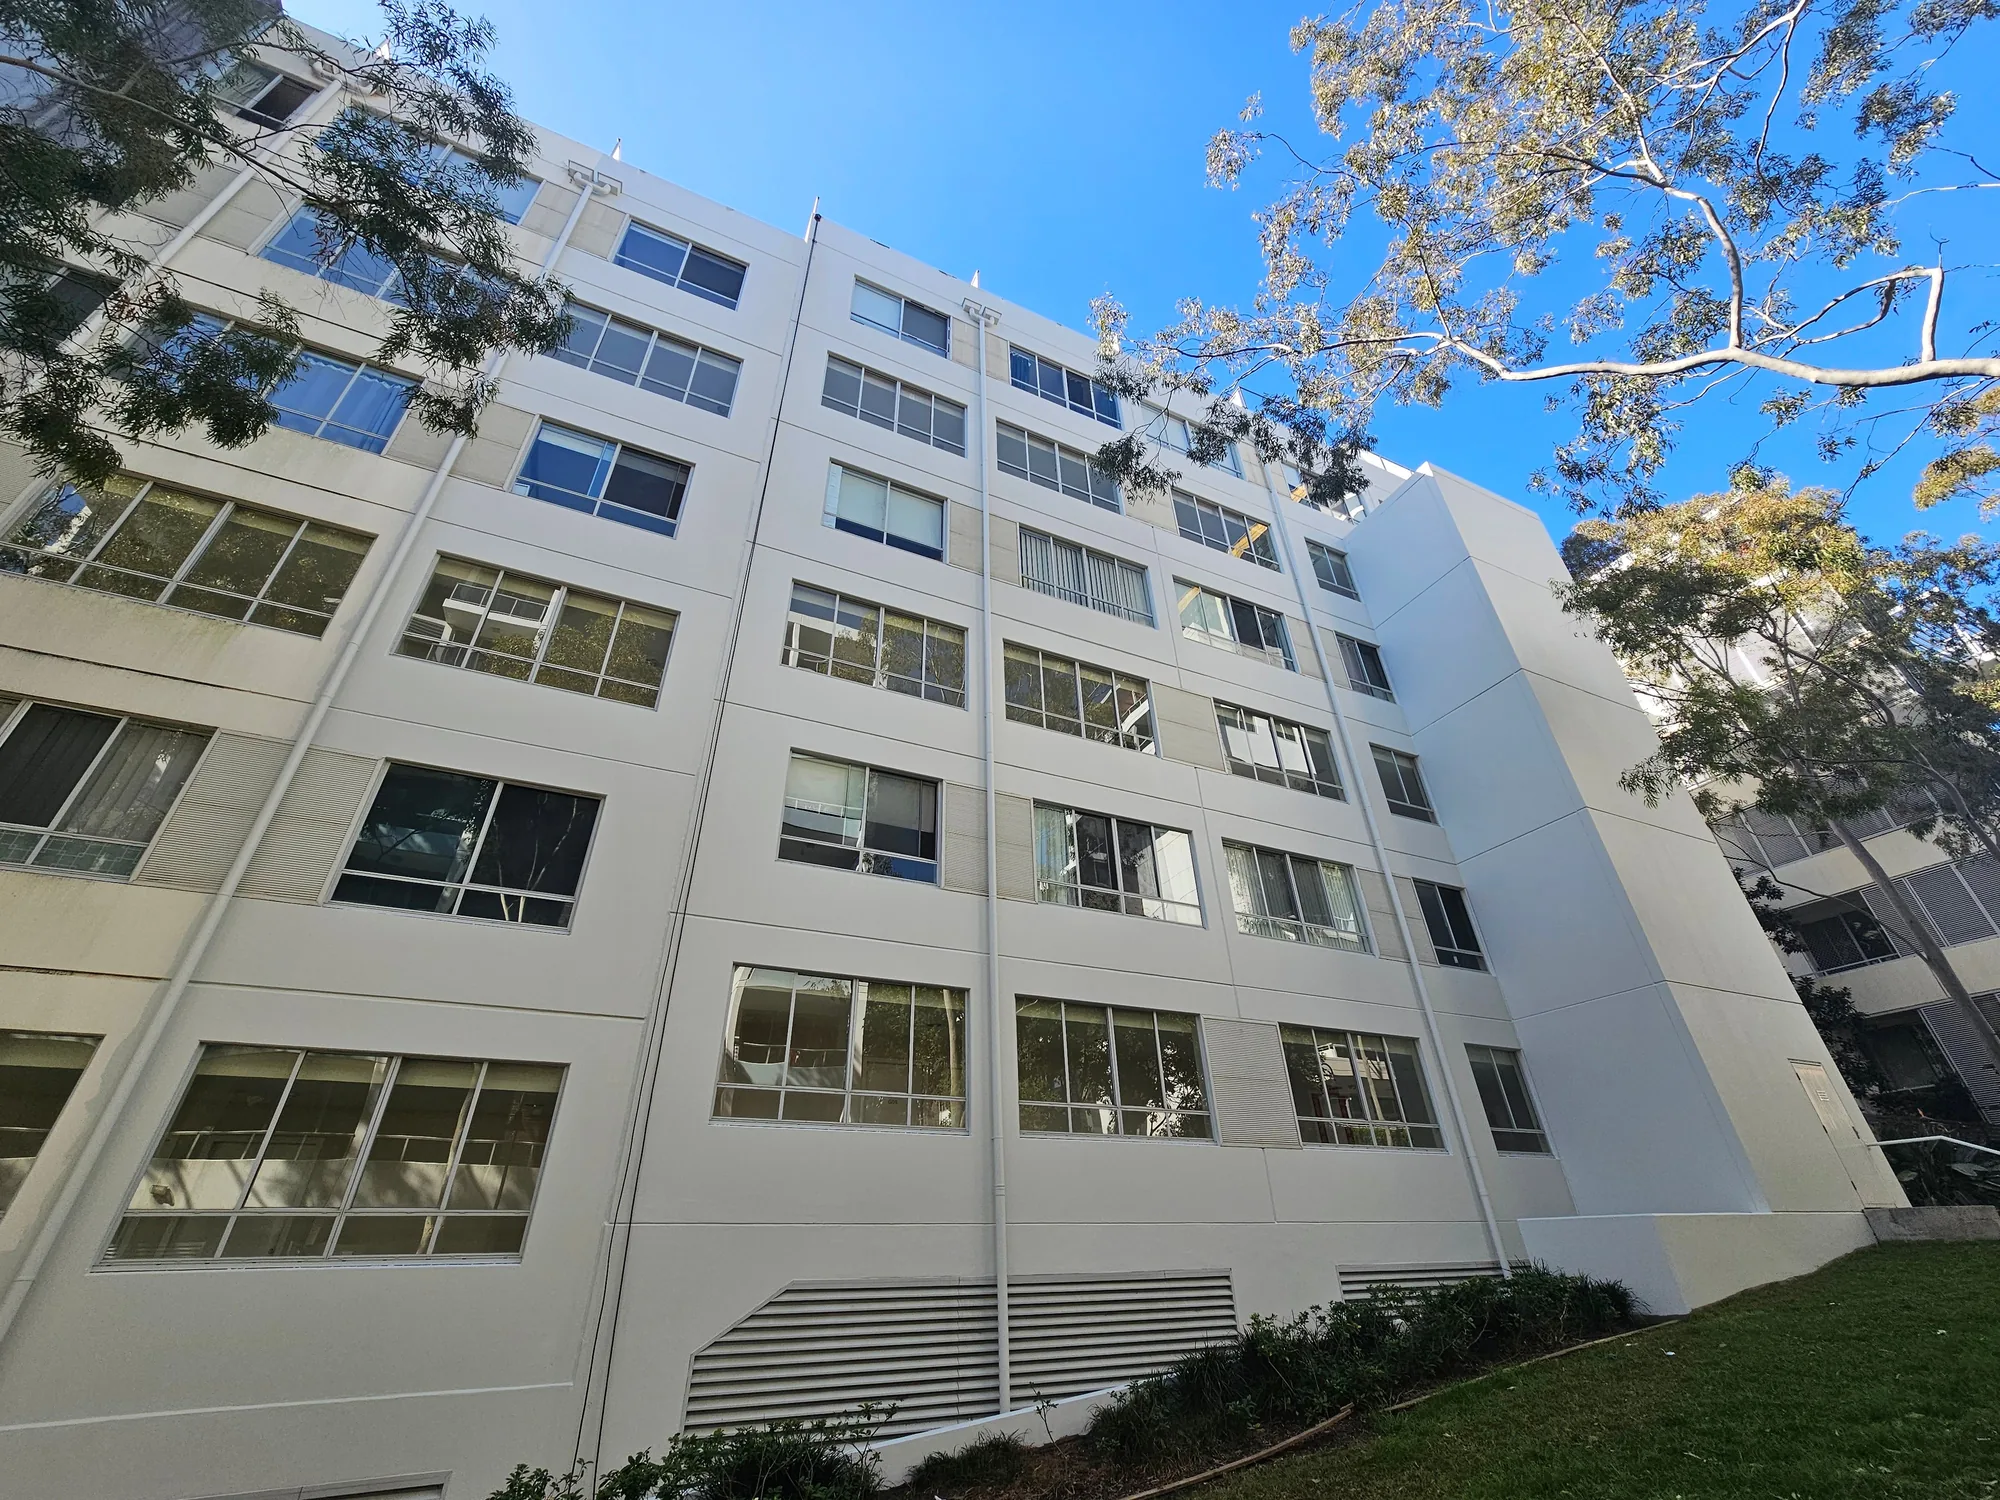
Multi-storey rendered residential facade repainted white after facade works, Sydney
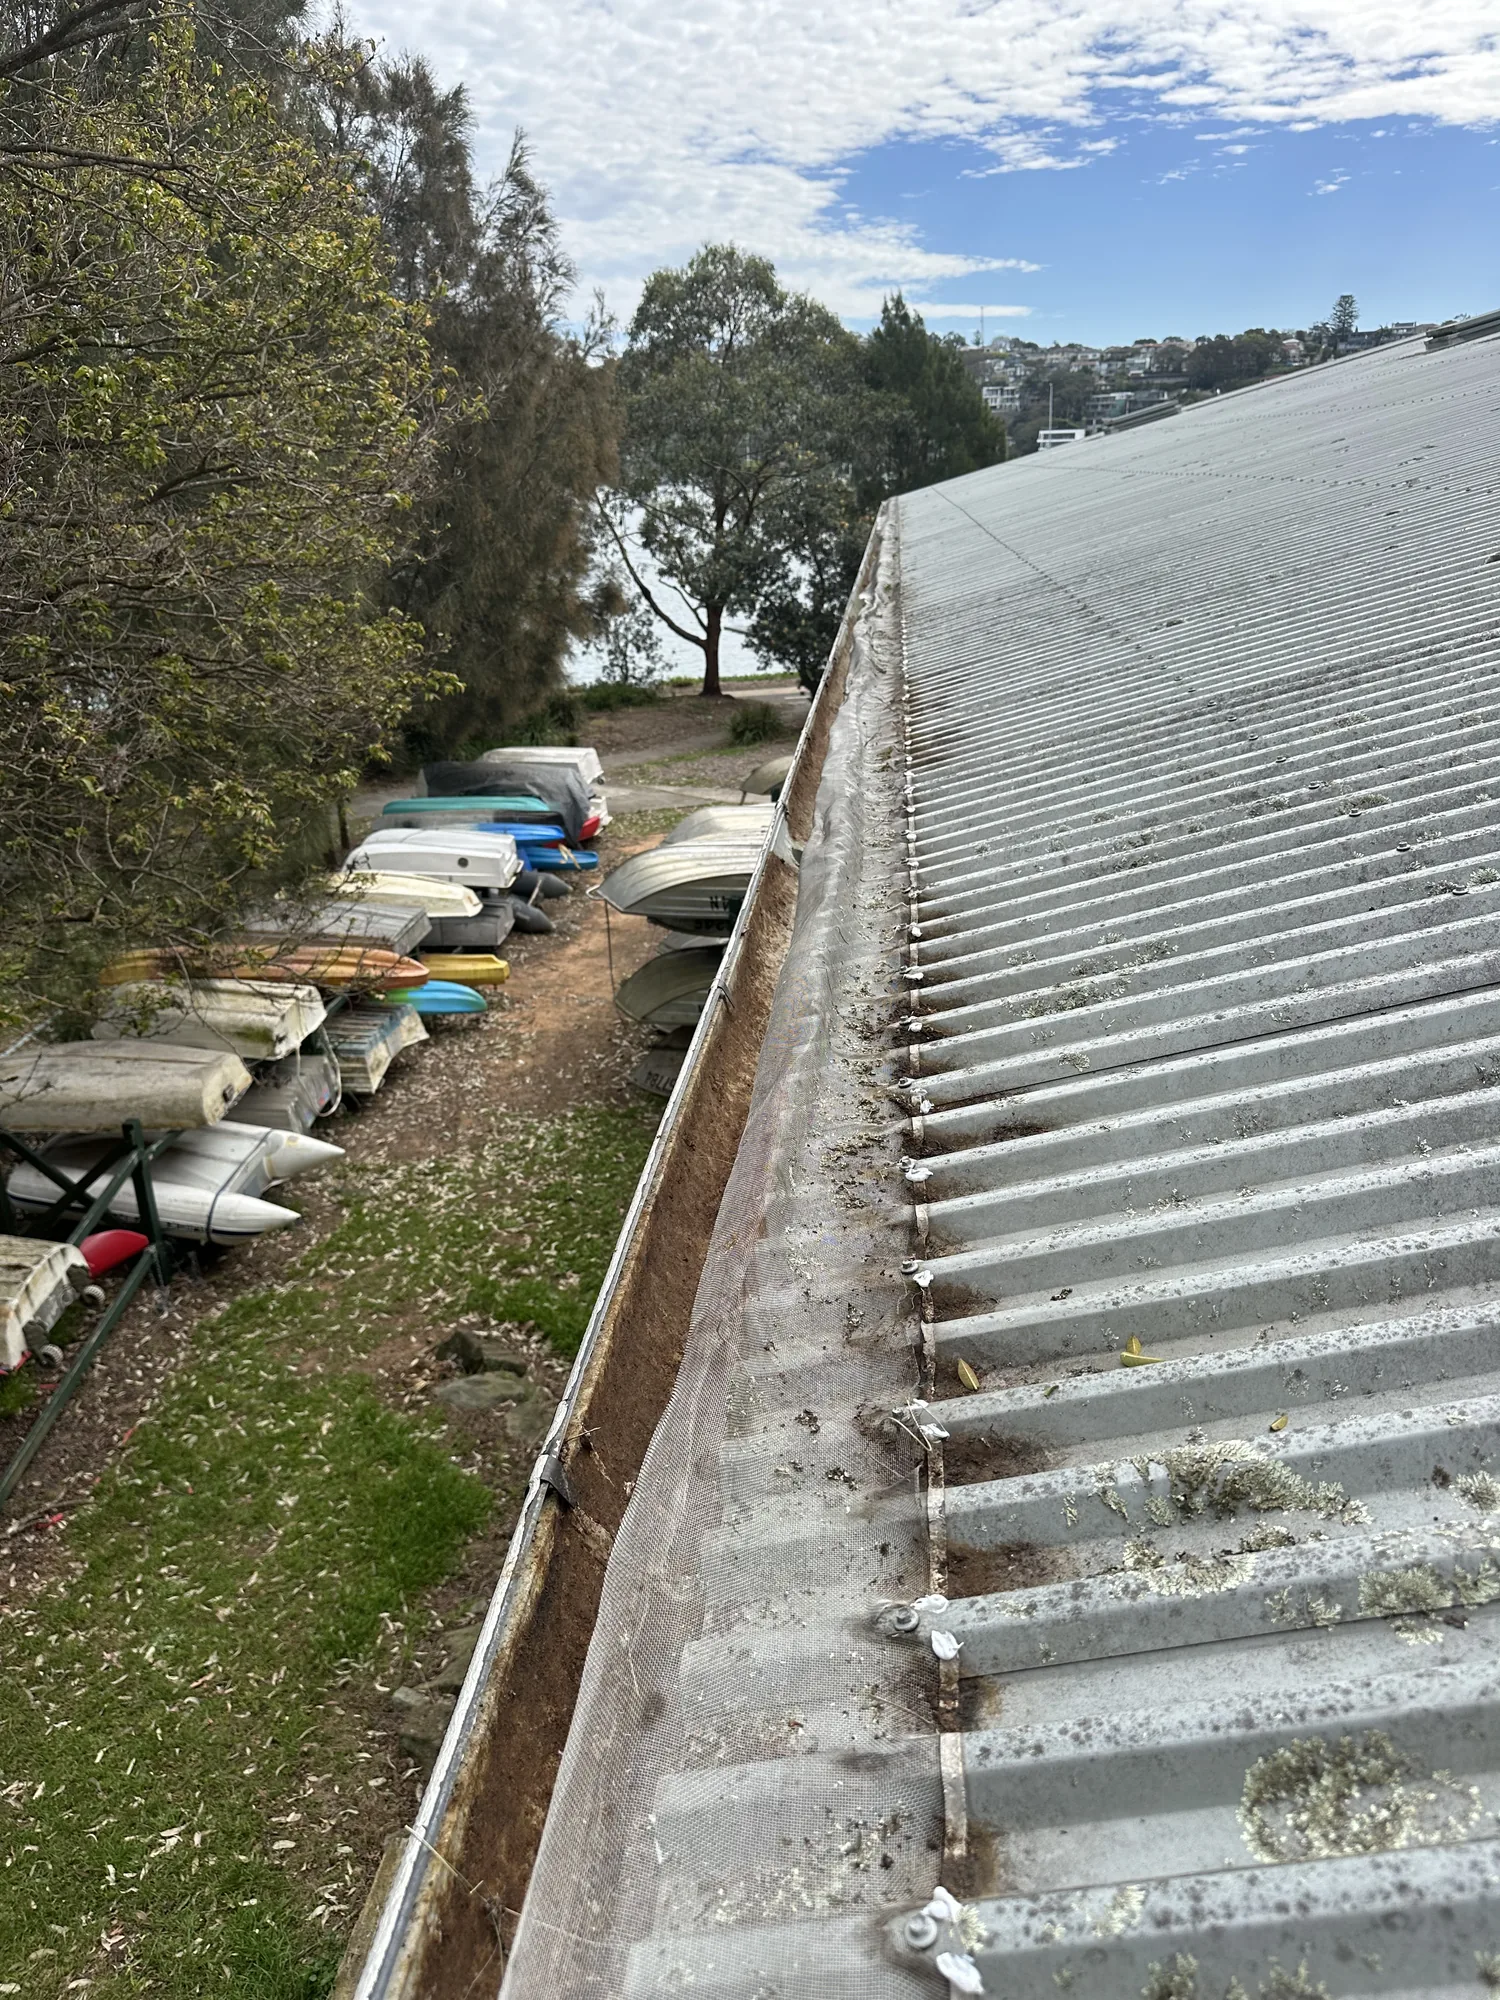
Self-seeded plant and leaf debris in a coastal metal gutter before clean-out, Northern Beaches
Orange circle with white left and right arrows pointing away from each other in the center.
Clear and functional gutter after cleaning, Northern Beaches
Rusting painted steelwork and soffit in a rooftop plant area before remedial recoating
Orange circle with white left and right arrows pointing away from each other in the center.
Rooftop plant-room steelwork and soffit repainted white after protective coating
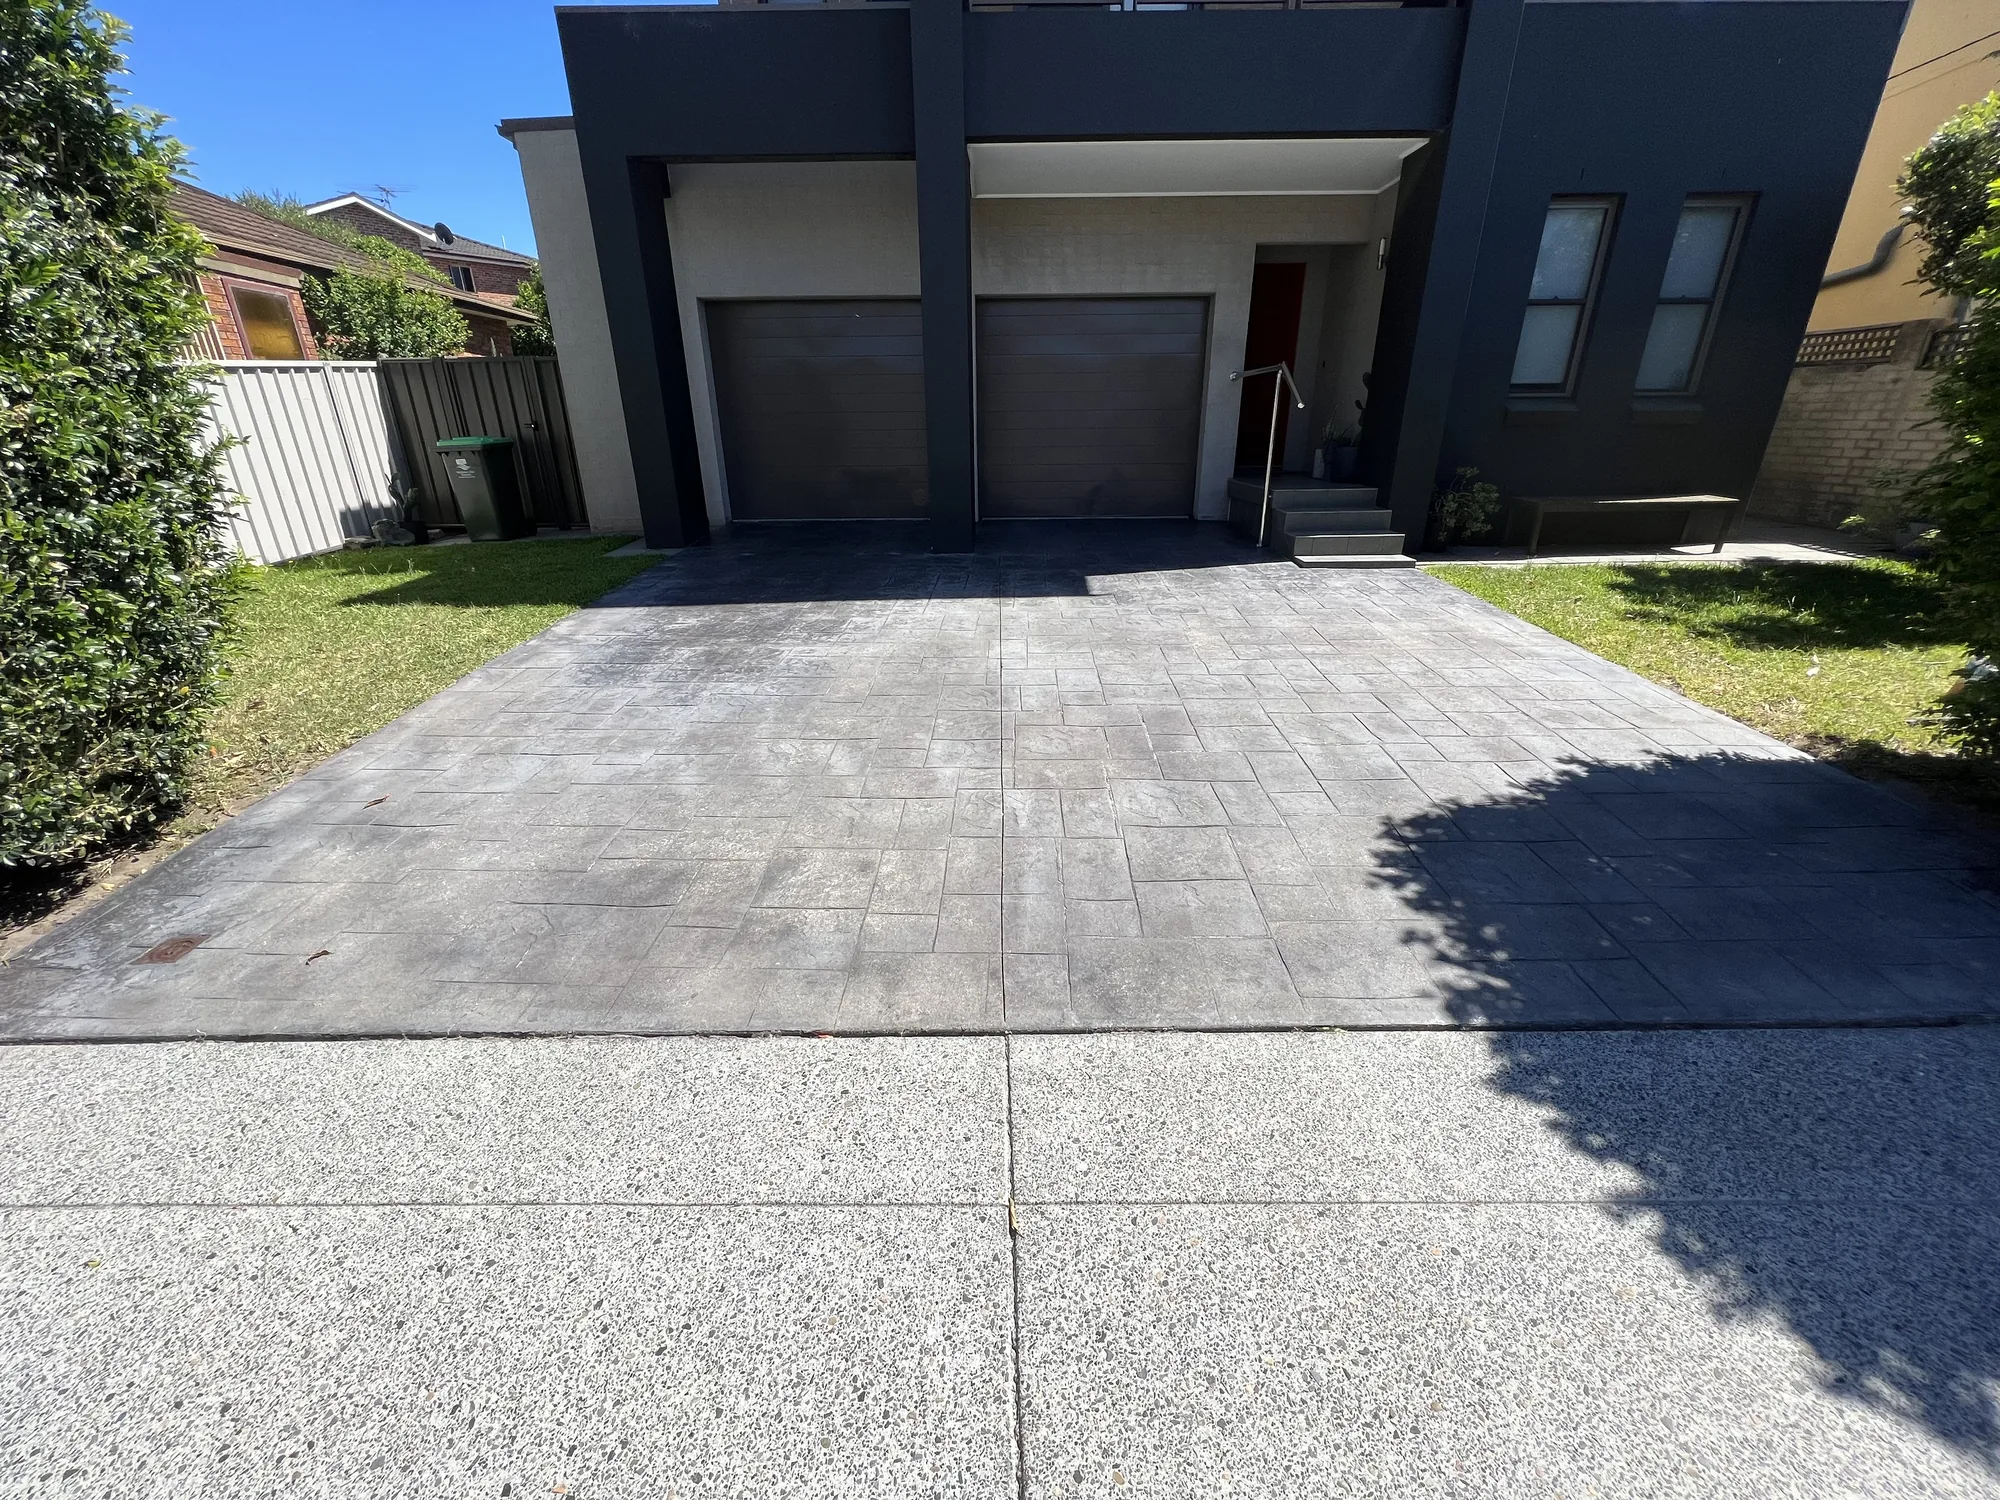
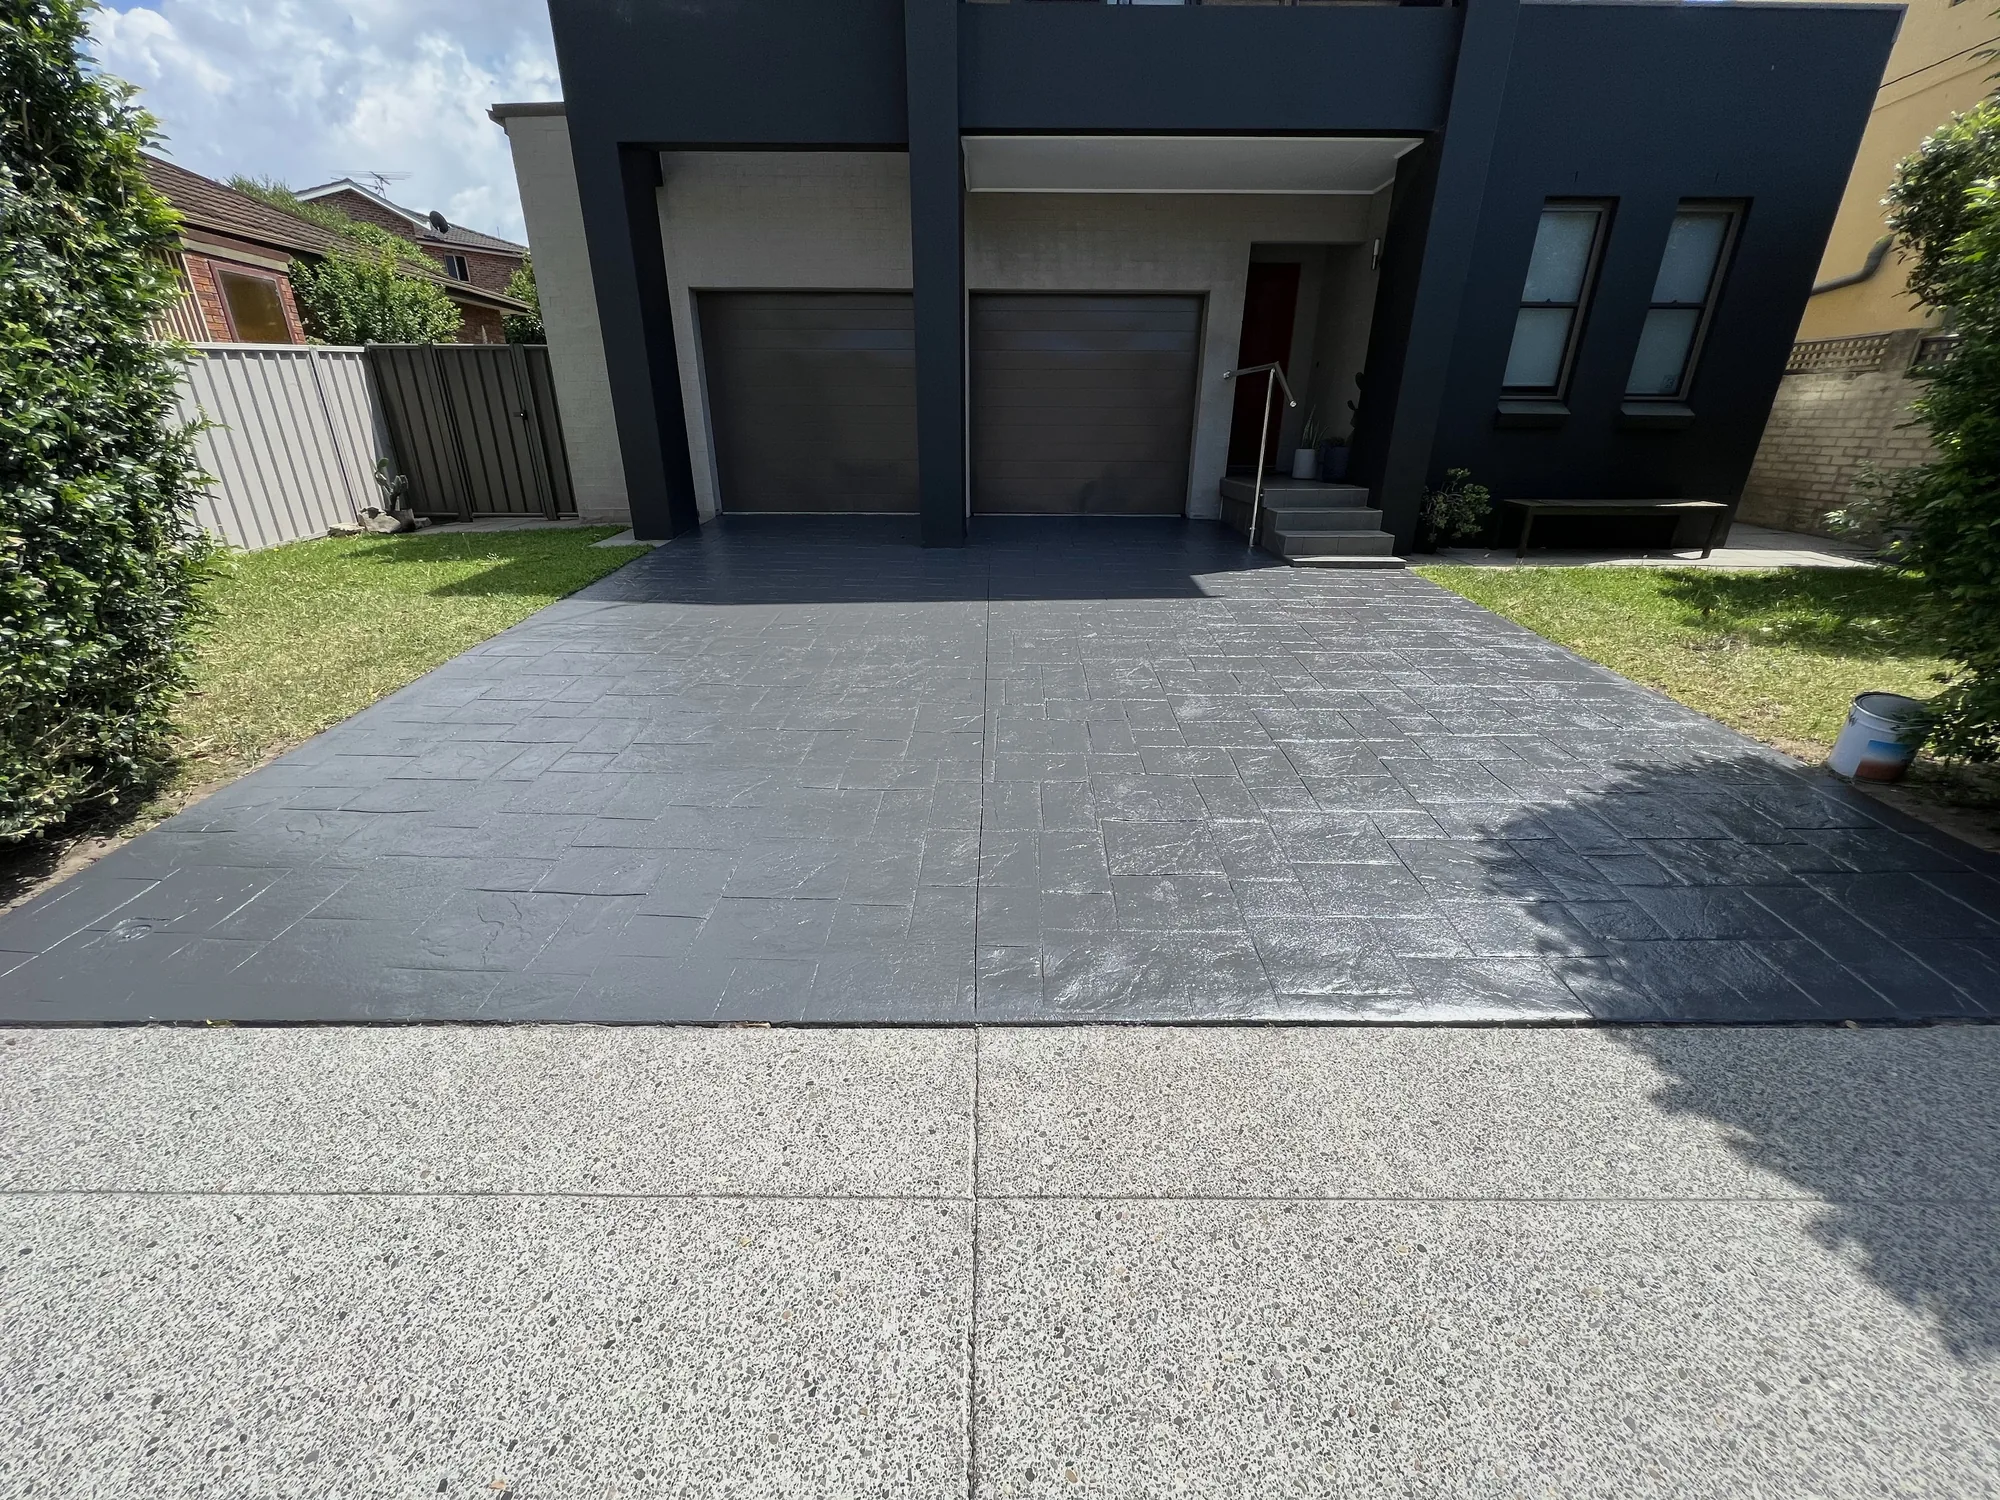
Stencil-pattern concrete driveway cleaned and ready for slip resistant paint, Sydney
Orange circle with white left and right arrows pointing away from each other in the center.
Stencil-pattern concrete driveway resealed in charcoal after coating, Sydney home
Two-storey brick unit with soiled render balcony and tiled patio before pressure washing, Sydney
Orange circle with white left and right arrows pointing away from each other in the center.
Brick unit balcony and patio cleaned after pressure washing, staining lifted
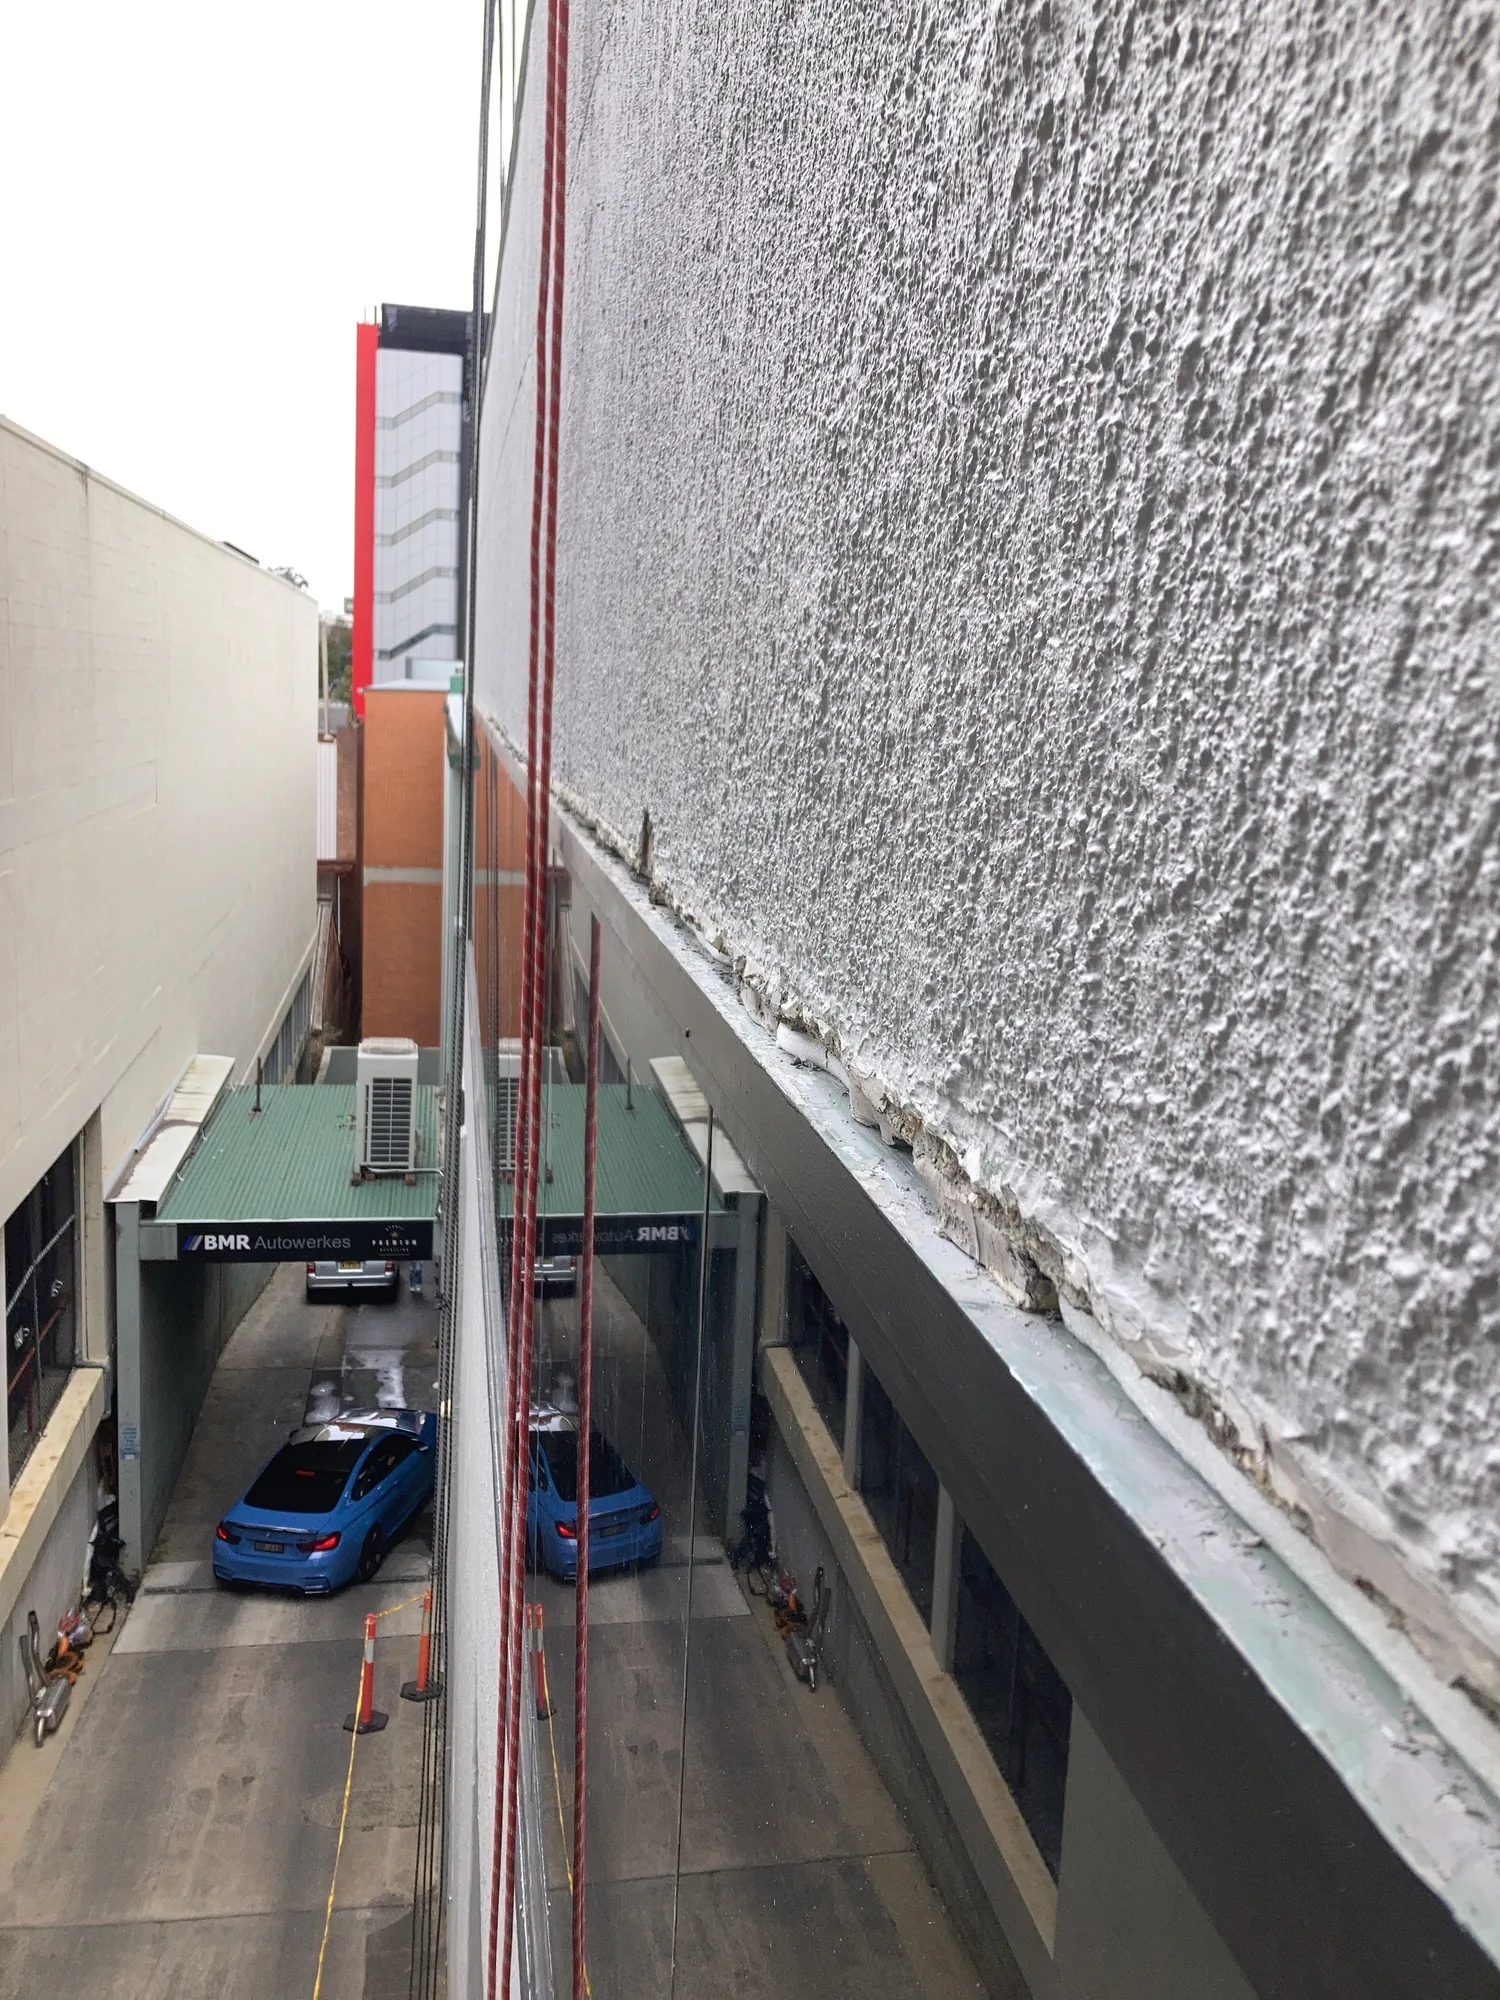
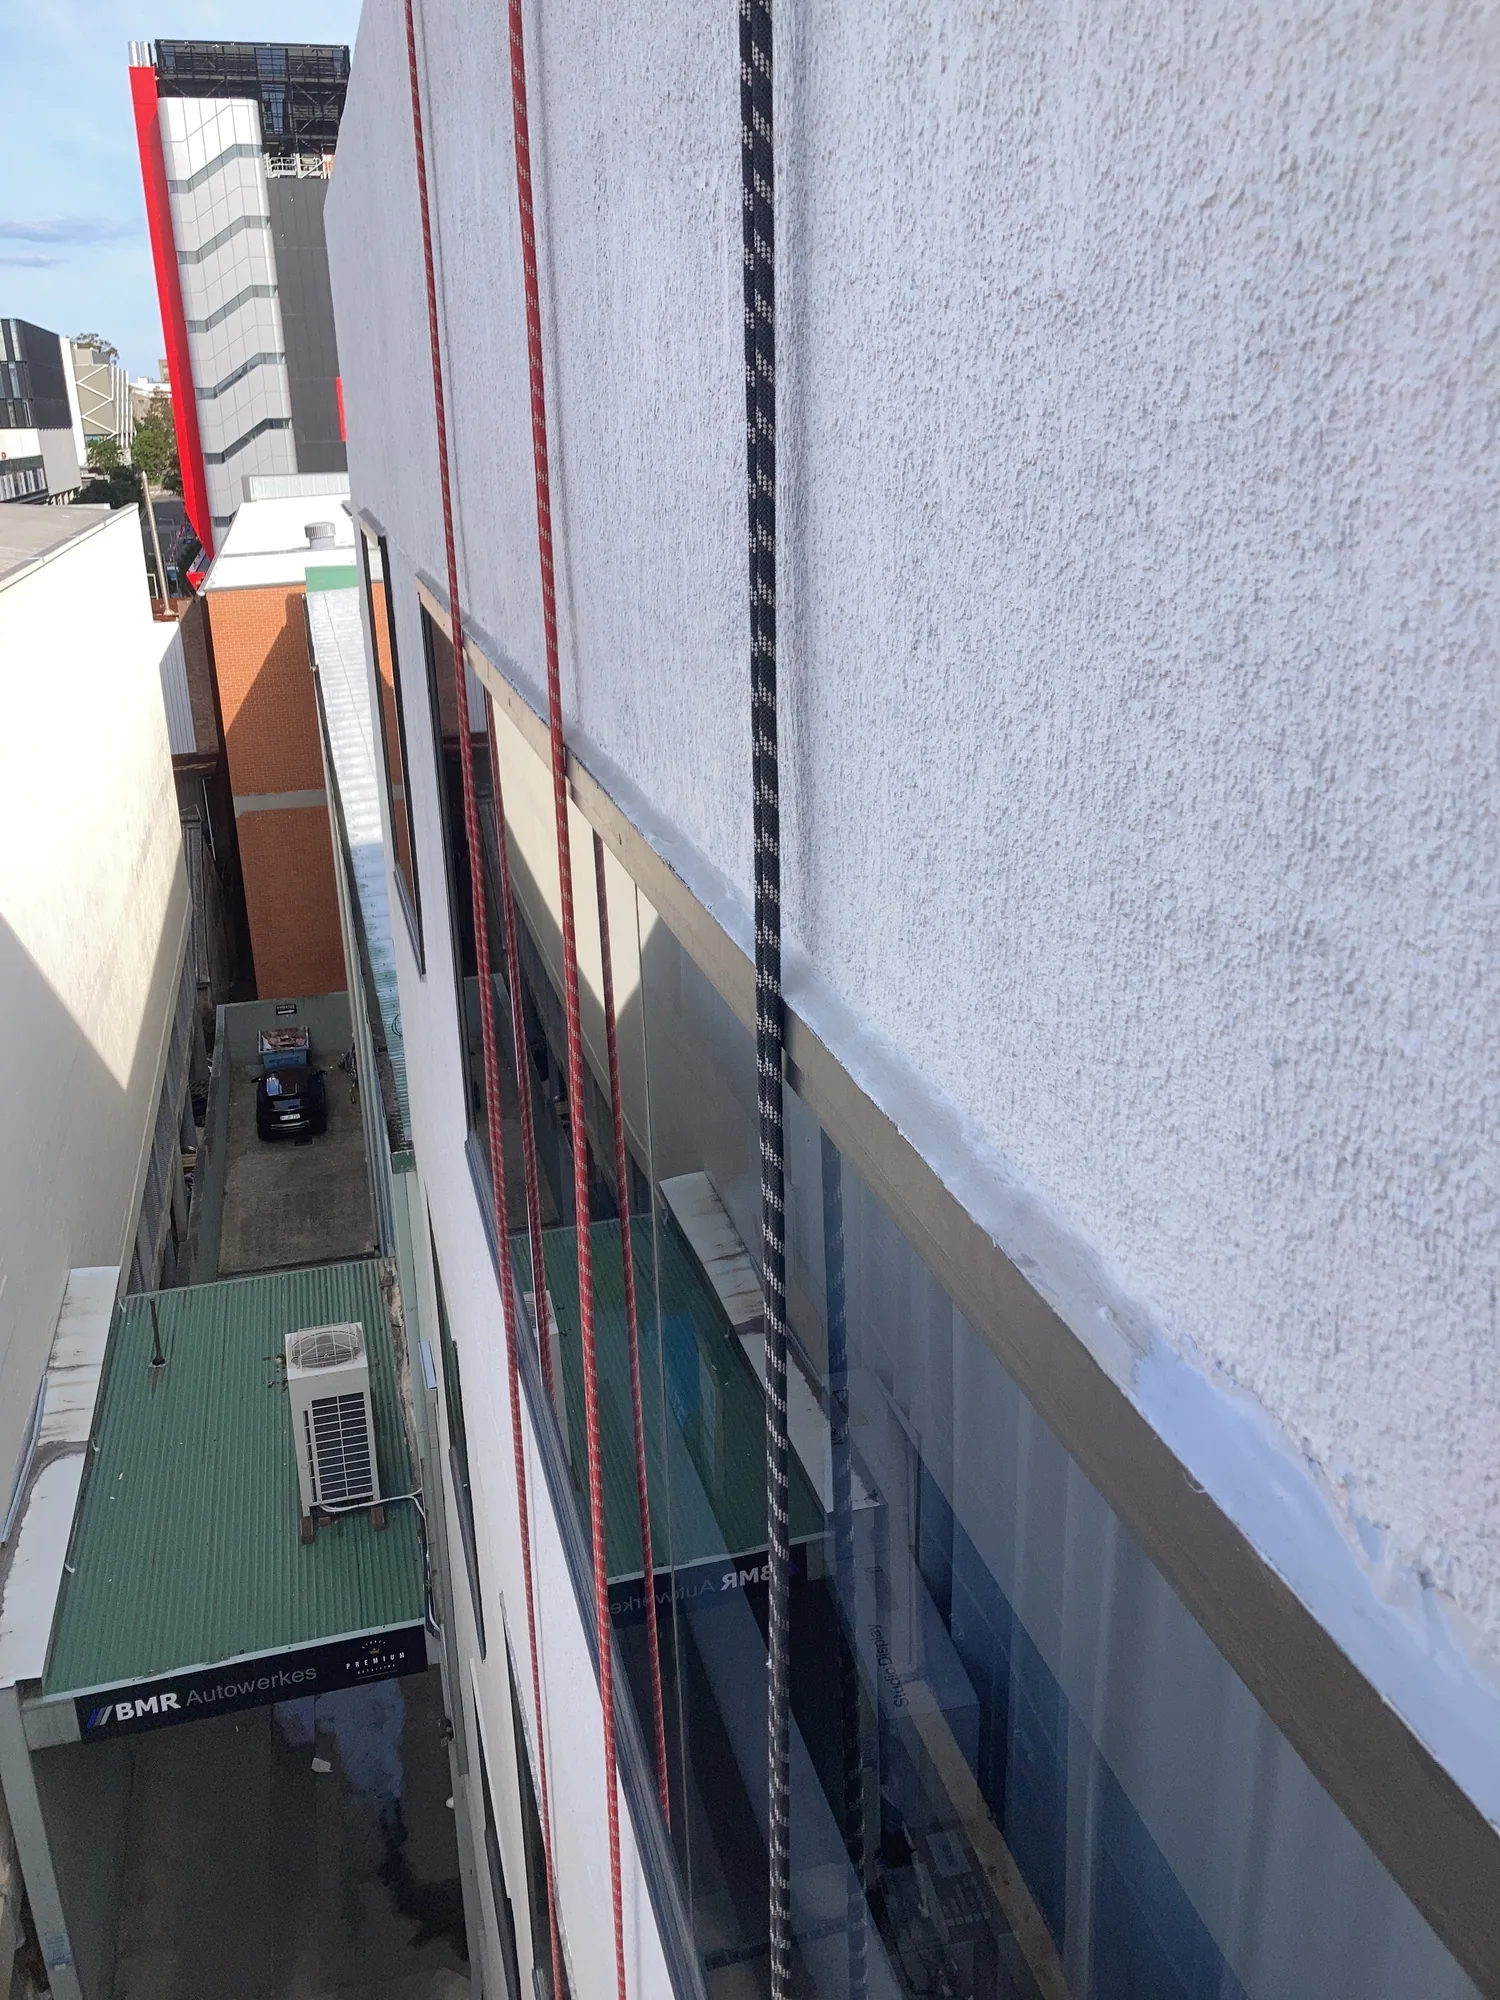
Rope lines down a rendered high-rise facade before rope-access sealant works are completed
Orange circle with white left and right arrows pointing away from each other in the center.
Rope lines down a rendered high-rise facade after rope-access sealant works are completed
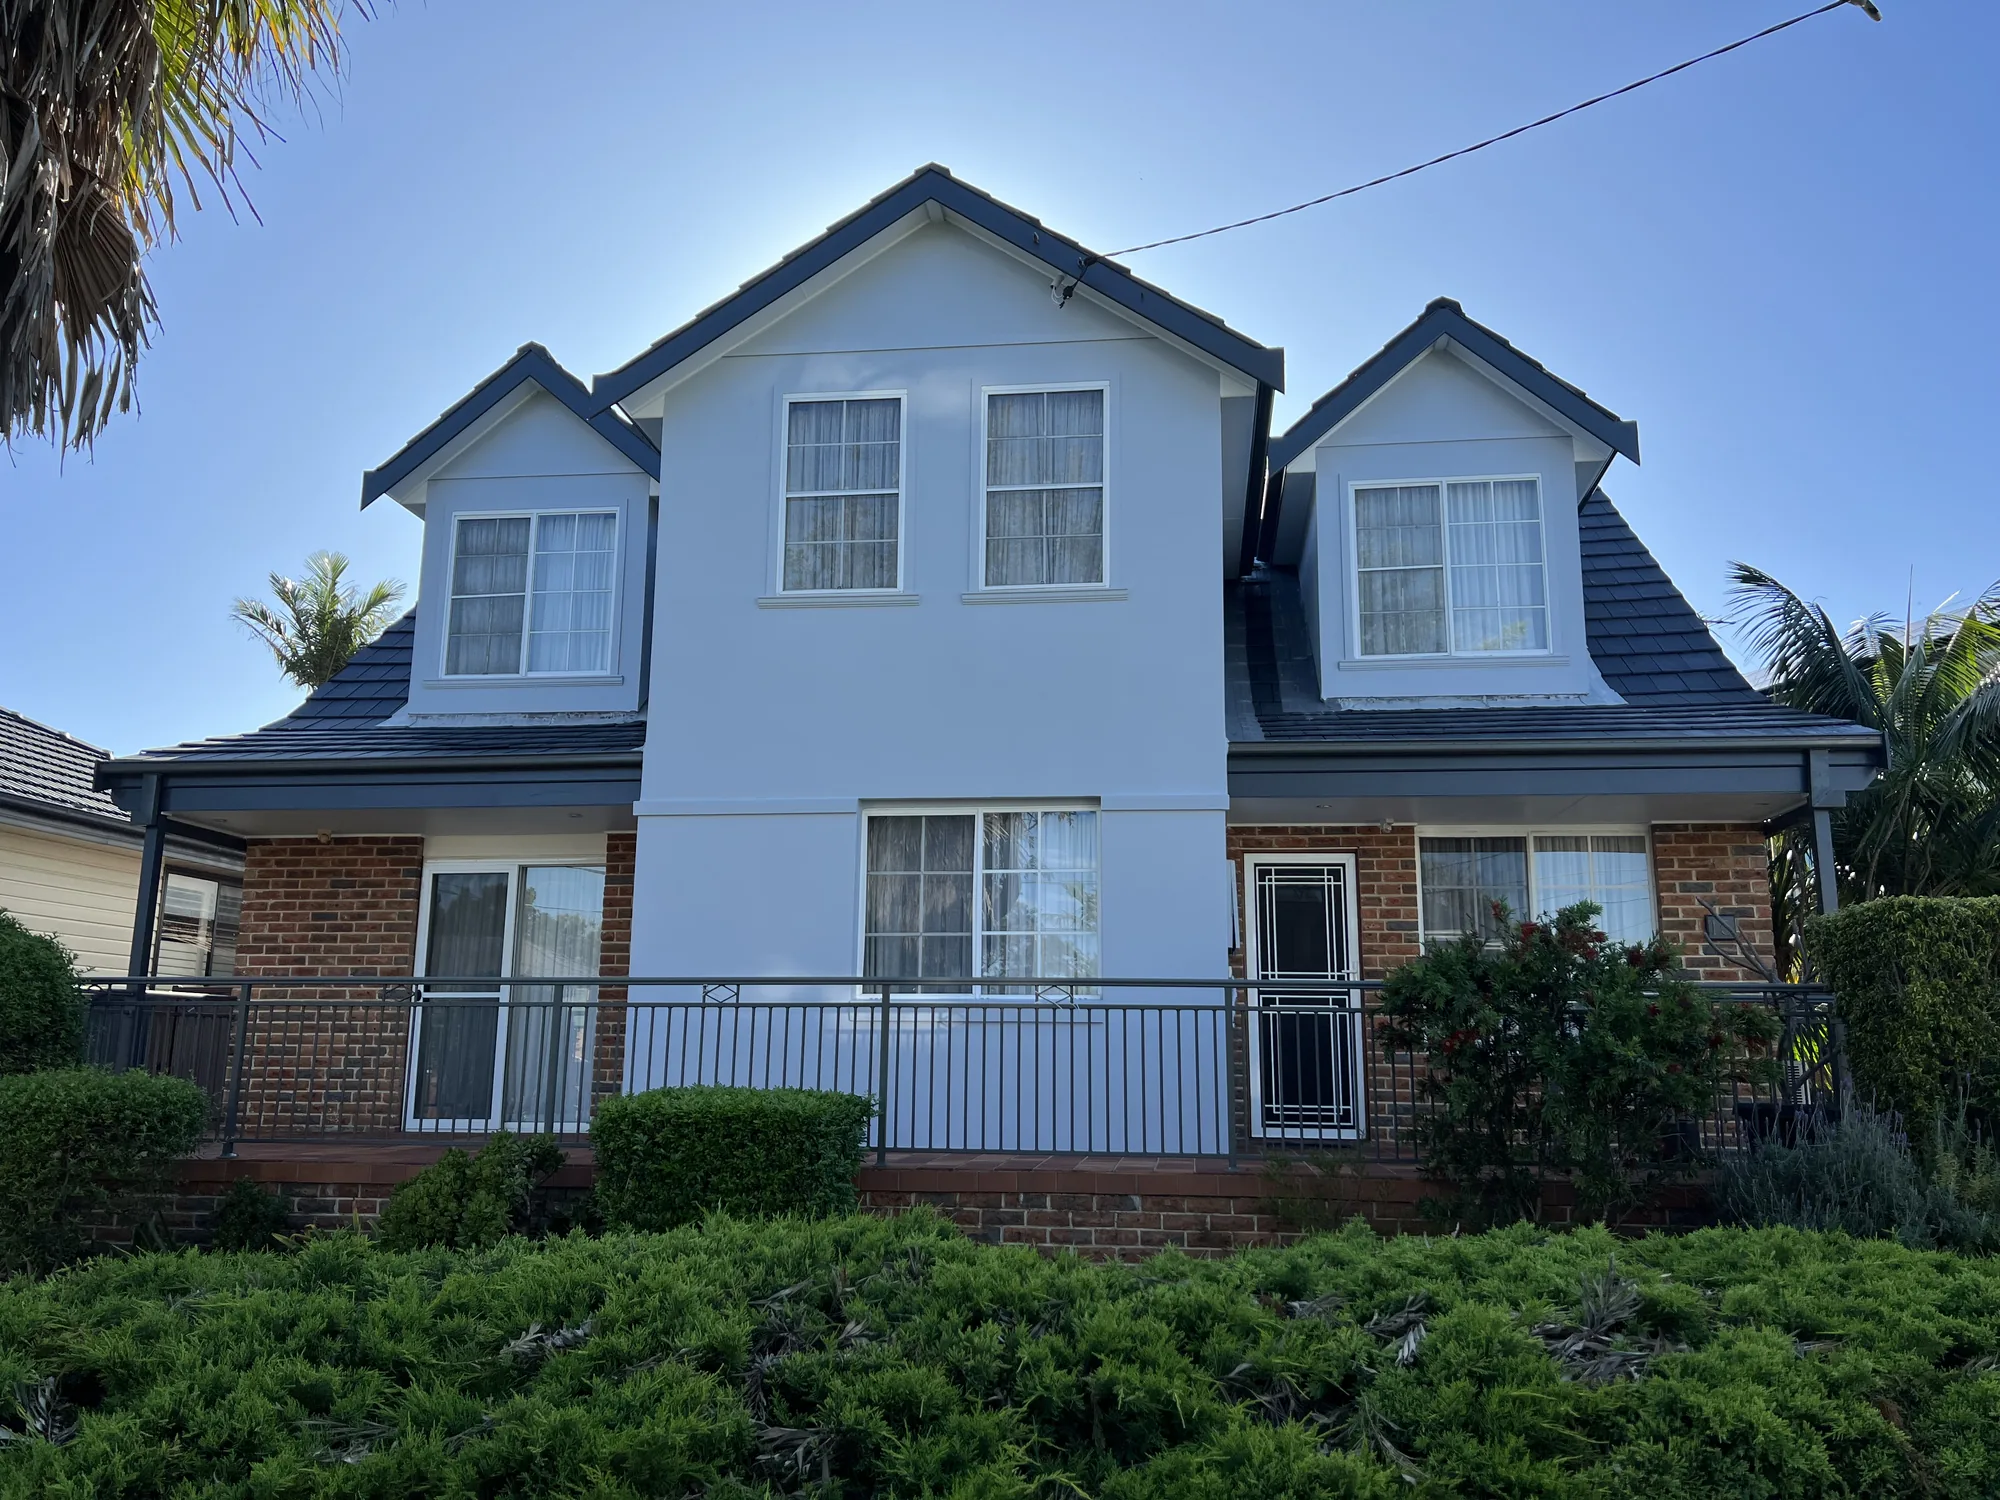
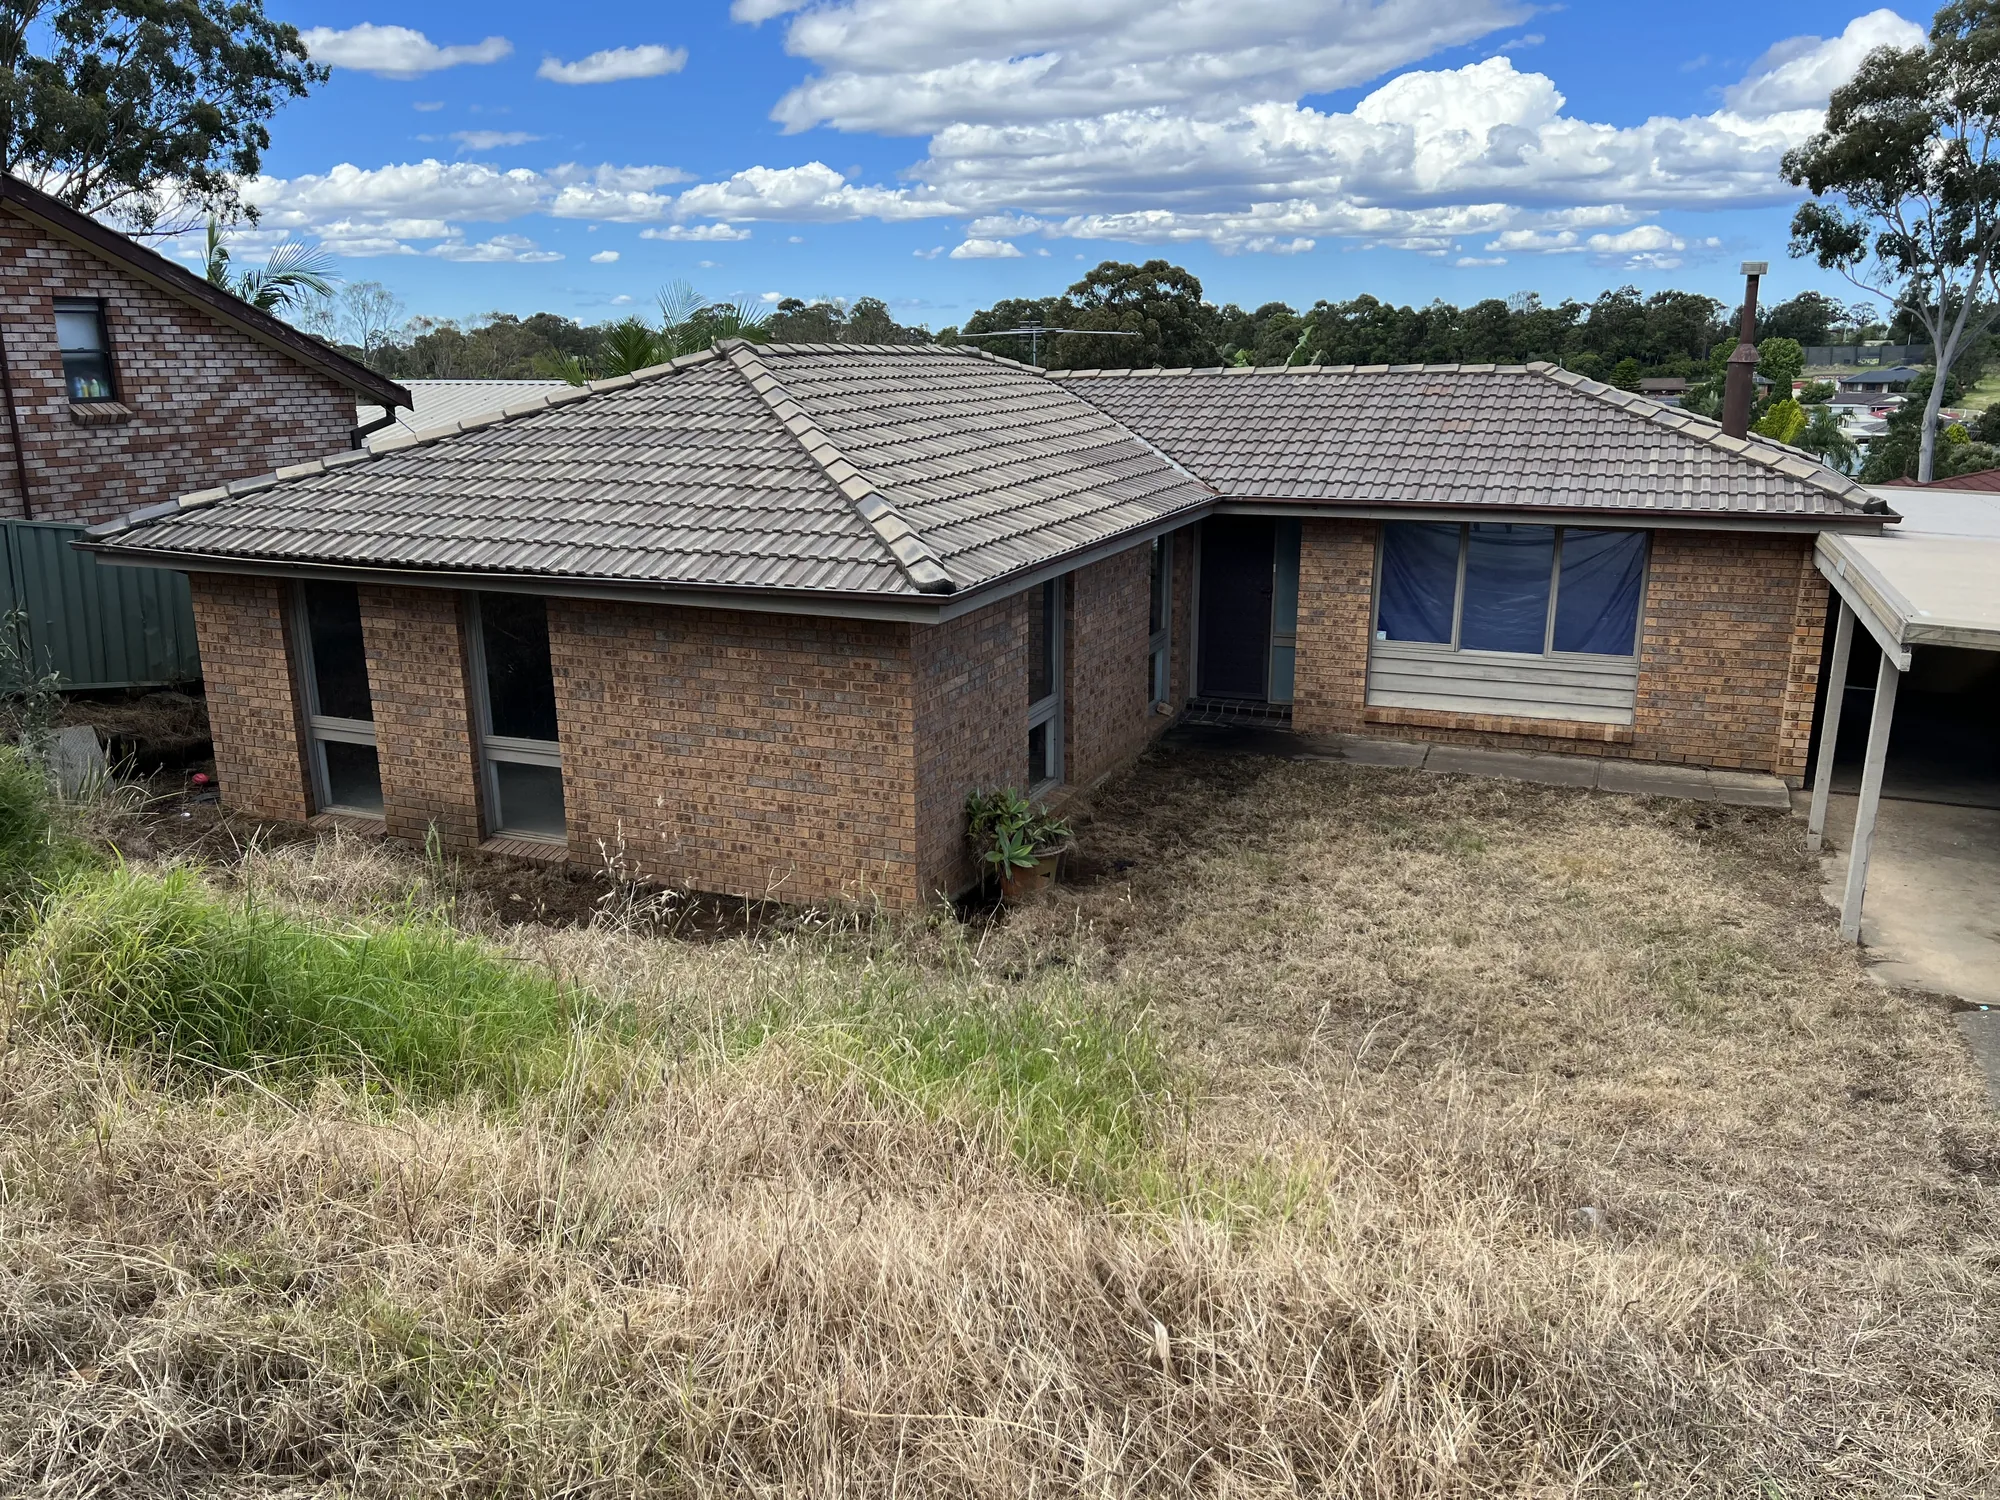
Weathered concrete-tile hip roof on a brick home after cleaning, before roof painting, Western Sydney
Orange circle with white left and right arrows pointing away from each other in the center.
Concrete-tile roof repainted after roof restoration on a brick home, Western Sydney
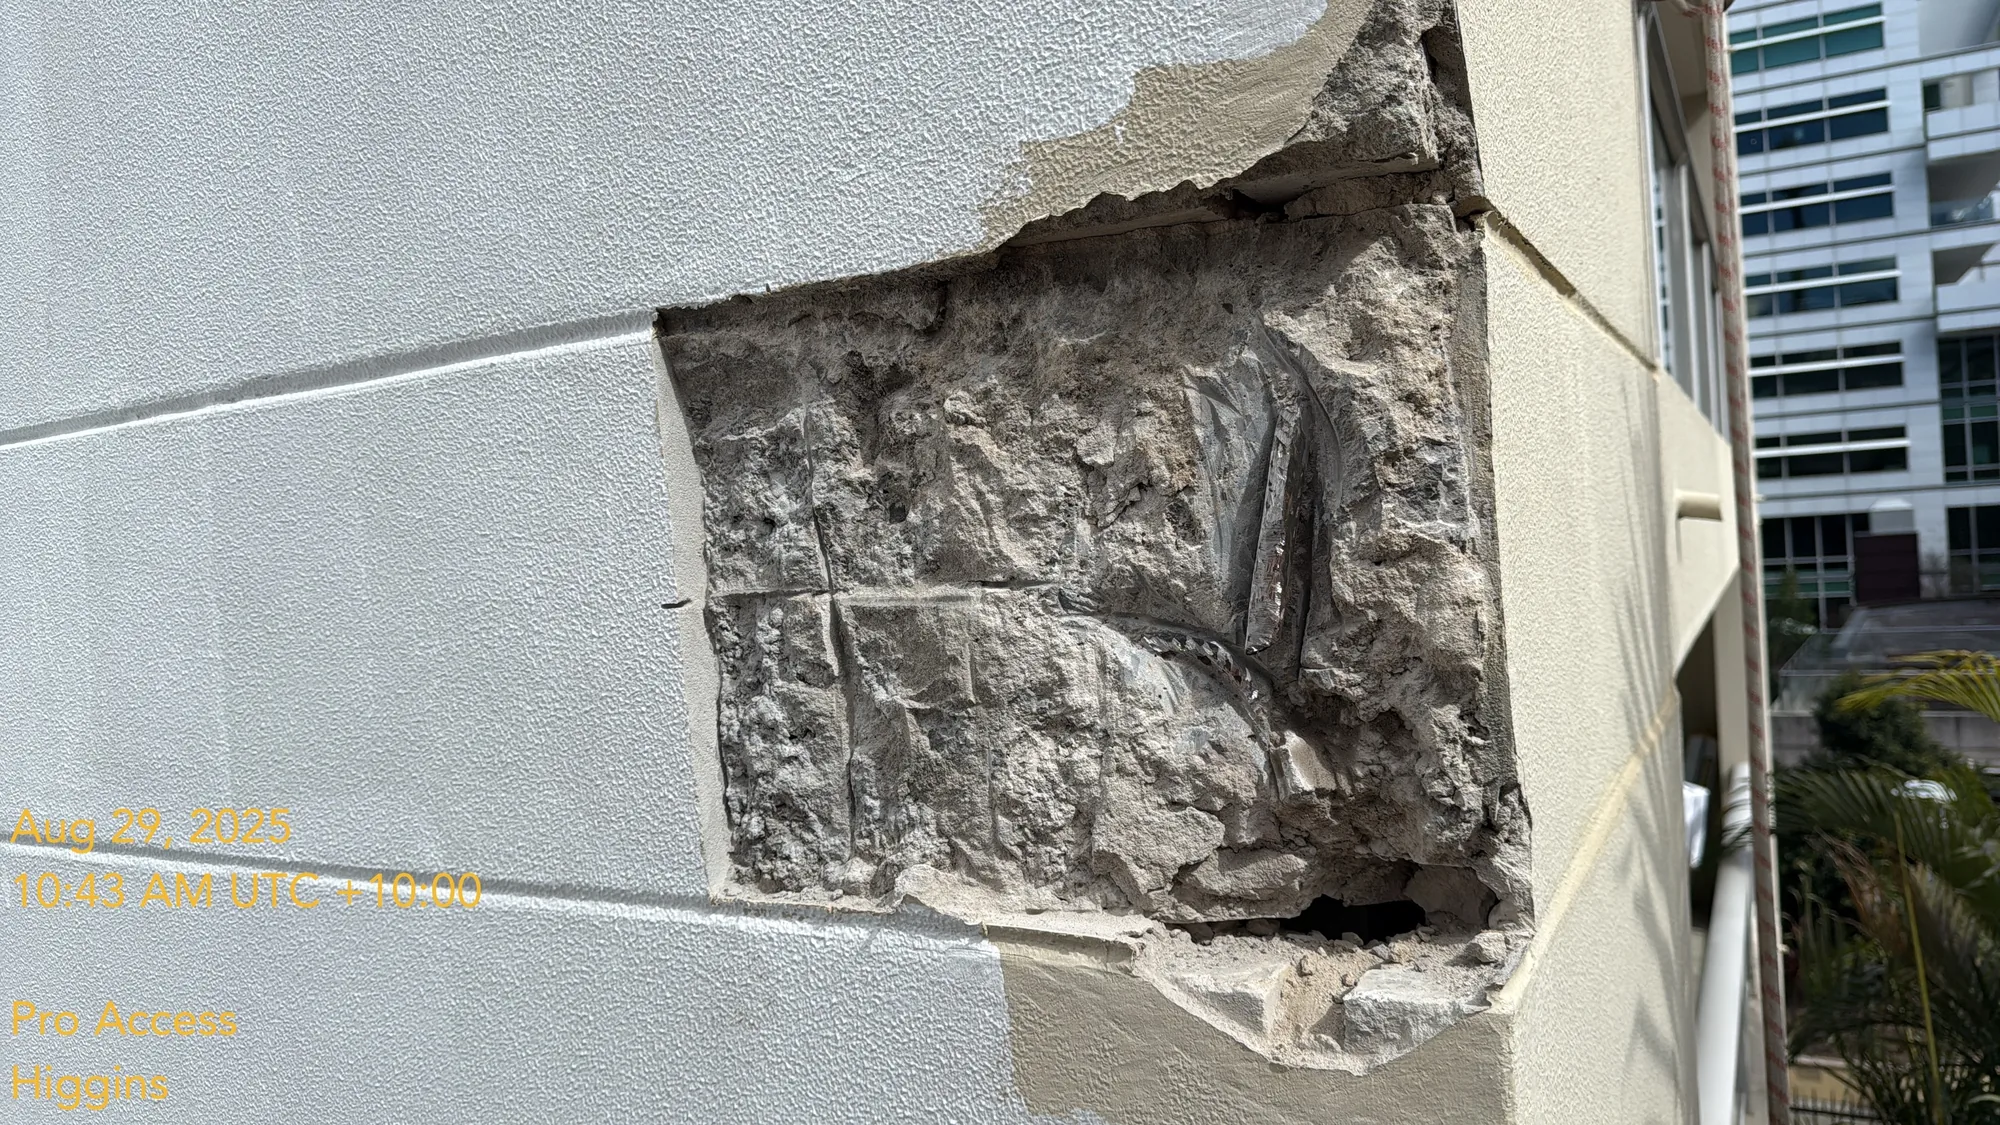
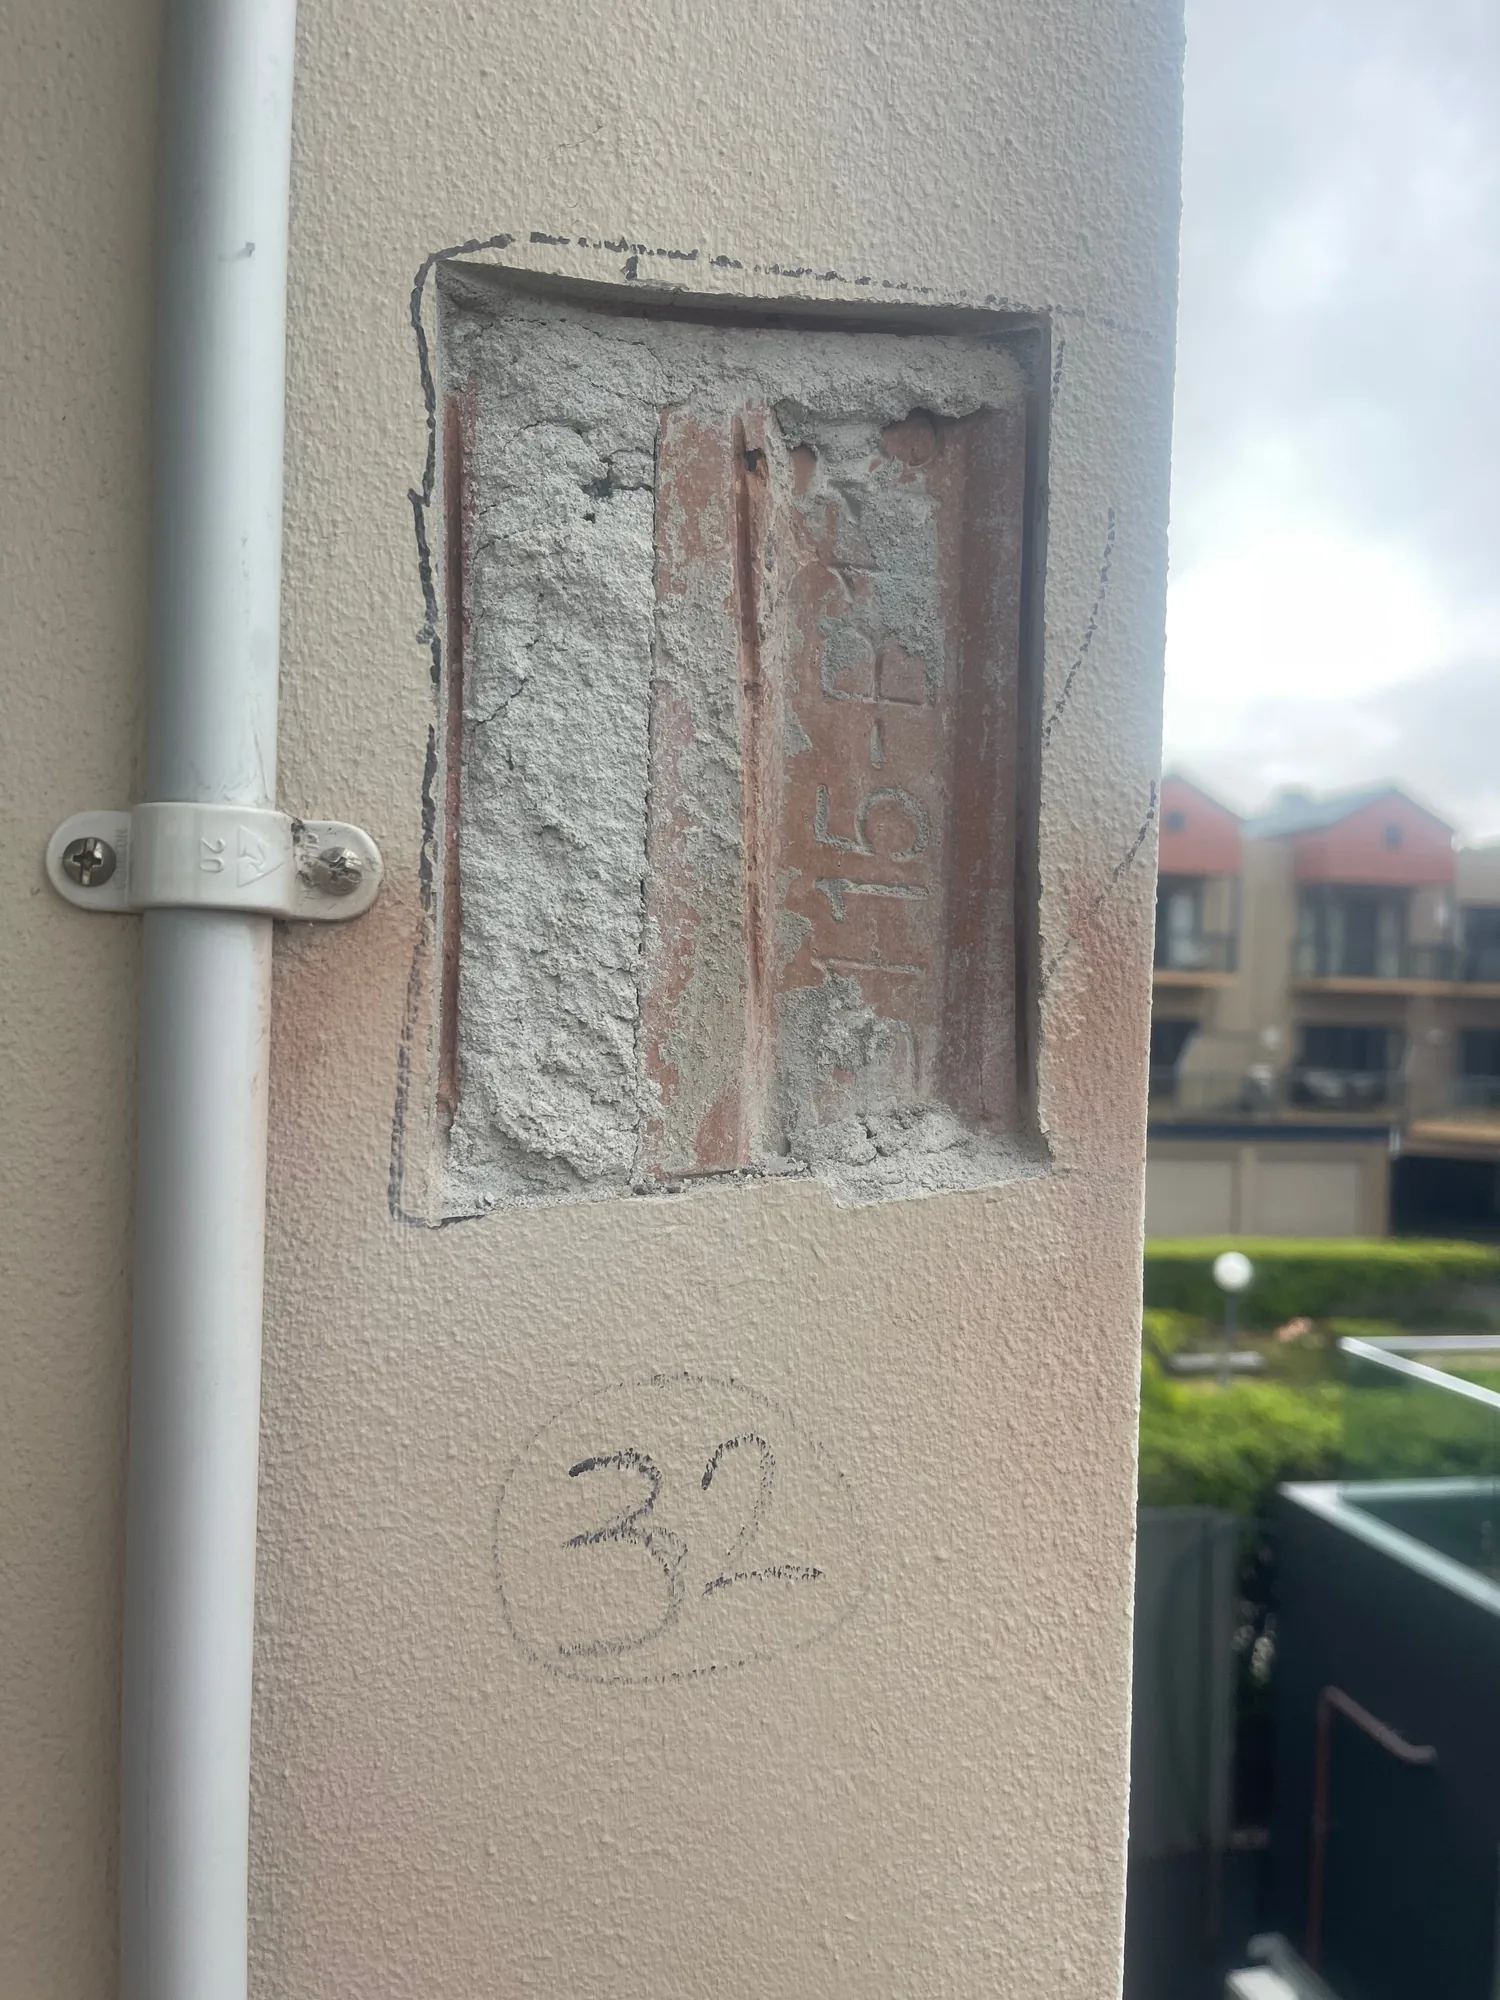
Large concrete spall on rendered facade exposing corroded steel reinforcement before repair
Orange circle with white left and right arrows pointing away from each other in the center.
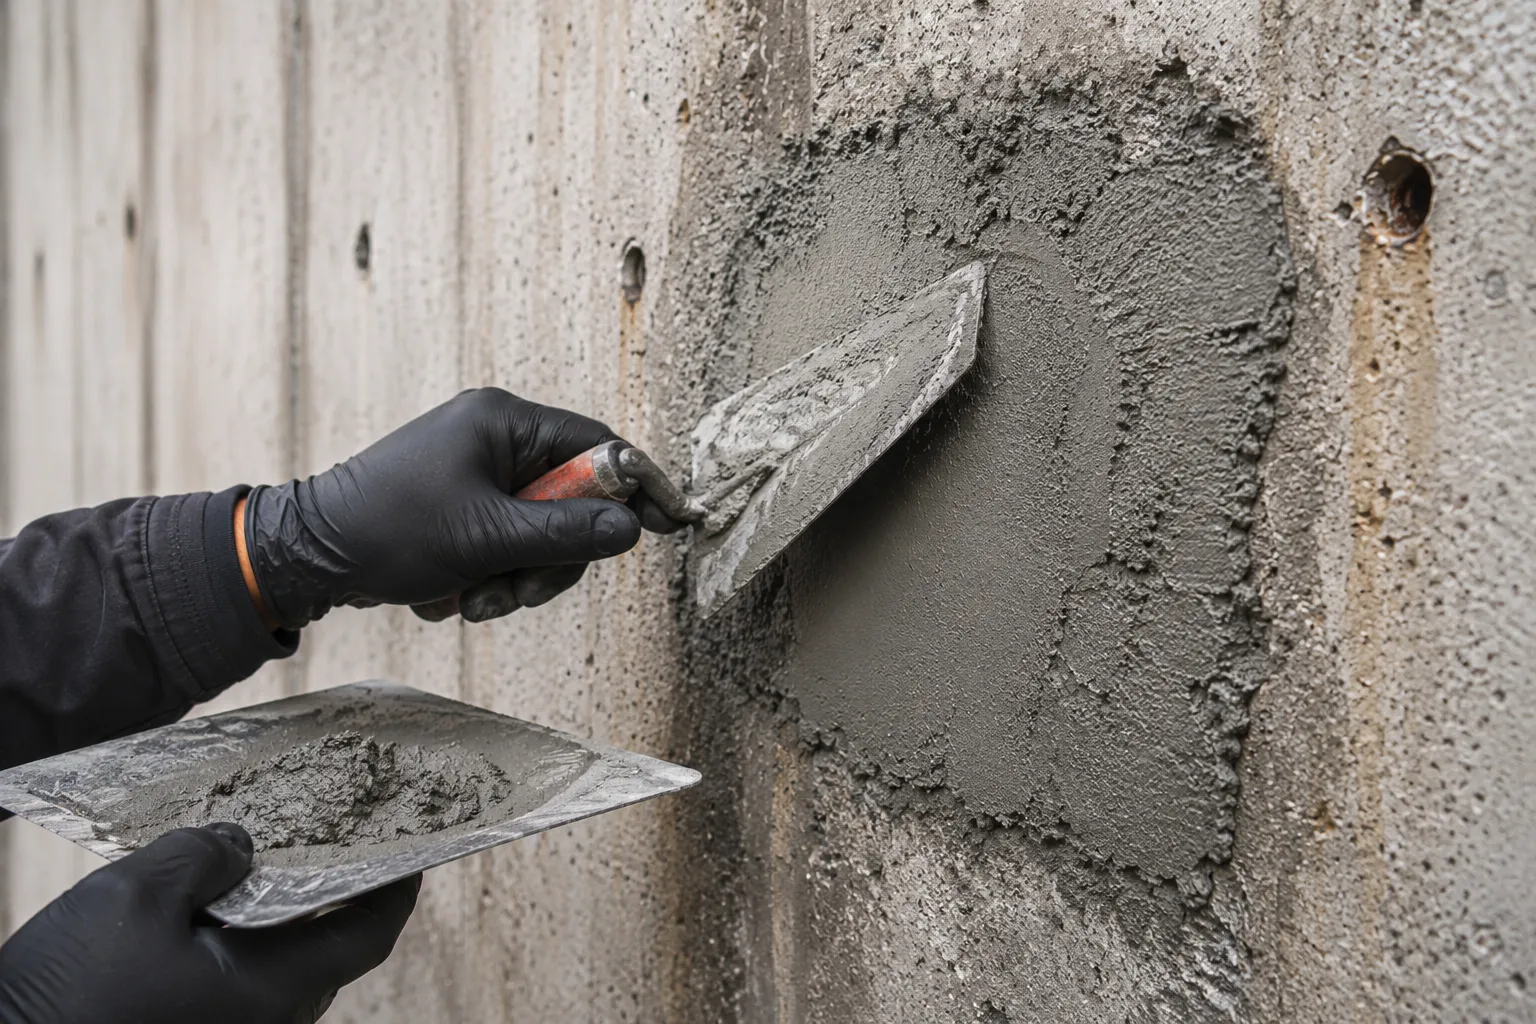
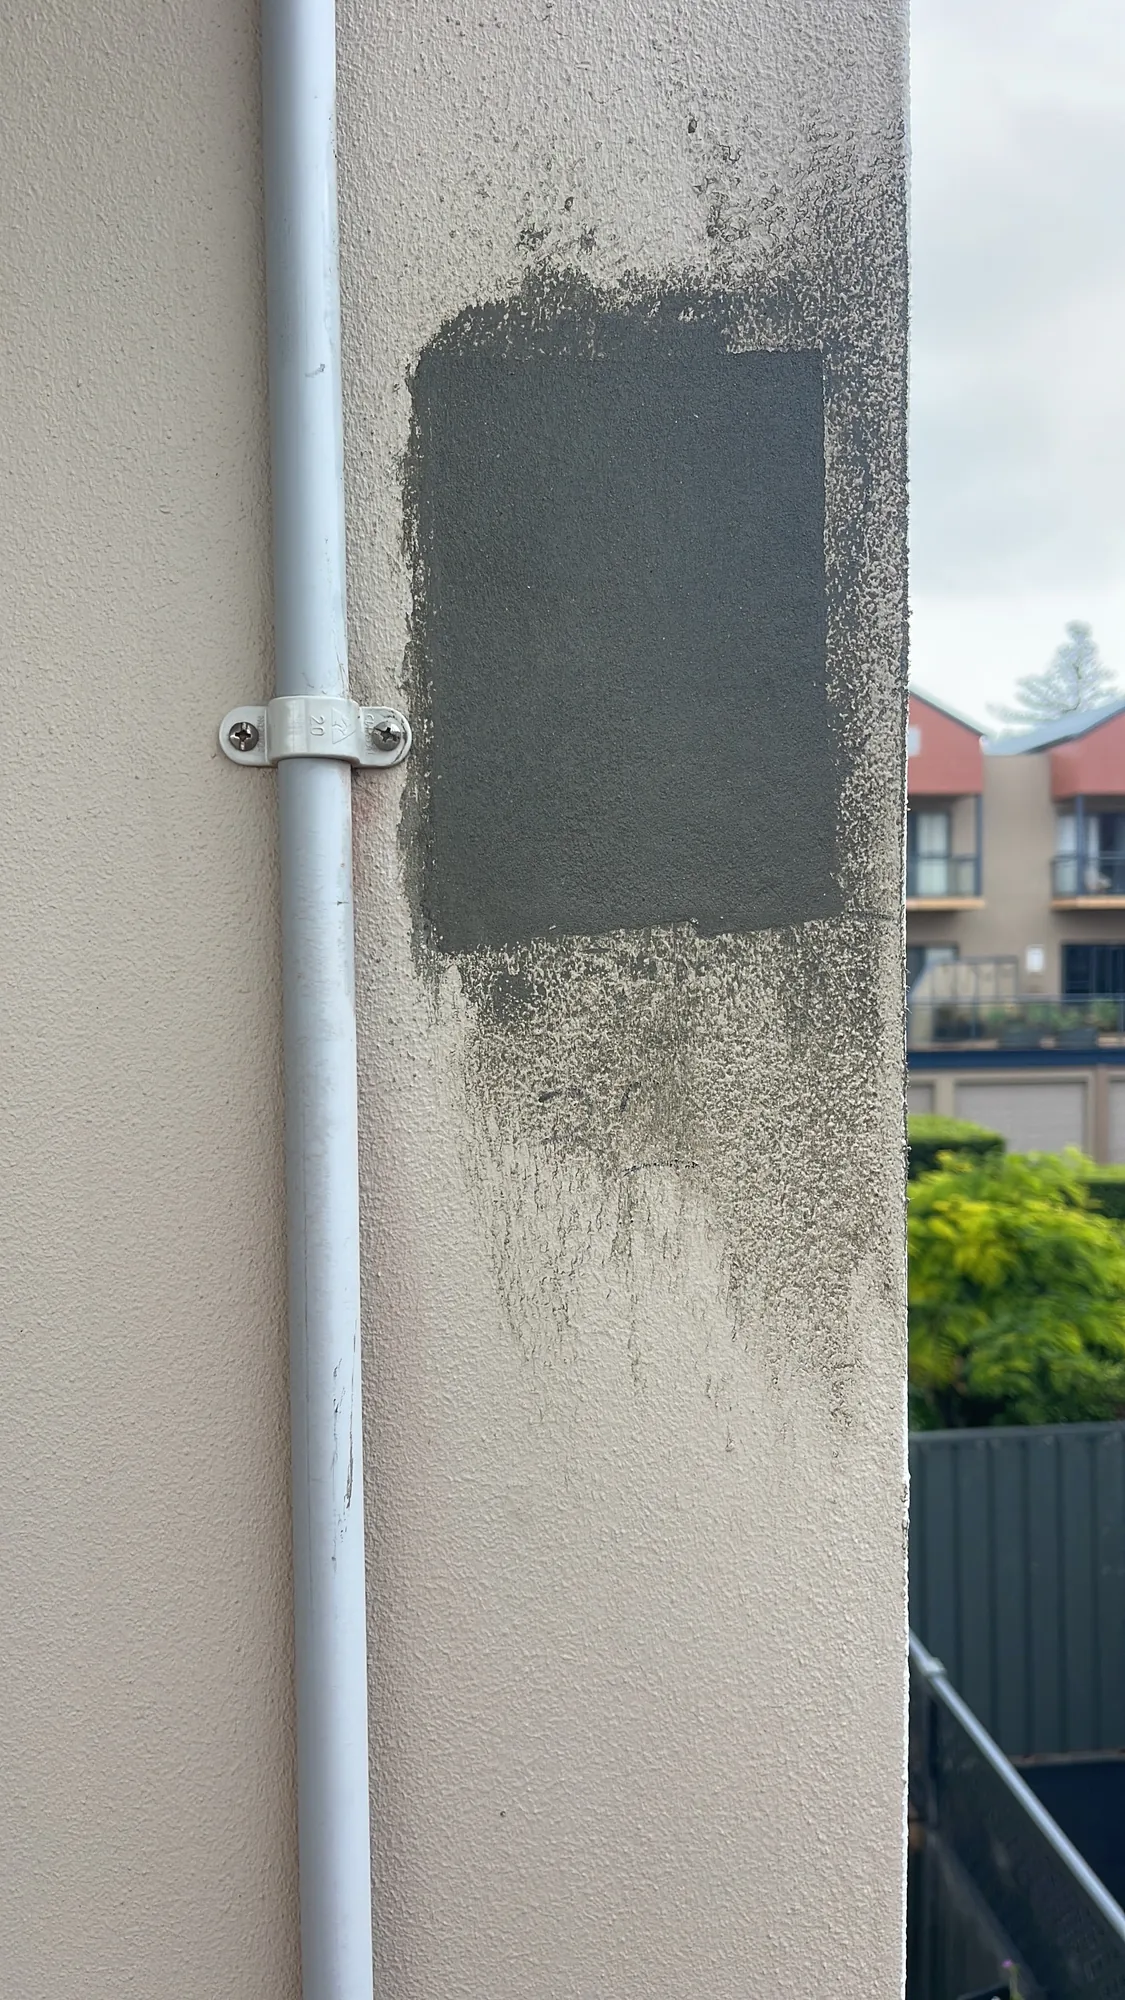
Final render coat applied to a prepared facade panel, colour-matched to substrate
Rendered facade cut back to brick substrate exposing the repair zone before re-rendering
Orange circle with white left and right arrows pointing away from each other in the center.
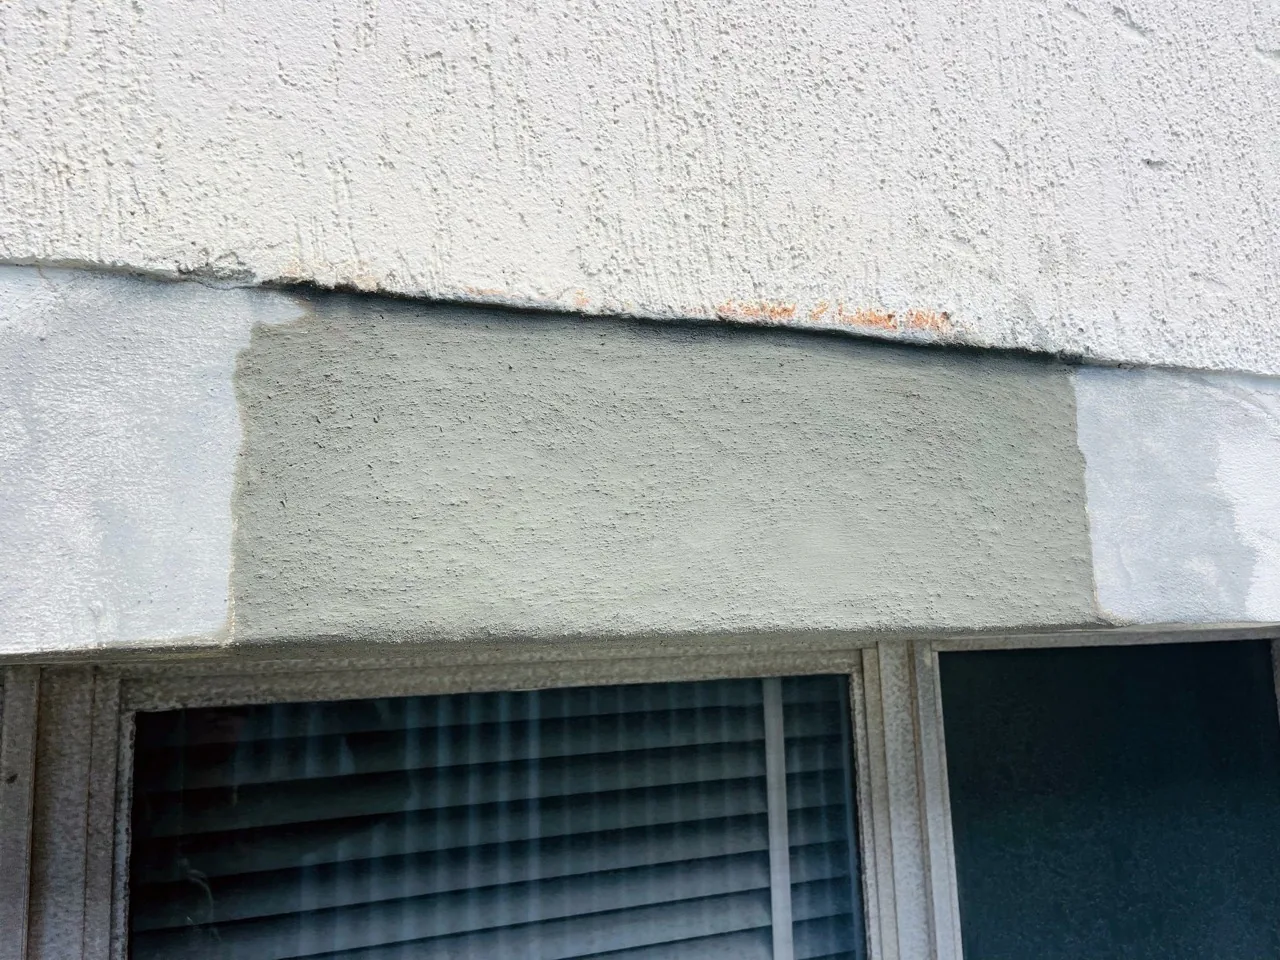
Grey render patch applied over prepared facade section, repair in progress
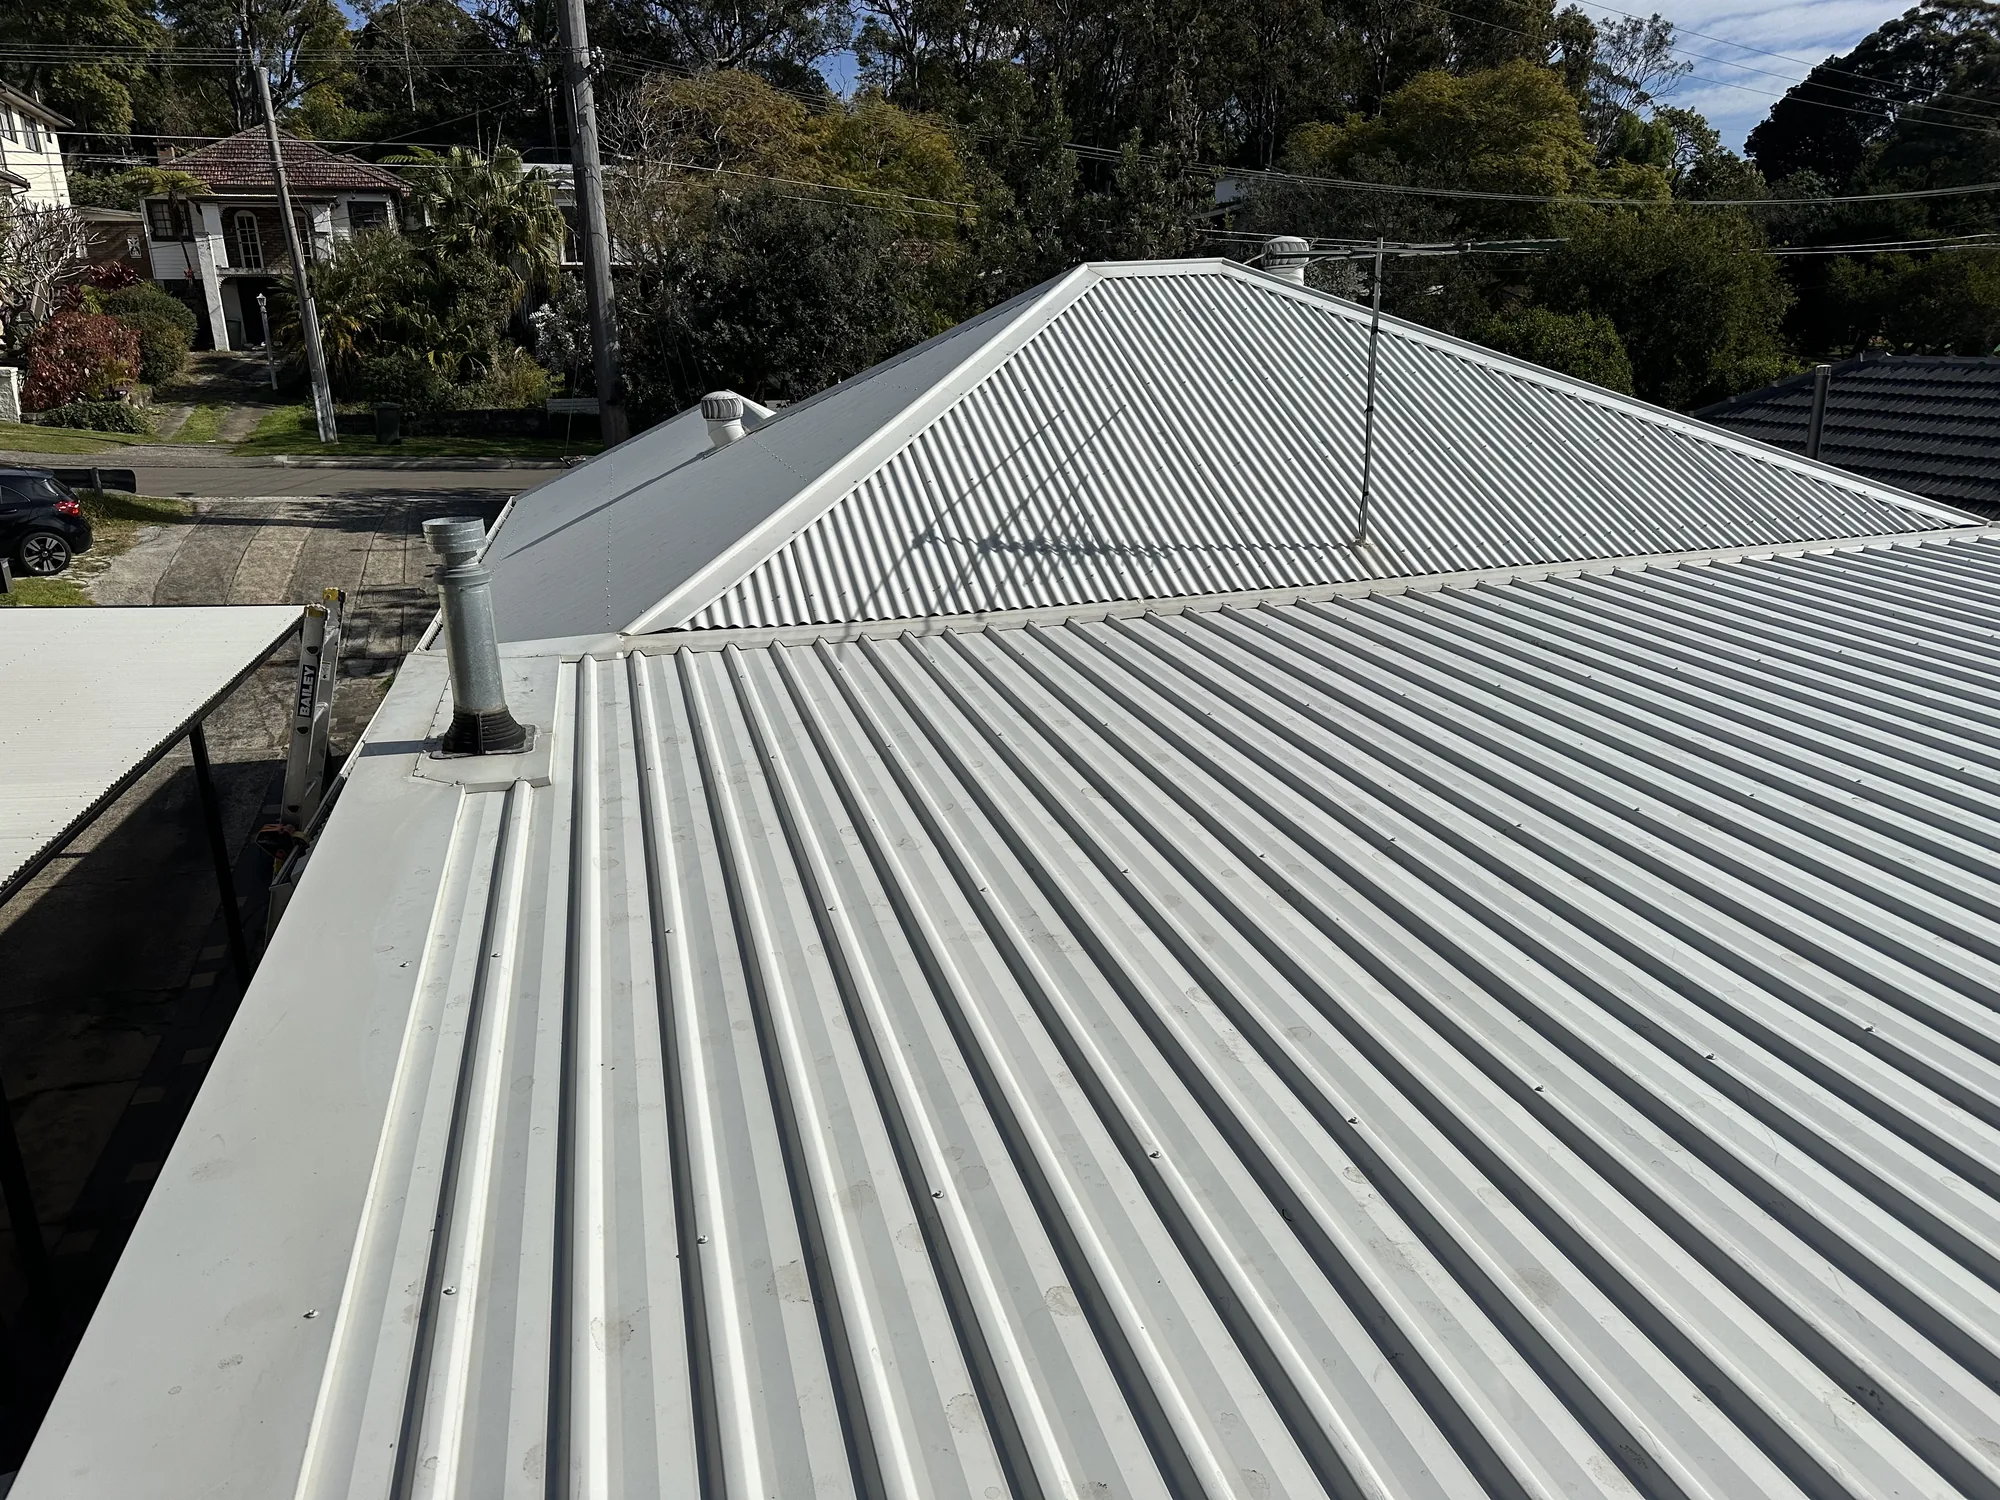
Weathered corrugated metal hip roof with surface lichen before roof restoration, Sydney
Orange circle with white left and right arrows pointing away from each other in the center.
Corrugated metal roof after cleaning, Sydney
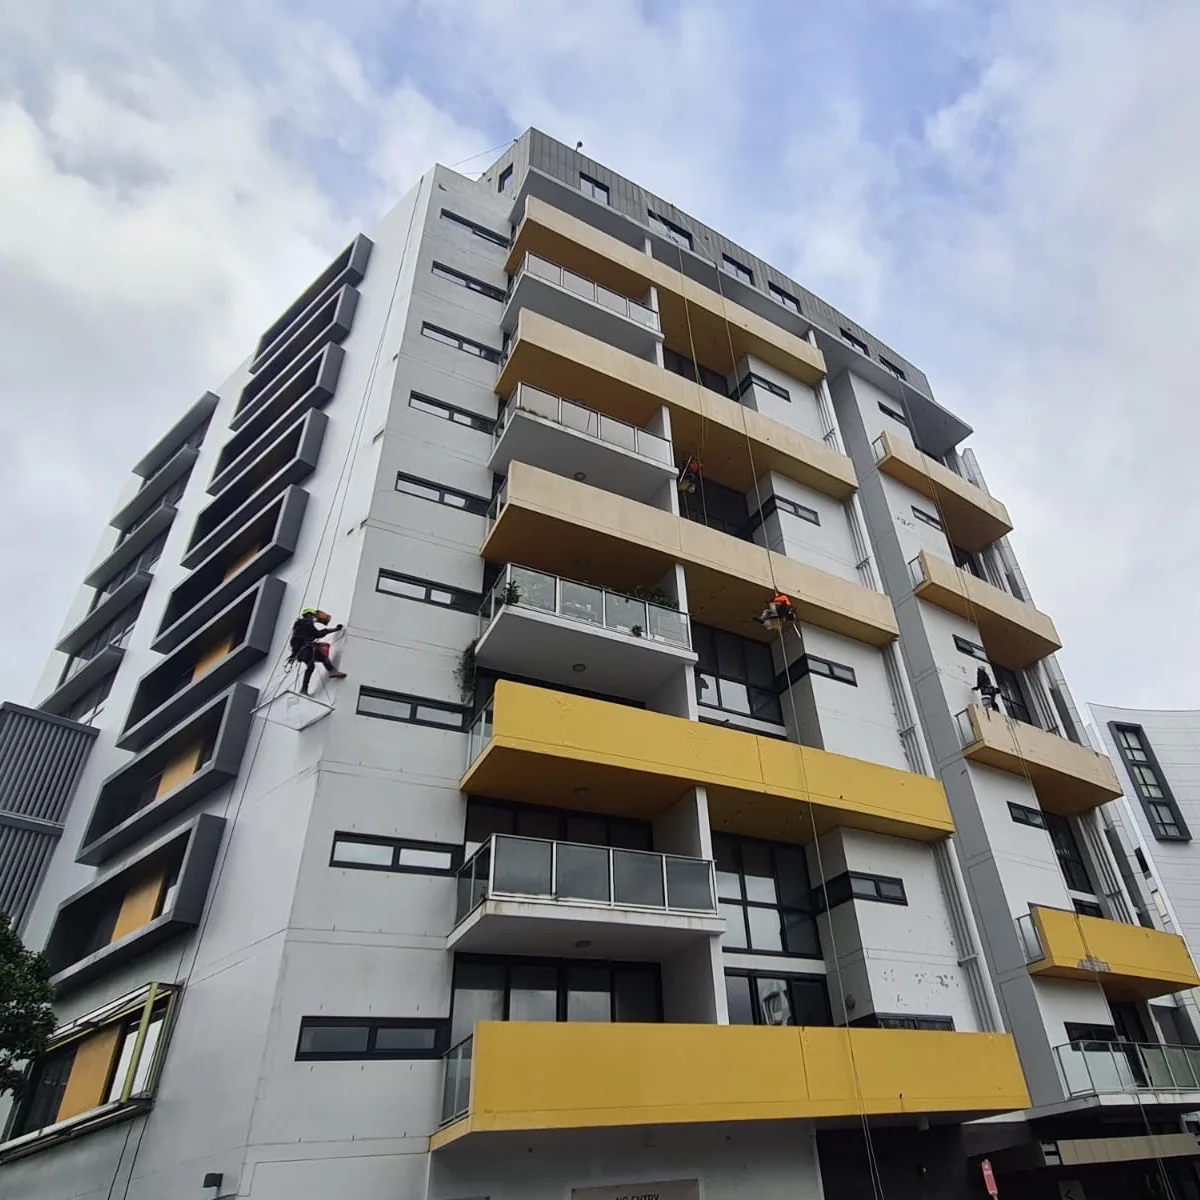
Rope access technicians complete concrete repairs to the side of a multi level building before painting, Sydney
Orange circle with white left and right arrows pointing away from each other in the center.
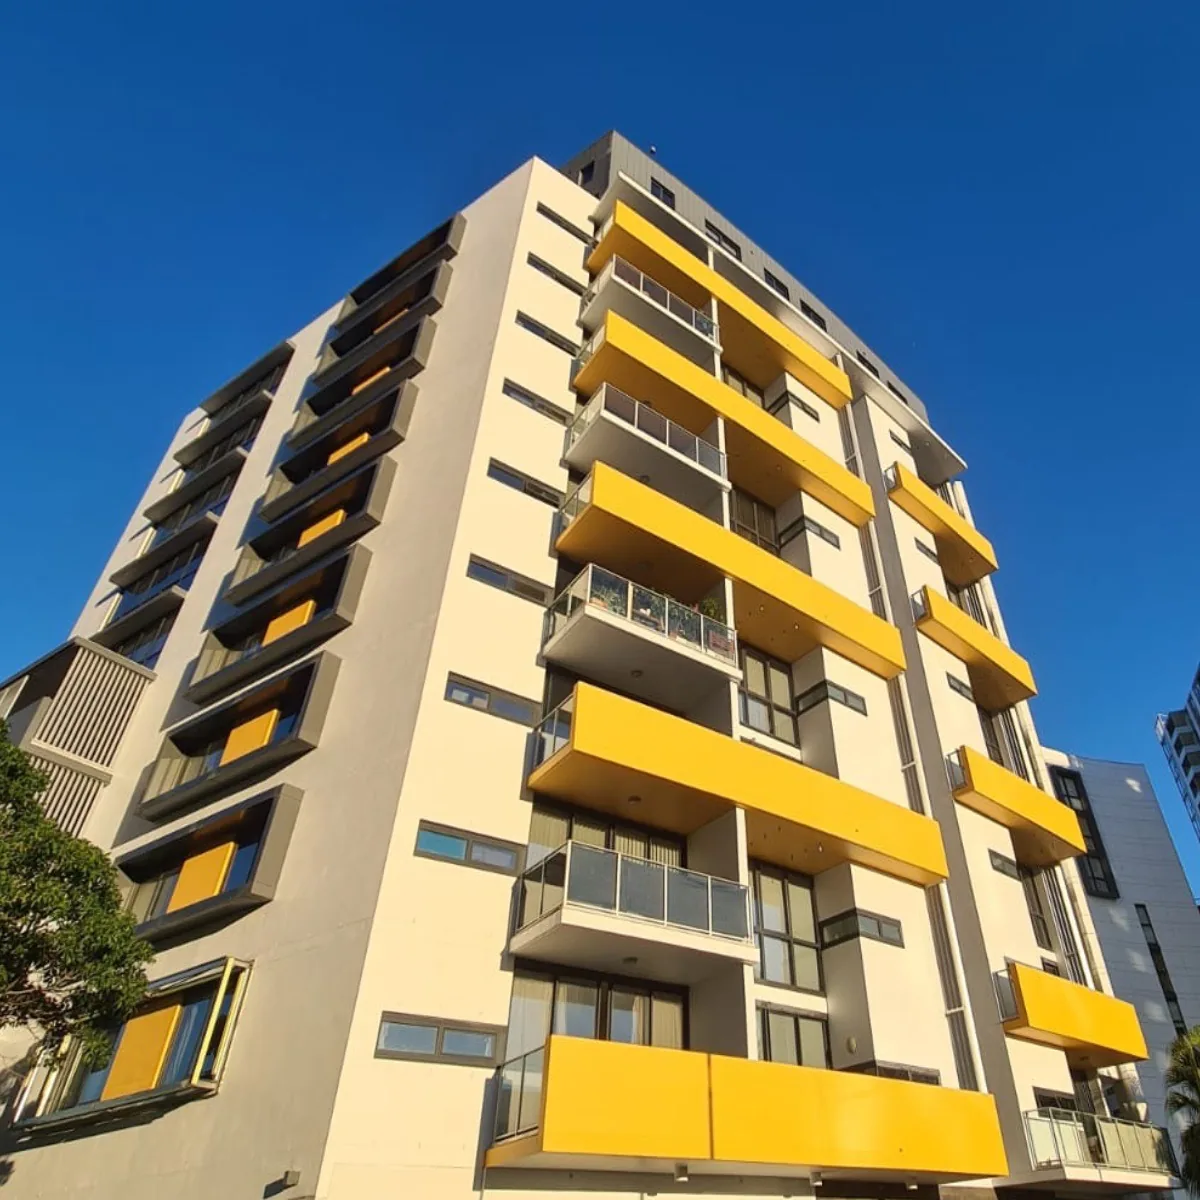
Apartment tower facade repainted cream with yellow balconies after rope-access painting, Sydney
Spalled window lintel exposing corroded steel reinforcement before remedial repair
Orange circle with white left and right arrows pointing away from each other in the center.
Window lintel re-rendered over treated reinforcement after concrete repair
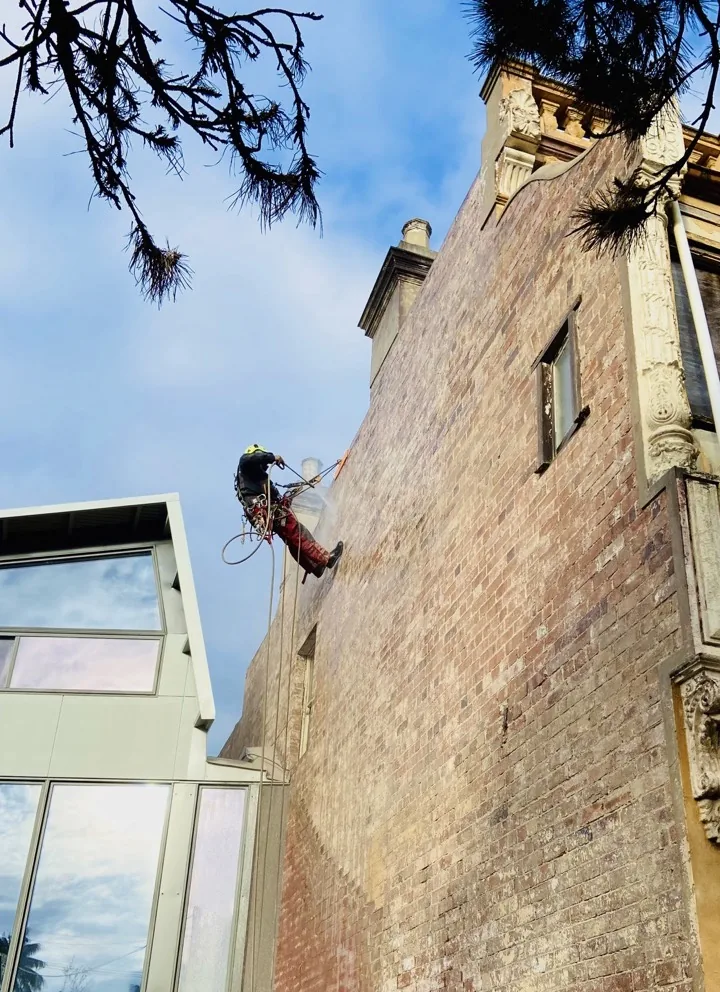
Rope-access technician soft-washing a heritage sandstone-trimmed brick facade in preparation for painting, Sydney
Orange circle with white left and right arrows pointing away from each other in the center.
Rope-access technician painting a heritage brick facade white, Sydney
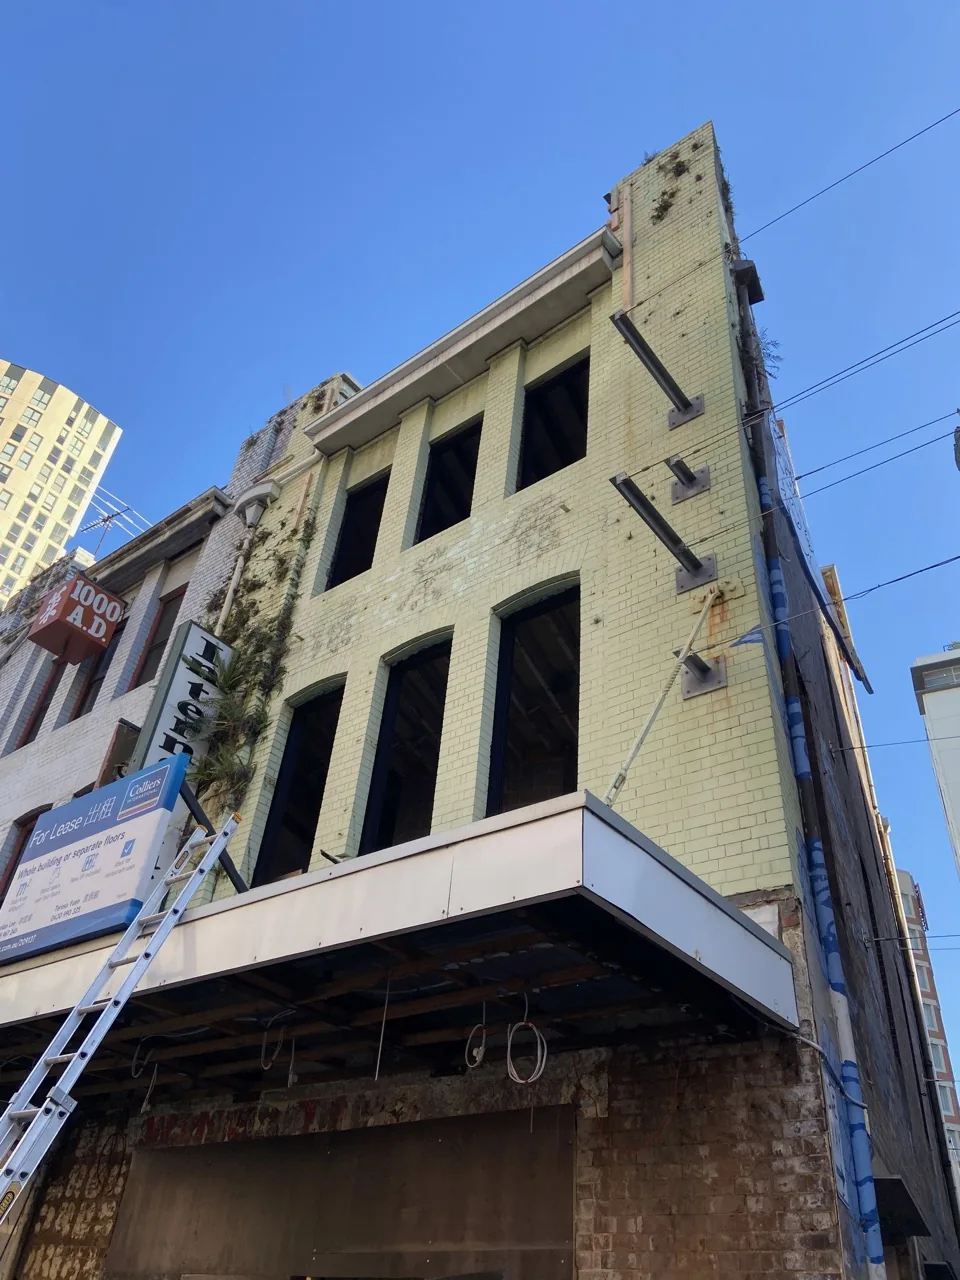
Weathered heritage CBD facade with organic growth before facade restoration, Sydney
Orange circle with white left and right arrows pointing away from each other in the center.
Heritage CBD commercial facade part-painted cream during remedial works, Sydney
Failed sealant above a window frame, showing mould behind it.
Orange circle with white left and right arrows pointing away from each other in the center.
Rendered parapet edge above glazing recoated white after expansion joint repair
Glazed-tiled roof heavily colonised by lichen and moss before pressure washing
Orange circle with white left and right arrows pointing away from each other in the center.
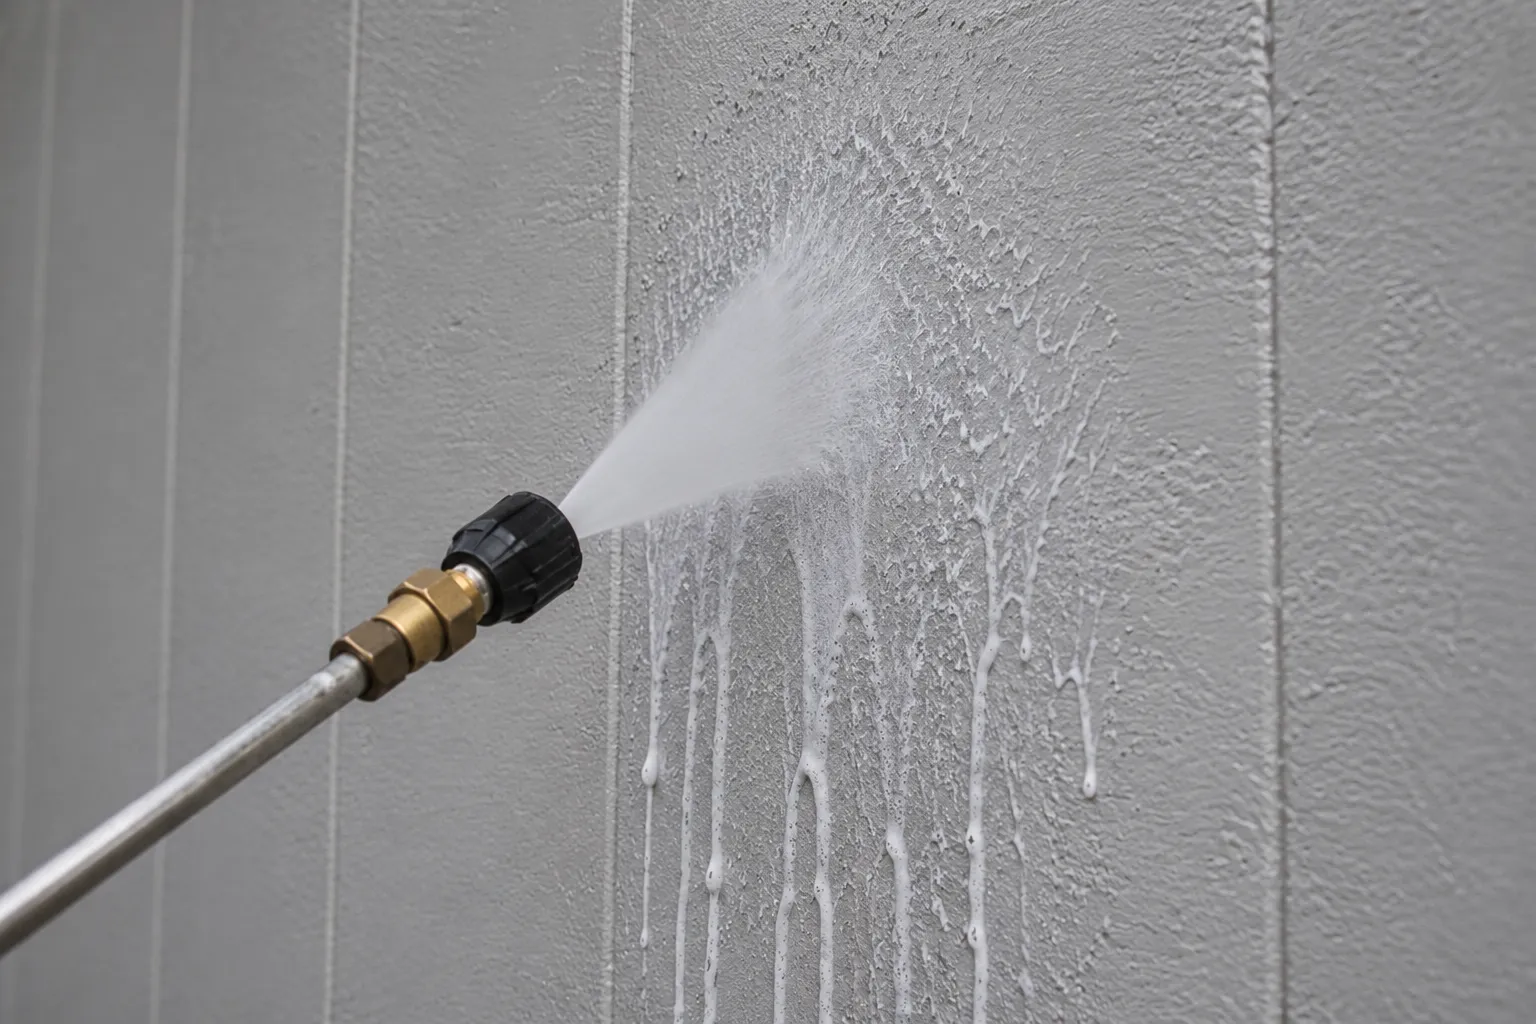
Glazed terracotta roof looking like new after a pressure washing.
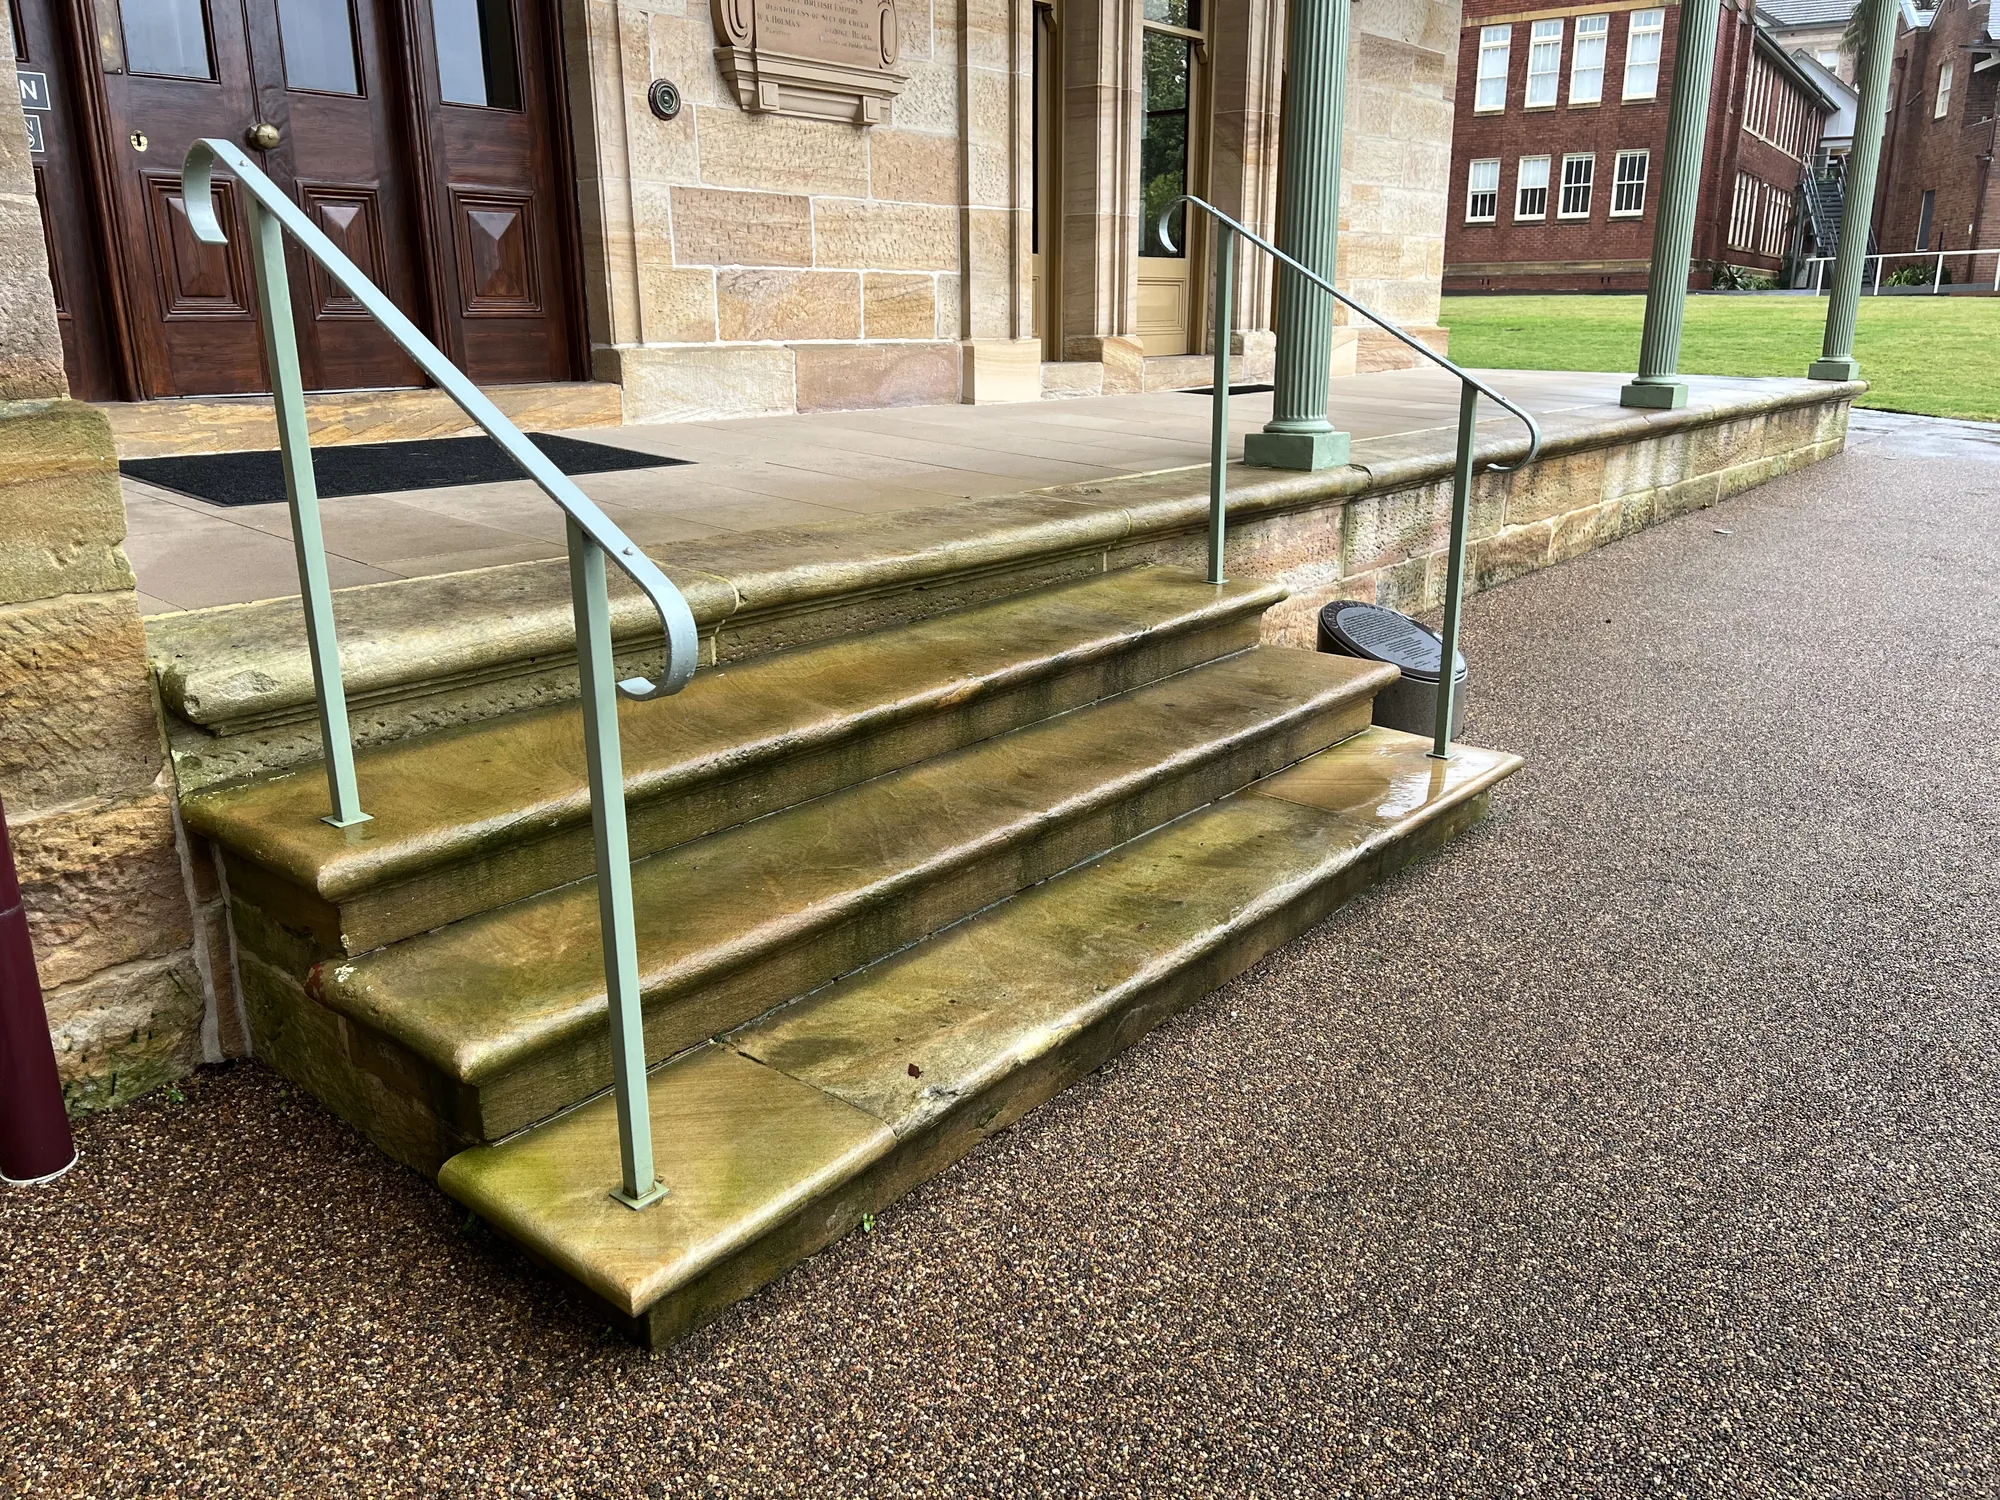
Heritage sandstone steps stained green with algae before soft-wash cleaning, Sydney
Orange circle with white left and right arrows pointing away from each other in the center.
Heritage sandstone entry steps cleaned to bare stone after restoration, Sydney
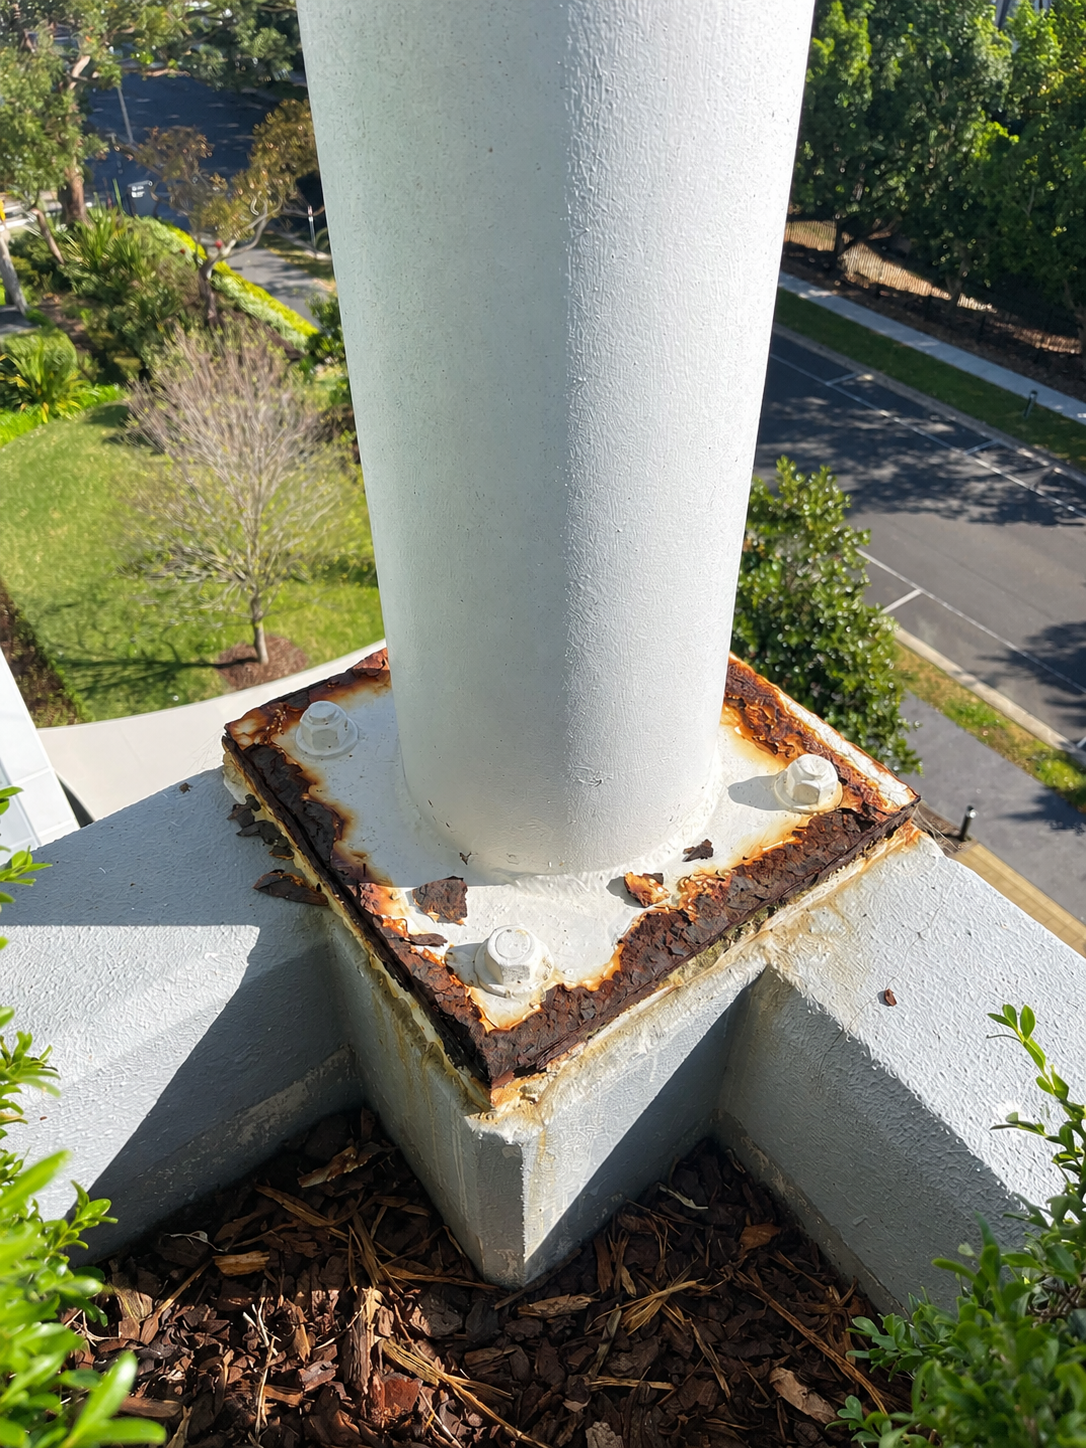
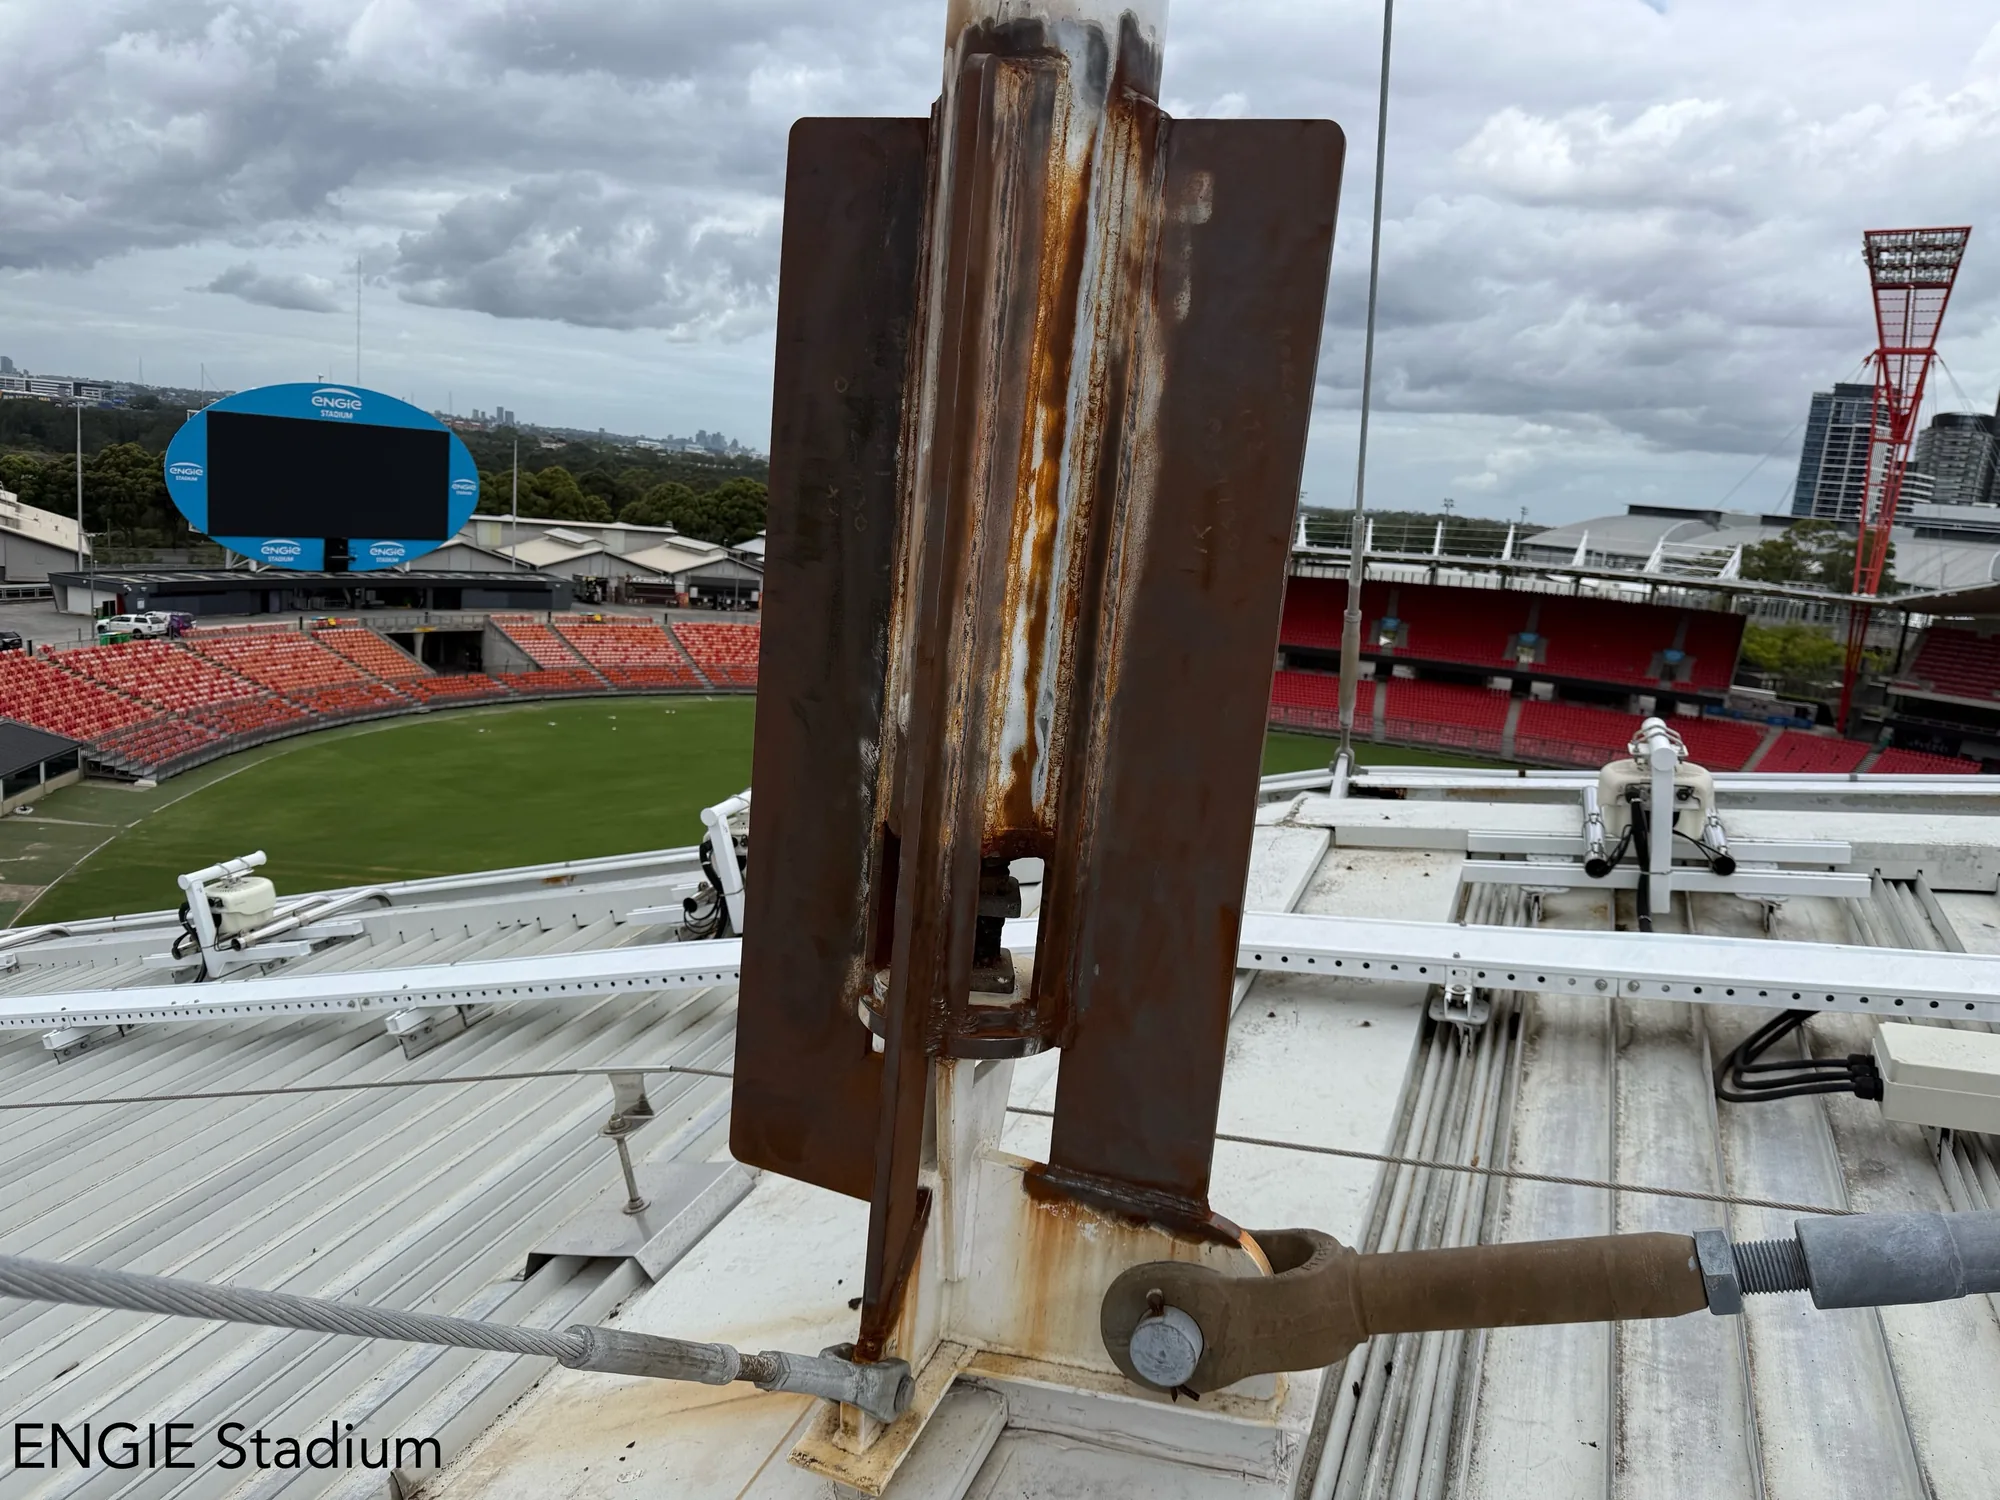
Steel column baseplate with rust bleeding through paint before remedial coating, Sydney
Orange circle with white left and right arrows pointing away from each other in the center.
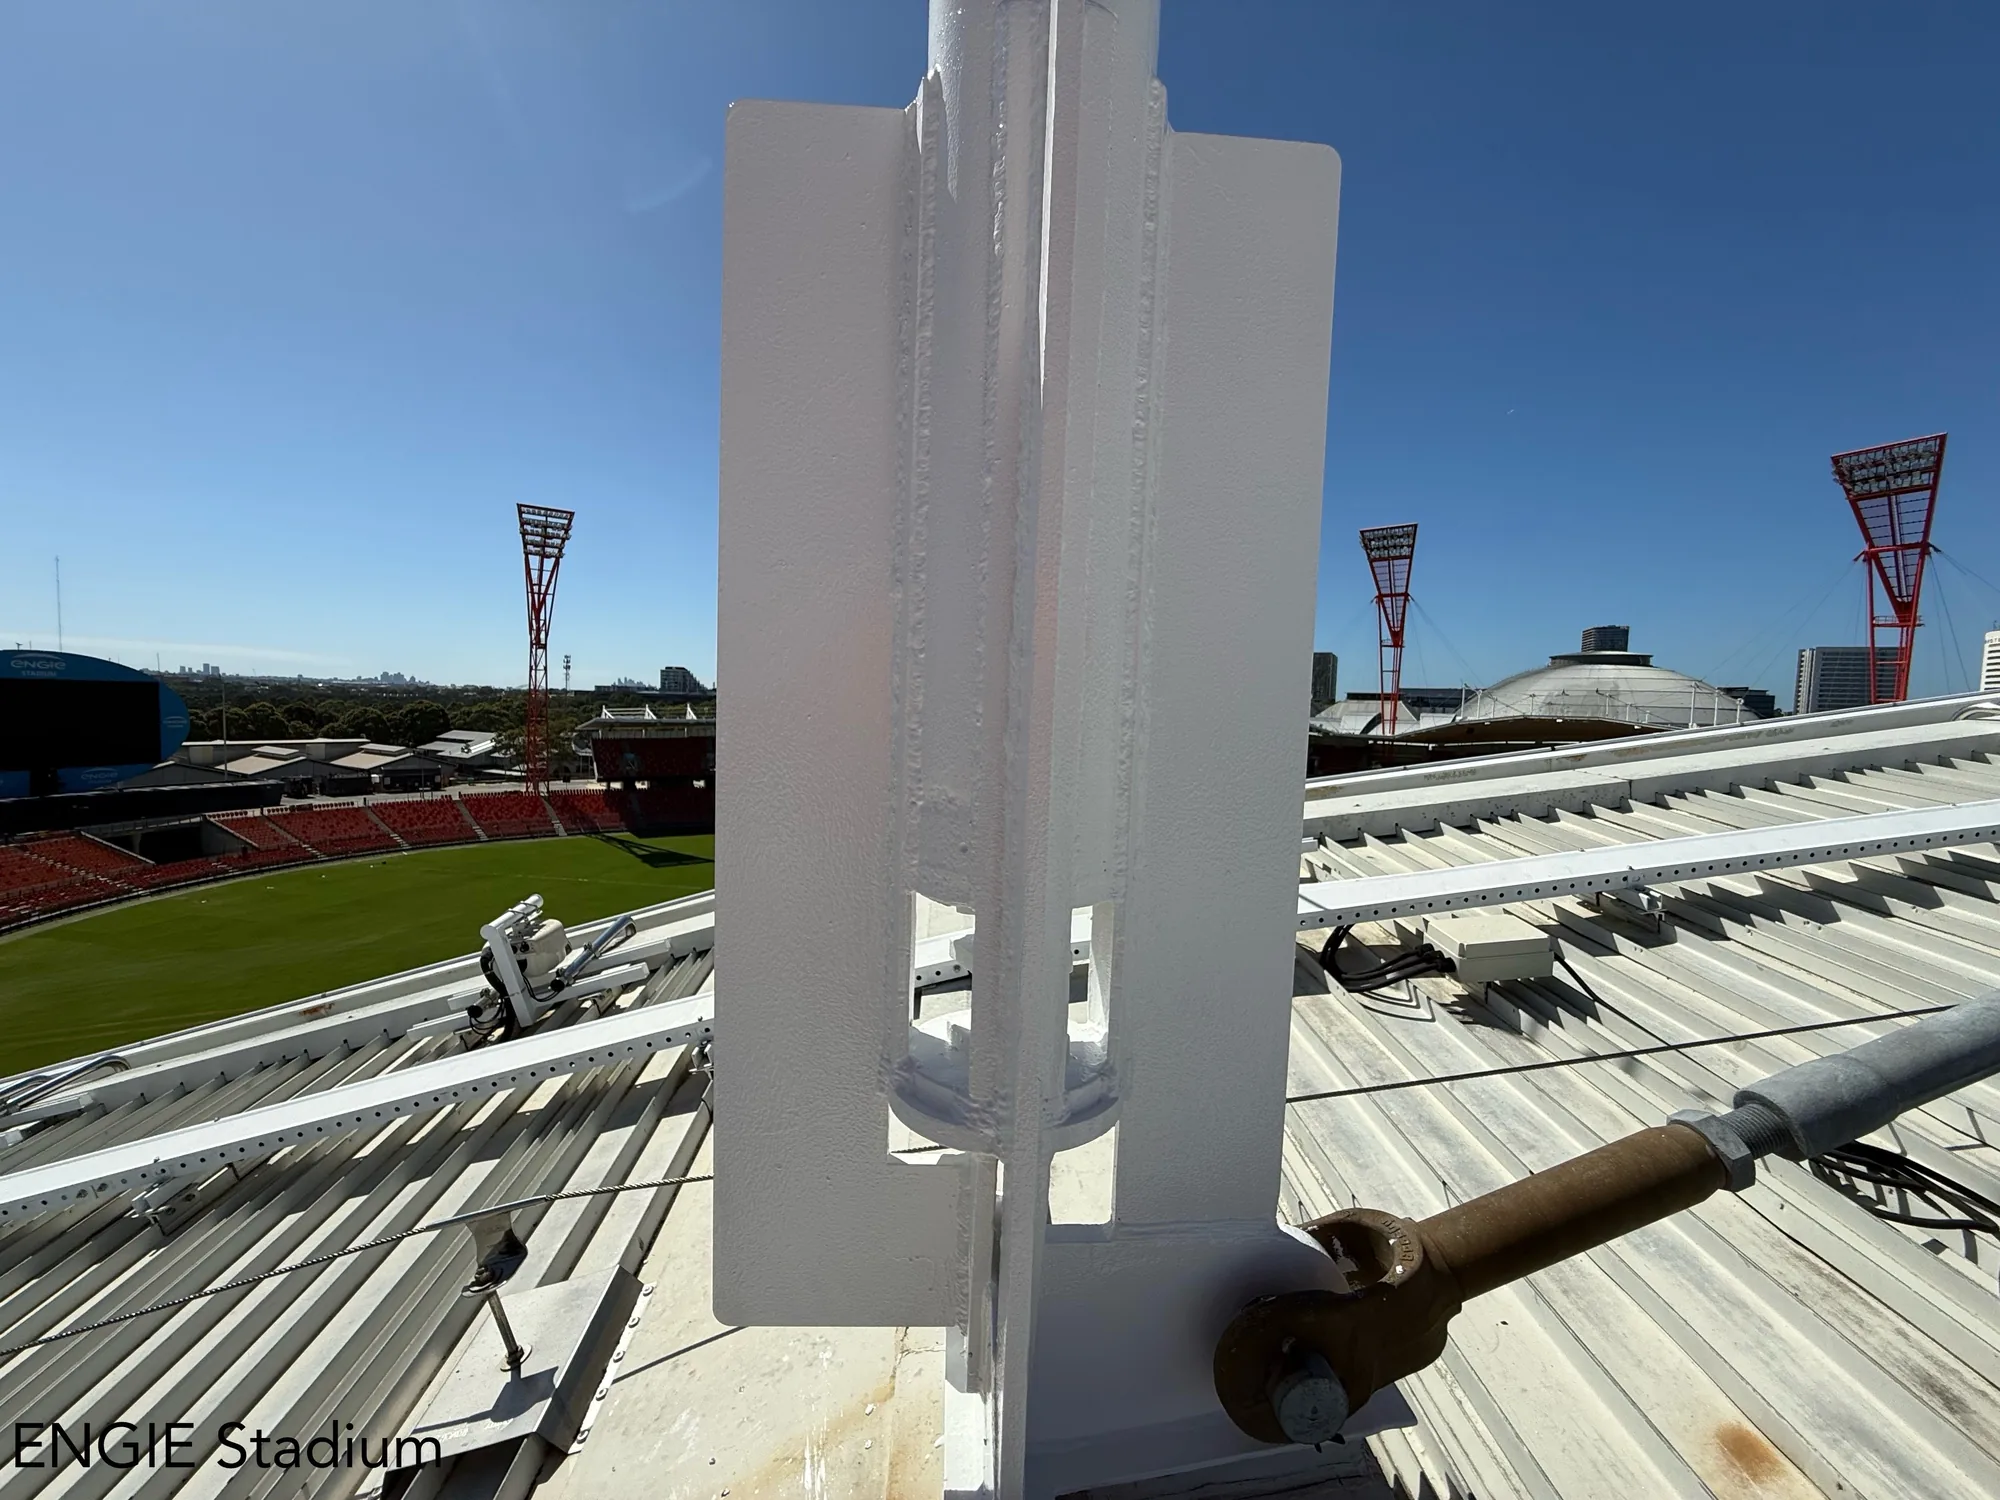
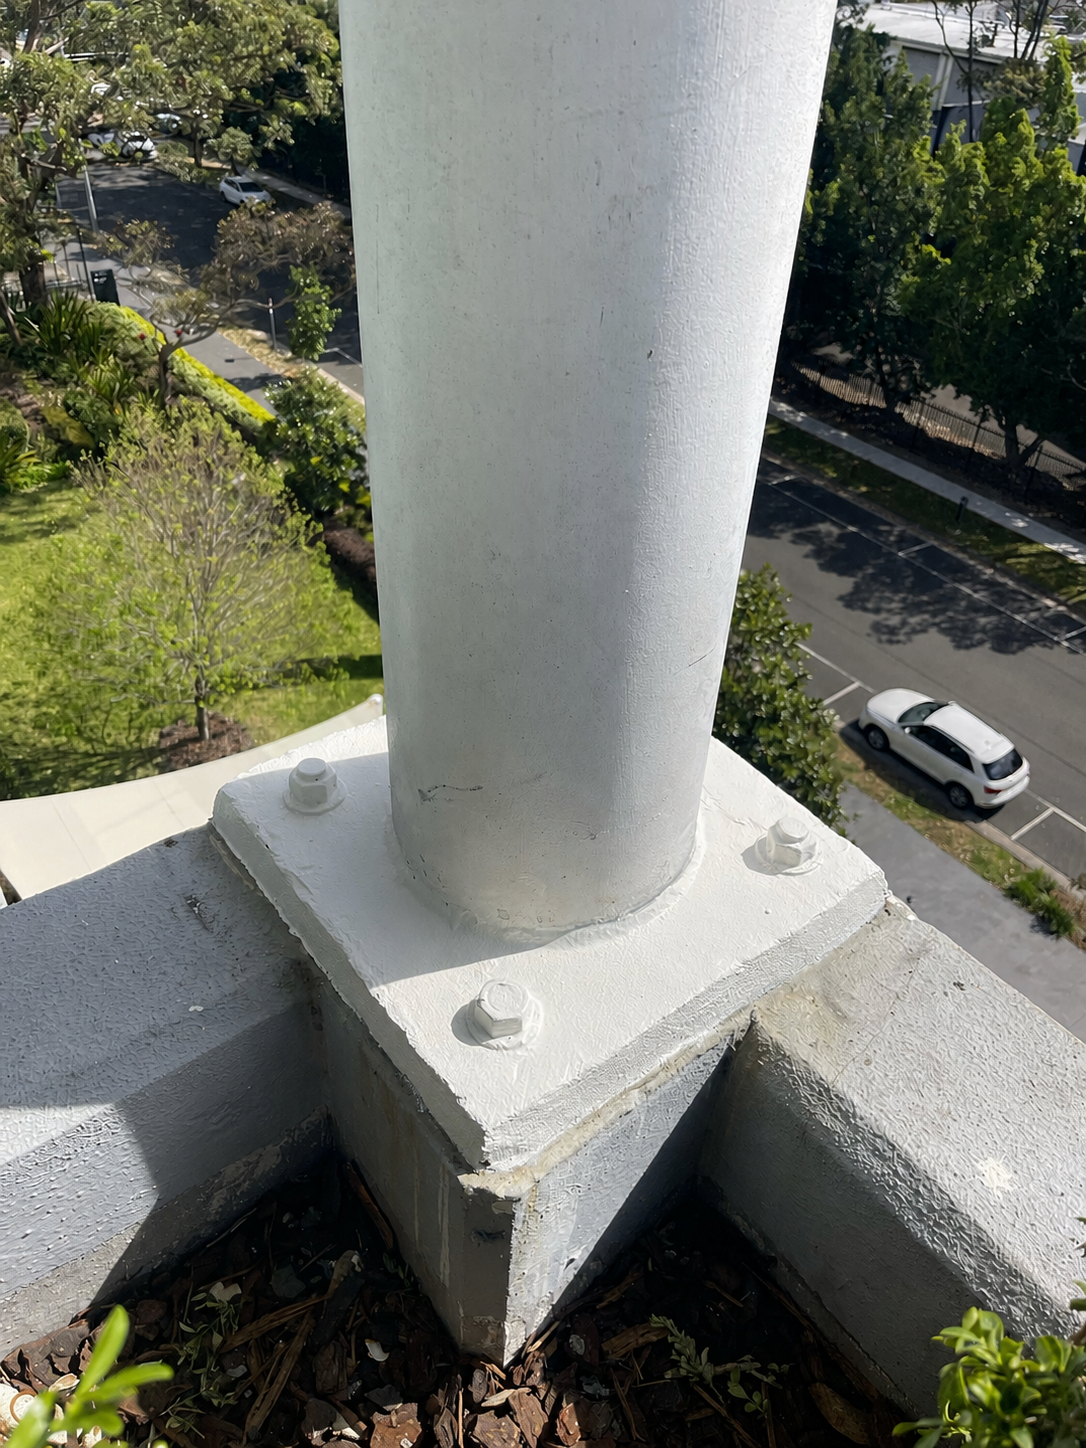
Steel column baseplate primed and painted white after rope-access remedial coating, Sydney
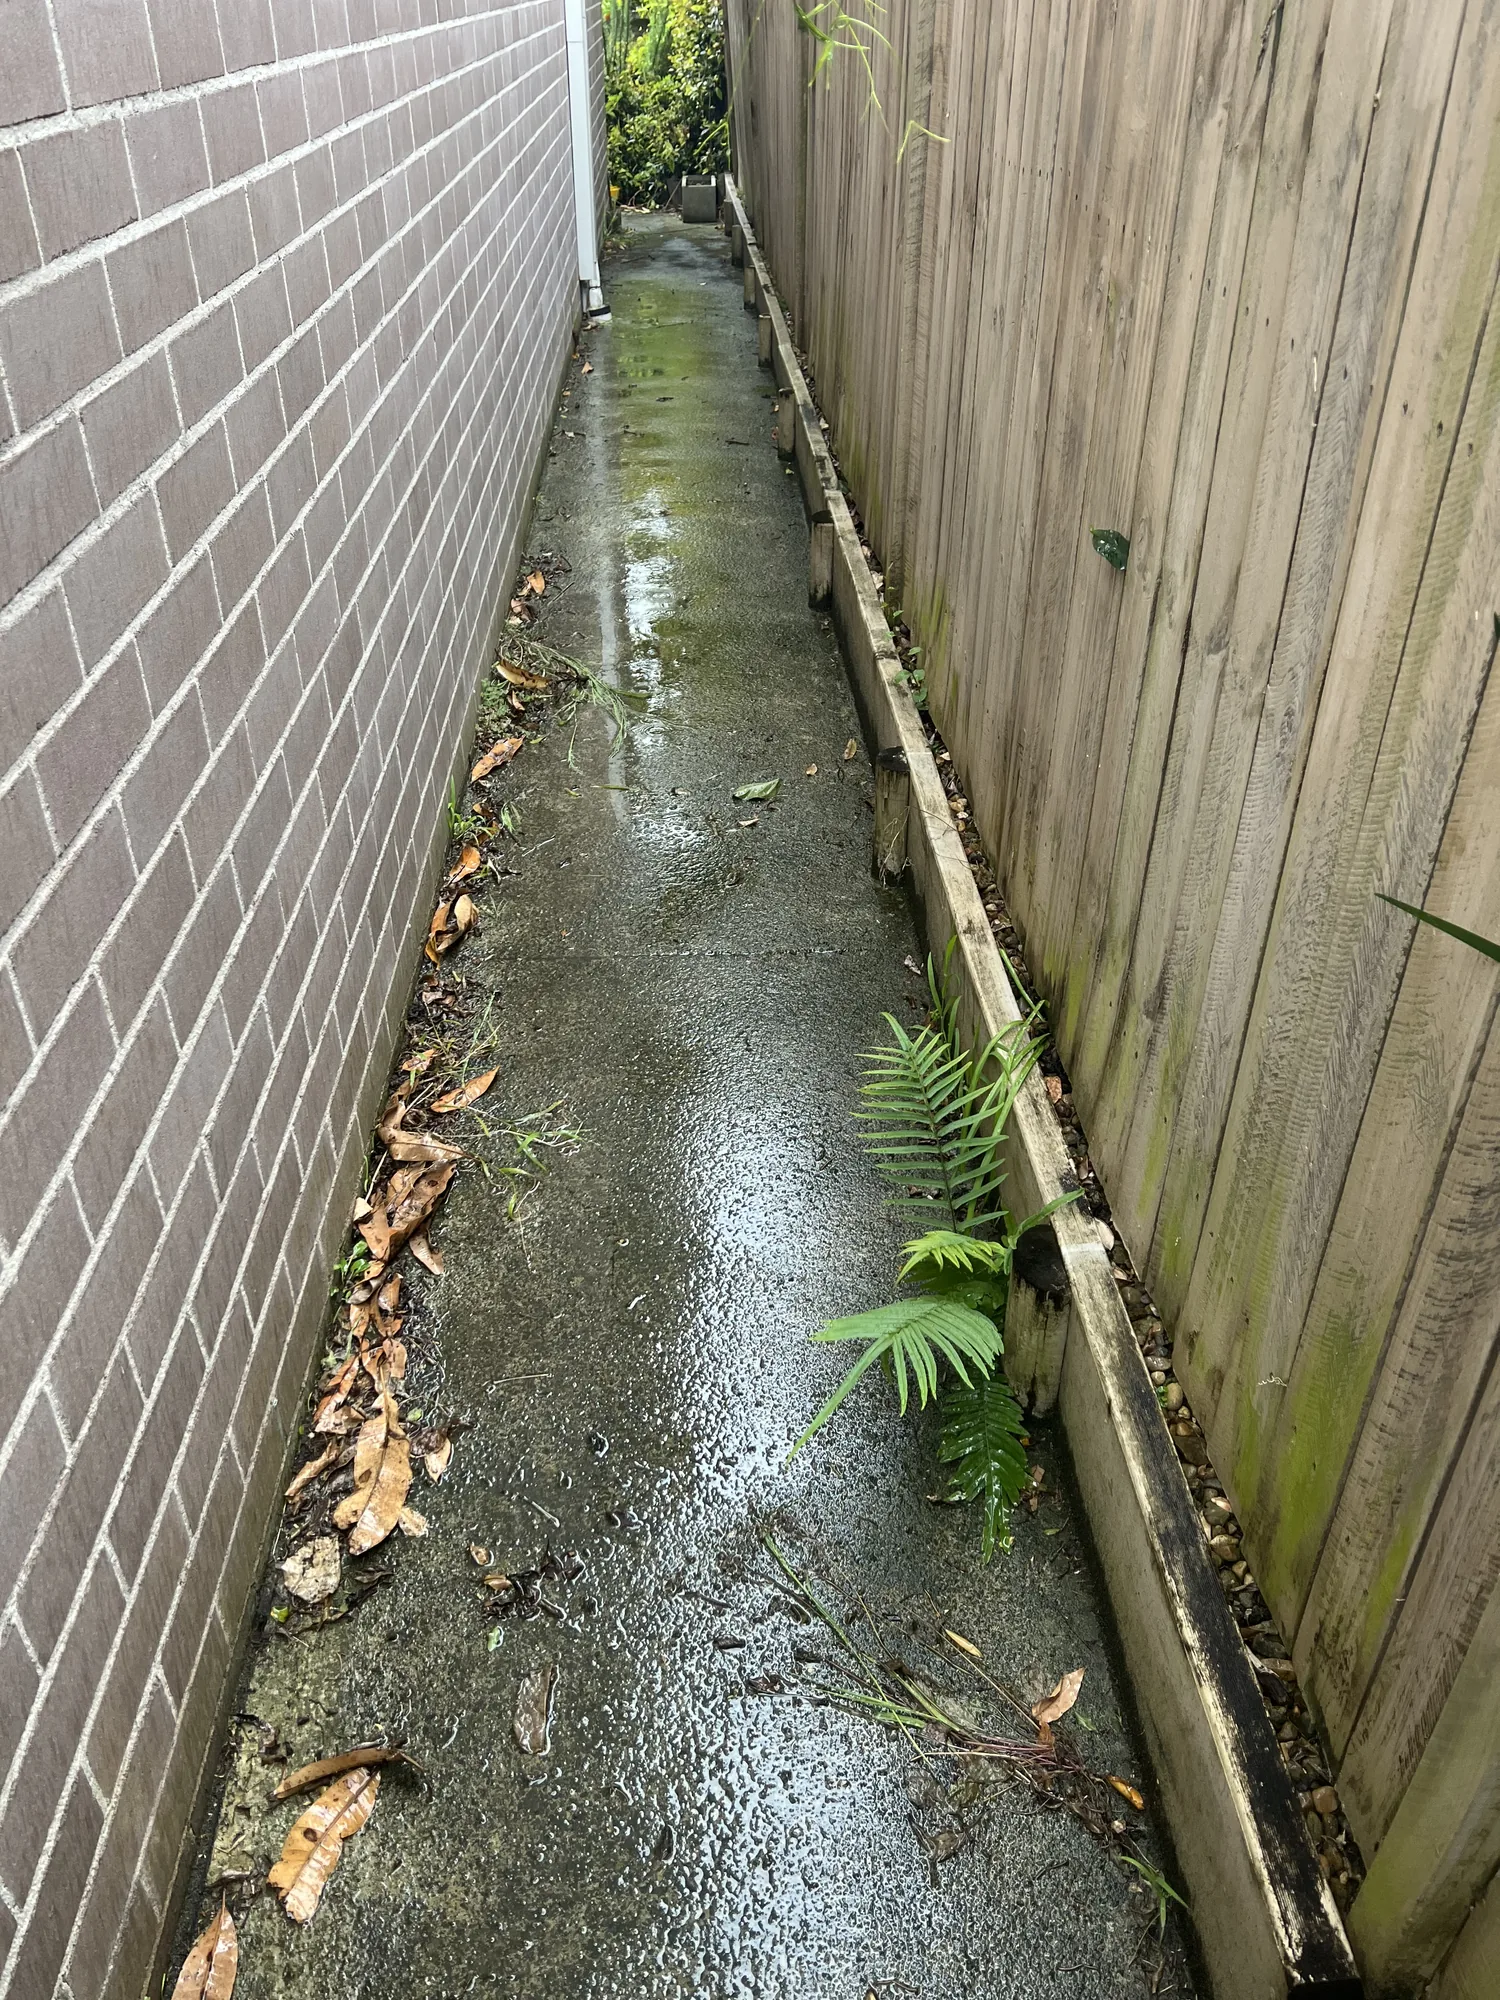
Narrow concrete side path with algae and leaf debris before pressure washing, Sydney
Orange circle with white left and right arrows pointing away from each other in the center.
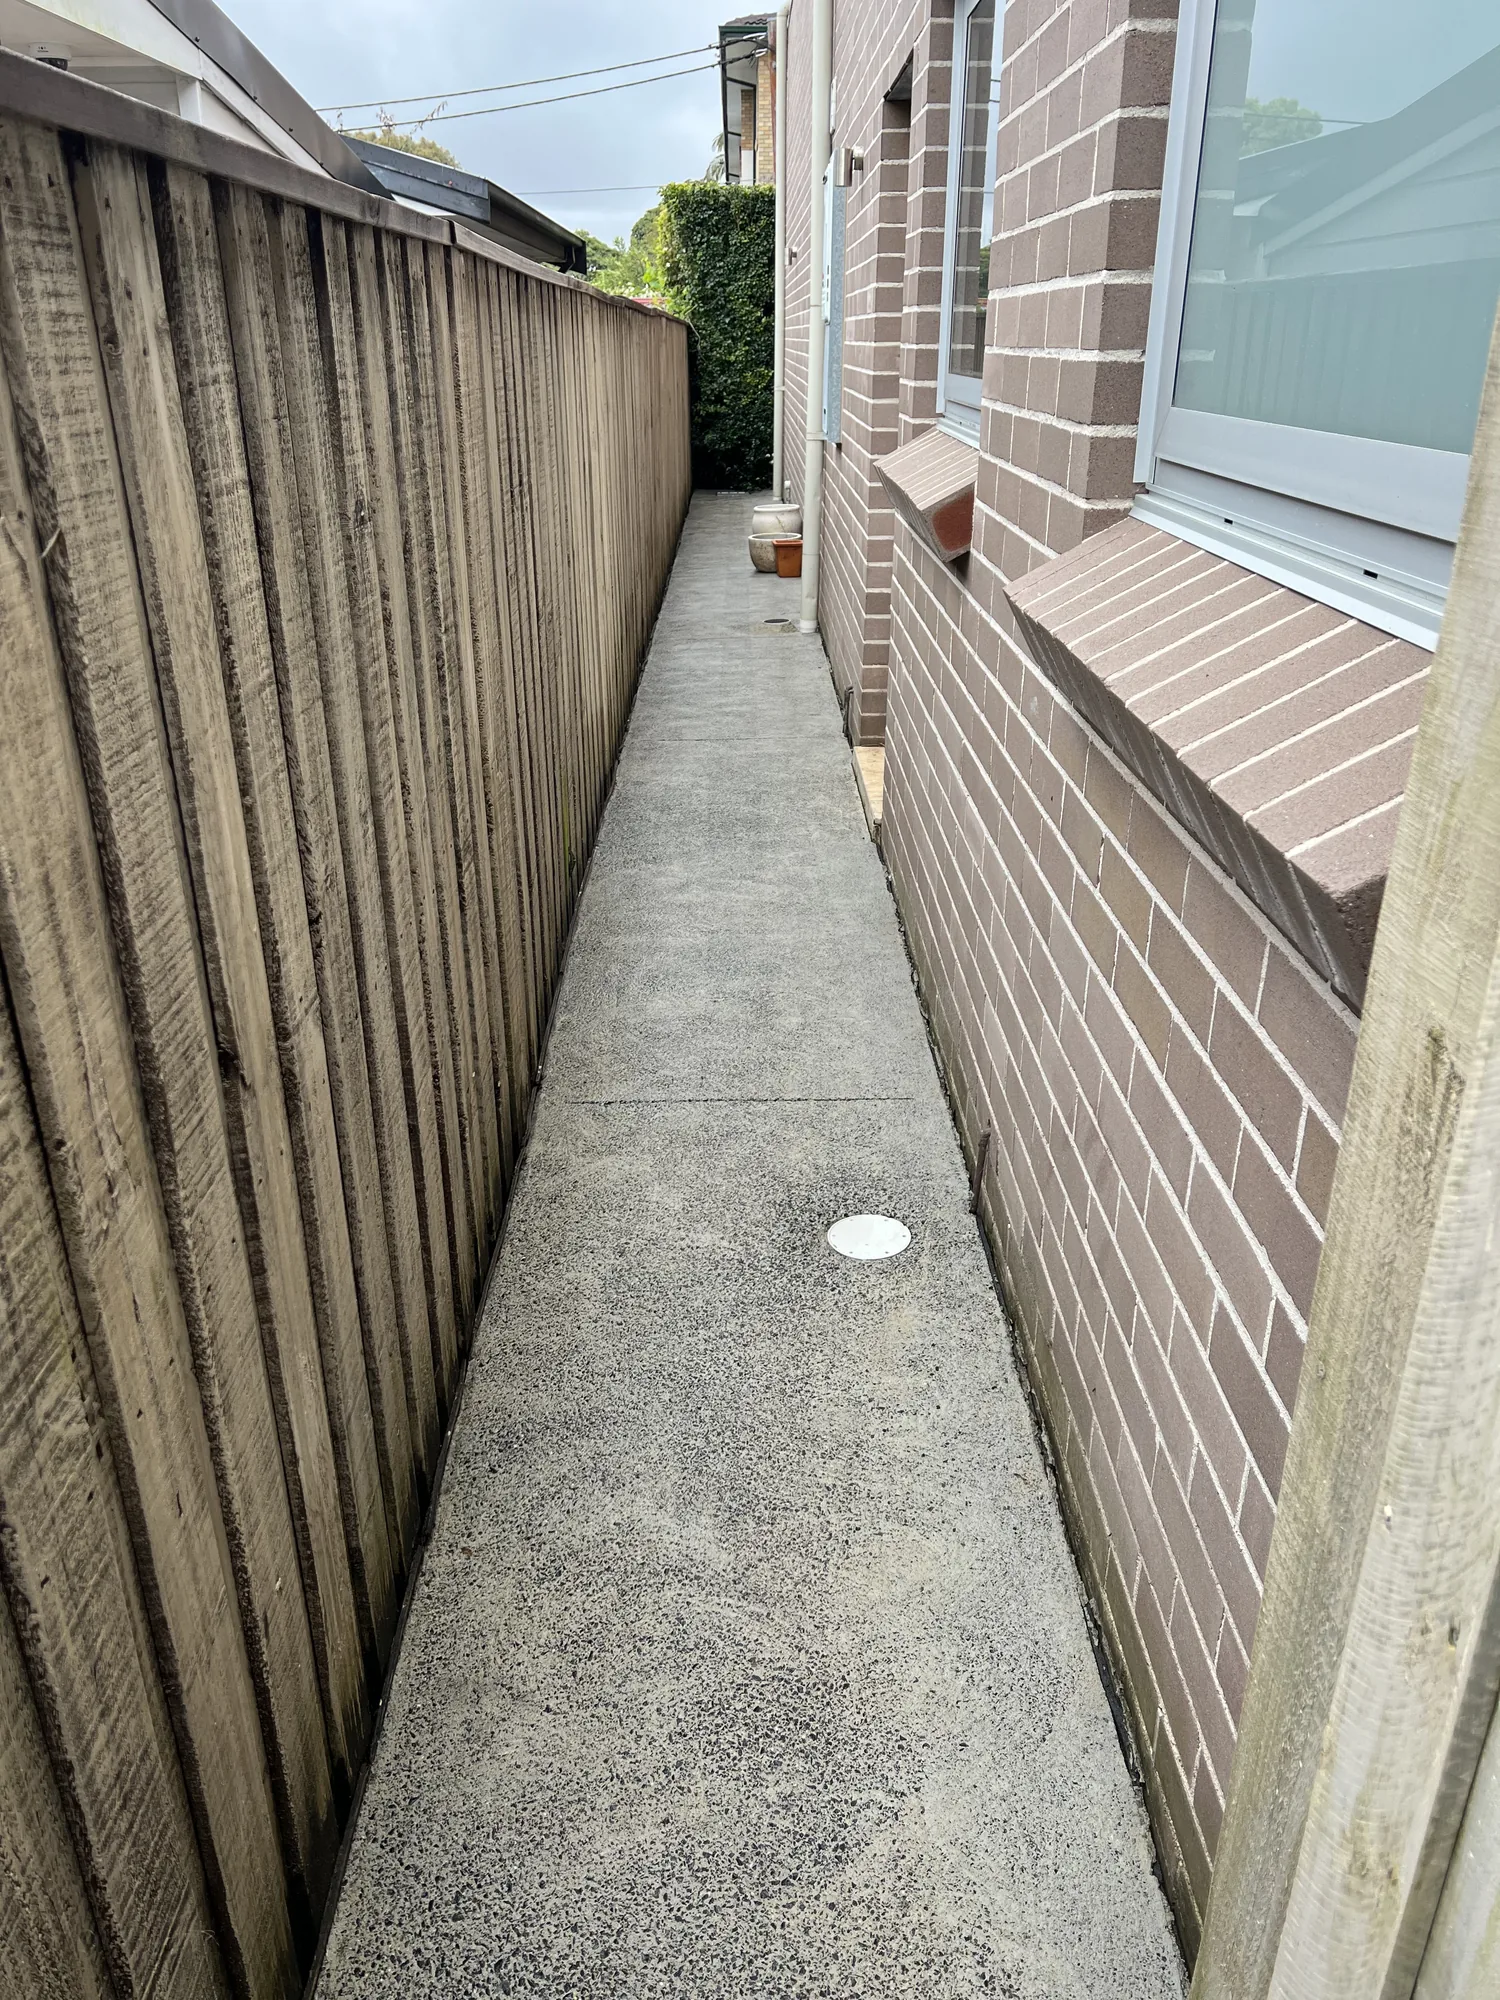
Concrete side path cleaned of algae and debris after pressure washing, Sydney
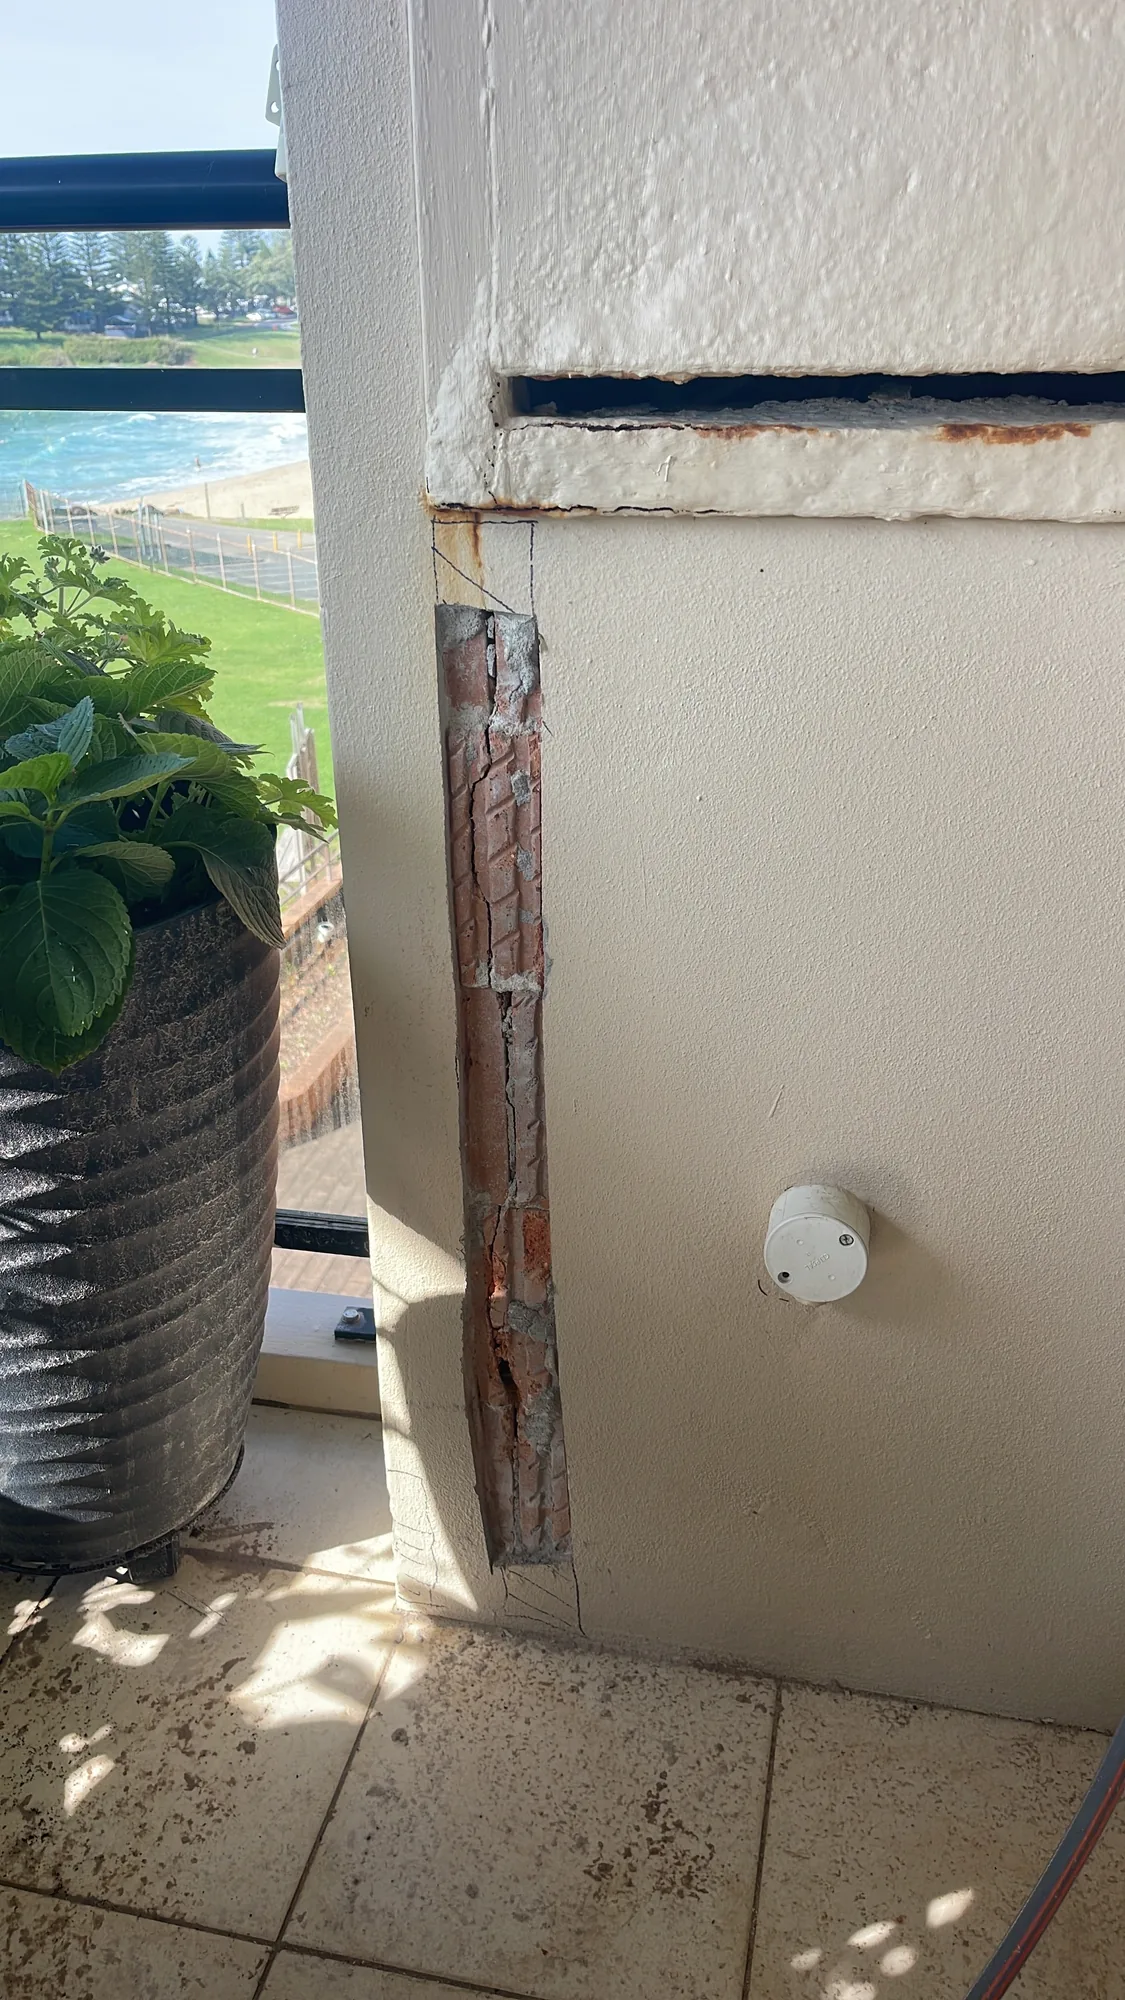
Cracked brickwork at a coastal balcony window reveal from water ingress before repair
Orange circle with white left and right arrows pointing away from each other in the center.
Balcony wall re-rendered and repainted after remedial repair, with vent reveal made good

SPECIALIST SERVICES

UPKEEP provides rope access painting, facade maintenance, concrete repairs, remedial works, sealant replacement, soft washing, window cleaning, roof cleaning, anchor testing and building inspections throughout Sydney.

THE RIGHT ACCESS
FOR EVERY PROJECT

Whether a project requires rope access, EWP access, ladders or ground-based access, we use the safest and most efficient method to complete painting, remedial and maintenance works.

ACCESS METHODS

ROPES

EWP

LADDERS

GROUND

PROPERTIES WE SERVICE

RESIDENTIAL

COMMERCIAL

STRATA

"Very impressed and grateful for Nick and team, from quote to finished product. We had an awkward area to reach on a busy street. Excellent communication, punctual and great workmanship. Highly recommend."
Carly C
"The team at Upkeep did a great job on a tough site in the middle of Coogee. Nick and the teams management of public safety was outstanding. I would definitely recommend them and will get then back on out next project."
John Currenti
"Highly recommend Upkeep's Painters!! Nick, Jesmond and team were very professional, kept us up to date on where our job was at with weeks of terrible weather and did a fantastic job repointing our roof and colour! House looks incredible and we couldn’t be happier! We recommend Upkeep for anyone looking for roof services!"
Bel K
"Nicholas and the Upkeep team were absolutely fantastic on our job in Turramurra. There was a reasonable level of complexity with a steep roof and gabled windows meaning they needed to rope up to get the painting done. All the lads were highhly professional and kept us informed throughout, we're a repeat customer and will use them again when needed. With appreciation."
Andrew Beer
"Jesmond is super honest, reliable and takes pride in his work. Excellent service and attention to detail. Our job was made tricky due to a slate roof and Upkeep took great care setting up access. Paint job was great with excellent attention to detail and a perfect colour match. Highly recommend."
Julian Charters

SERVICING SYDNEY & SURROUNDING AREAS

Northern Beaches

North Sydney

Eastern Suburbs

Sydney CBD

Inner West

Parramatta

Western Sydney

Sutherland Shire

REQUEST FREE QUOTE

FREQUENTLY ASKED
QUESTIONS

What is the difference between caulking and sealing?

The terms are often used interchangeably. Caulking typically refers to filling gaps and joints with a flexible compound to prevent air and water infiltration. Sealing refers more broadly to the application of sealant products to joints, penetrations and interfaces. In practice both involve the same materials and process — the distinction is largely semantic.
What causes sealant failure?

The most common causes are UV degradation, thermal movement beyond the sealant's design capacity, three-sided adhesion from missing backing rod, missing primer, incorrect product selection, and age. Poor original installation is the single biggest contributor to premature sealant failure.

Can failed sealant be painted over?

No. Painting over failed sealant hides the problem without fixing it. Water will continue to enter through the failed joint regardless of what is applied on top. The sealant must be removed and correctly reinstalled before any paint finish is applied.

What sealant products do you use?

We specify polyurethane and silicone sealants from leading manufacturers selected to match the joint type, movement requirement, UV exposure and substrate. We do not use one product for every application — correct specification is what separates a 10-year joint from a 2-year joint.

Can sealant work be done while the building is occupied?

Yes. Rope access sealant work causes minimal disruption. Residents are notified in advance, access to the building is not affected, and most sealant programmes can be completed without any impact on daily building operations.

How long does sealant last?

Standard polyurethane sealants last 7–12 years in typical conditions. Premium products can extend this to 15 years. High-movement joints, north-facing surfaces and coastal environments shorten service life. An inspection will give you a realistic picture of what your building's joints have left.

What is a backing rod and why is it important?

A backing rod is a polyethylene foam cylinder inserted into the joint before sealing. It controls the depth of the sealant, prevents it from bonding to the back of the joint — which would cause tearing when the joint moves — and ensures the correct sealant profile for long-term performance. Most failed sealant jobs are missing it.

Do you seal internal and external joints?

Yes. We seal external facade joints, window perimeter seals, balcony and wet area joints, expansion joints, penetration seals and internal joints where required. The product and method varies by location and exposure.

How do you prepare a joint before sealing?

All old sealant is mechanically removed. Joint faces are cleaned of contamination, dust and residue. Backing rod is installed to the correct depth. Primer is applied to both faces and allowed to cure before any sealant is applied. This preparation process is what most cheap contractors skip.

What certifications do you hold?

Our team holds a broad range of certifications and licences across the business including IRATA and SPRAT rope access qualifications, public liability and workers compensation insurance, First Aid, Police Checks, Working with Children, Height Safety System Installation and Testing, EWP over 11m, Asbestos Awareness, Confined Spaces, and Painting and Decorating trade qualifications. Every job is staffed with the right people for the scope of work.